---
category: general
scraped_at: '2025-11-12T14:09:00.175534'
title: Phone
url: /docs/telephony
---
# Phone
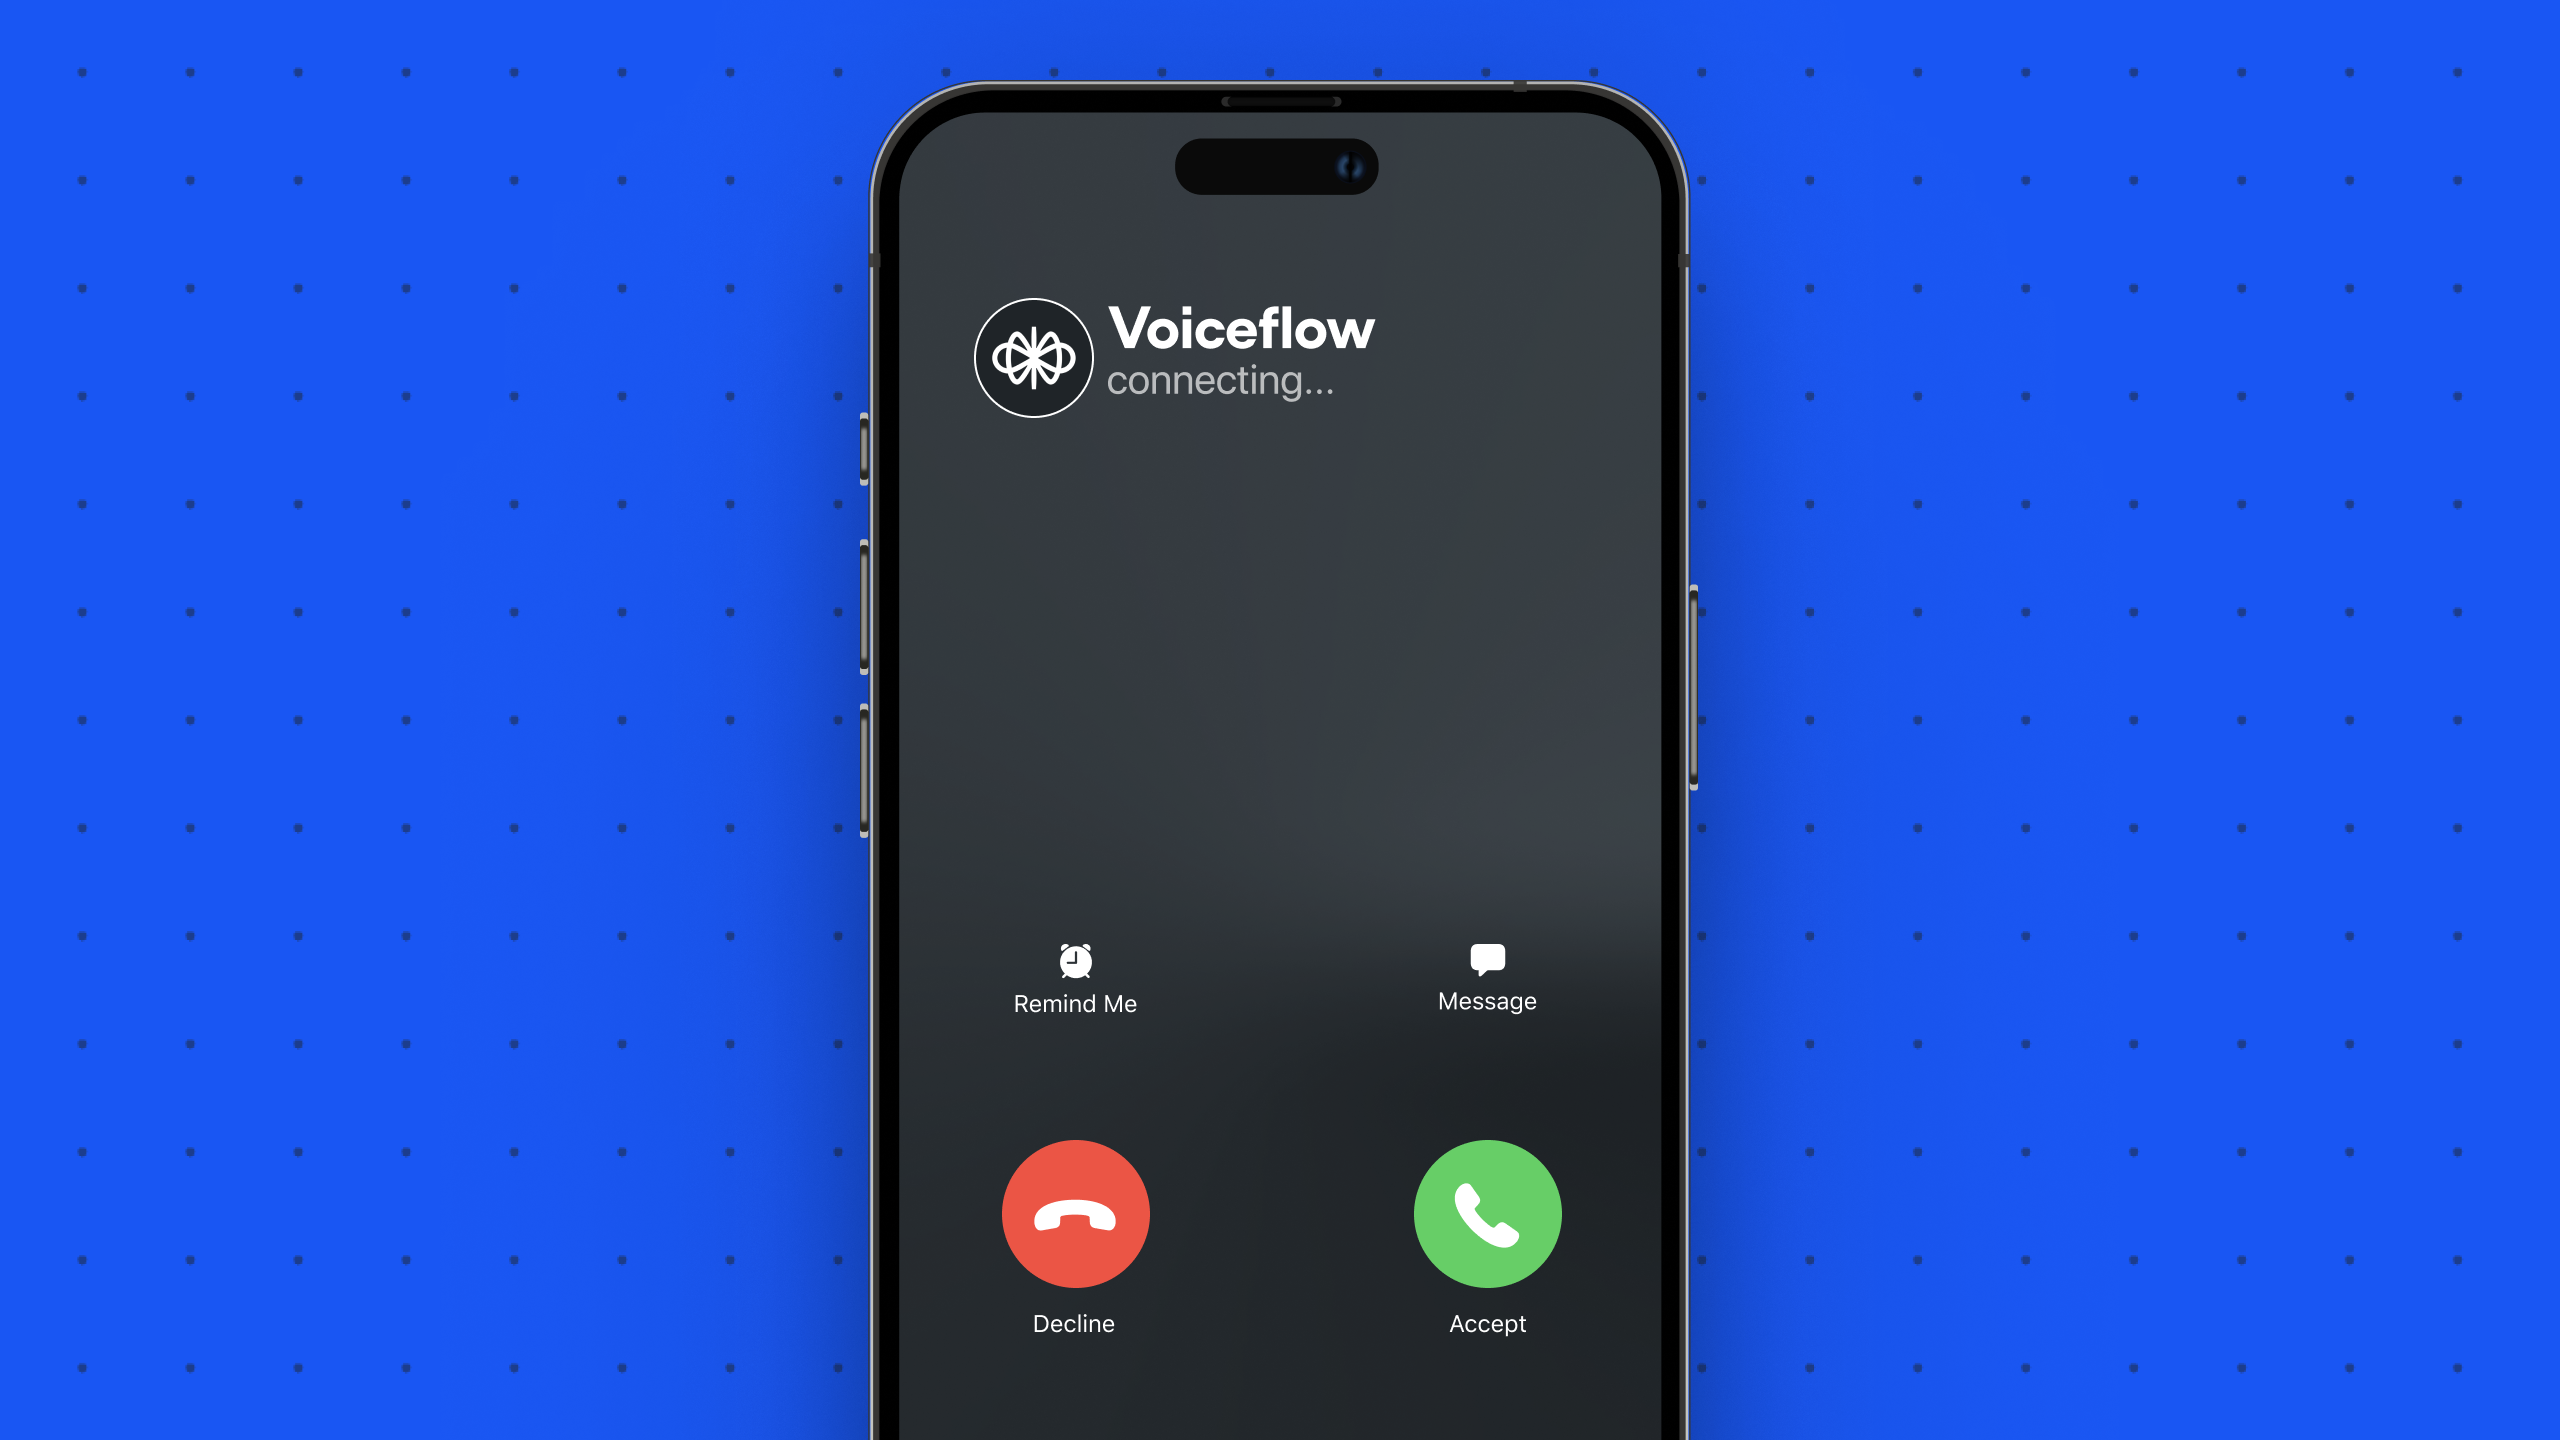
Make your agent call phone numbers, and receive inbound phone calls.
Voiceflow integrates with **Twilio** and **Vonage**, allowing you to connect a phone number to your agent. Agents with a phone number connected can receive inbound calls and programatically make outbound calls, subject to concurrency limits [associated with your plan](https://voiceflow.com/pricing). Our voice integration is often used for customer support hotlines, lead qualification workflows, and appointment scheduling.
## Setting up voice with Twilio
To use our voice features, you'll need a [Twilio account](https://twilio.com) and a Twilio phone number. A free trial account is enough to test out our voice integration. Once you've created a Twilio account, follow the instructions below to connect a phone number to your agent.
Written version
To set up the Twilio integration, you'll need to have a Twilio account with an active phone number, as well as Editor permissions in your Voiceflow workspace. Here's how to get started:
1. **Generate Twilio API credentials**
1. Log in to your Twilio console and navigate to the Account Info section on the dashboard.
2. Save the Account SID and Auth token for your account.
> ❗️
>
> Before proceeding, ensure you've setup a phone number in your Twilio account that is ready to connect to your agent.
2. **Enable the integration in Voiceflow (from Workspace)**
1. Open your Voiceflow workspace and go to *Phone Numbers*.

2. Click *Import Numbers* and input the number you want to use.
3. Enter your Twilio Account SID, Auth Token.
4. *Optionally*, add a friendly name for your number.
5. Click *Import* to connect your accounts.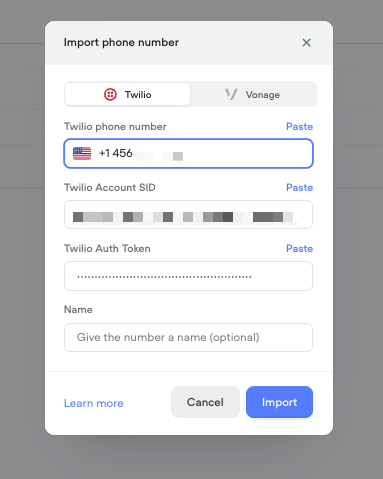
3. **Enable the integration in Voiceflow (from Agent)**
1. Open your Voiceflow agent and go to the *Integrations* > *Telephony* tab.
2. Follow same steps as above.
4. **Assign a phone number to your agent**
1. Open your agent and go to the *Integrations* > *Telephony* tab.
2. Under *Phone Numbers*, click *Assign existing number*.
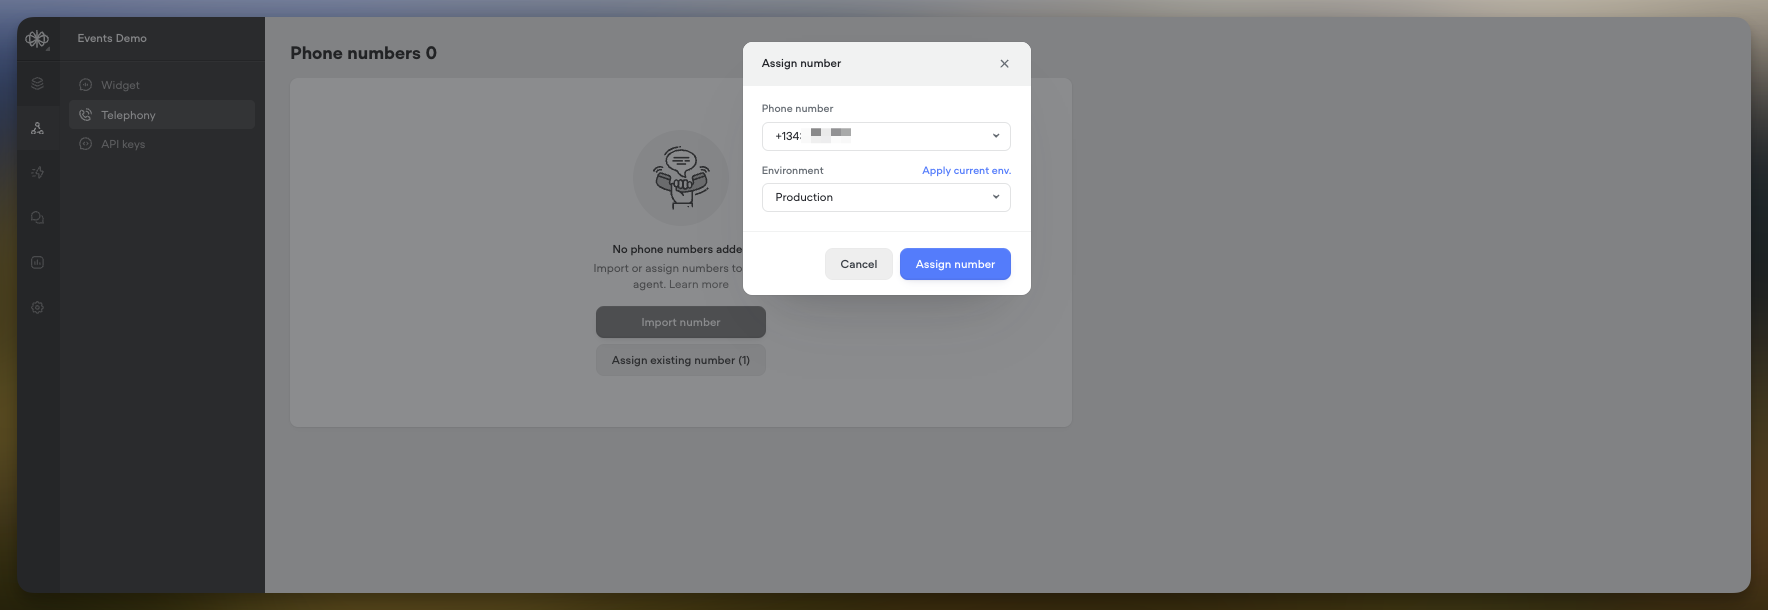
3. Choose a number and the environment (Development/Production) to route calls to.
> 📘
>
> Reminder: Agents come with two built-in environments: the **development** and **production** environments. The development environment is what you edit with the Voiceflow canvas, while the production environment is the version that is automatically created (or updated) when you publish your agent.
5. **Test the integration by calling your agent from a real phone.**
## Setting up voice with Vonage
Importing phone numbers from Vonage lets you use your existing Vonage numbers in Voiceflow — similar to Twilio — so you can forward calls or build telephony workflows without switching providers.
[](https://w17llroiln.ufs.sh/f/JH4JLc5mceYkeKmBft8Ygt8fiVpRXyHEGkuKxn6d7zZqL31h)
Written version
To set up the Vonage integration, you'll need a Vonage (Nexmo) account with an active voice-enabled phone number, as well as Editor permissions in your Voiceflow workspace. Here's how to get started:
1. **Generate Vonage API credentials**
1. Log in to your Vonage dashboard at <https://dashboard.nexmo.com>.
2. Navigate to *API Settings* and save your **API Key** and **API Secret**.
> ❗️
>
> Before proceeding, ensure you've configured a Vonage phone number that supports voice calls.
2. **Enable the integration in Voiceflow (from Workspace)**
1. Open your Voiceflow workspace and go to *Phone Numbers*.

2. Click *Import Numbers* and select *Vonage* as the provider.
3. Enter your Vonage API Key, API Secret, and phone number.
4. *Optionally*, add a friendly name for your number.
5. Click *Import* to connect your Vonage account.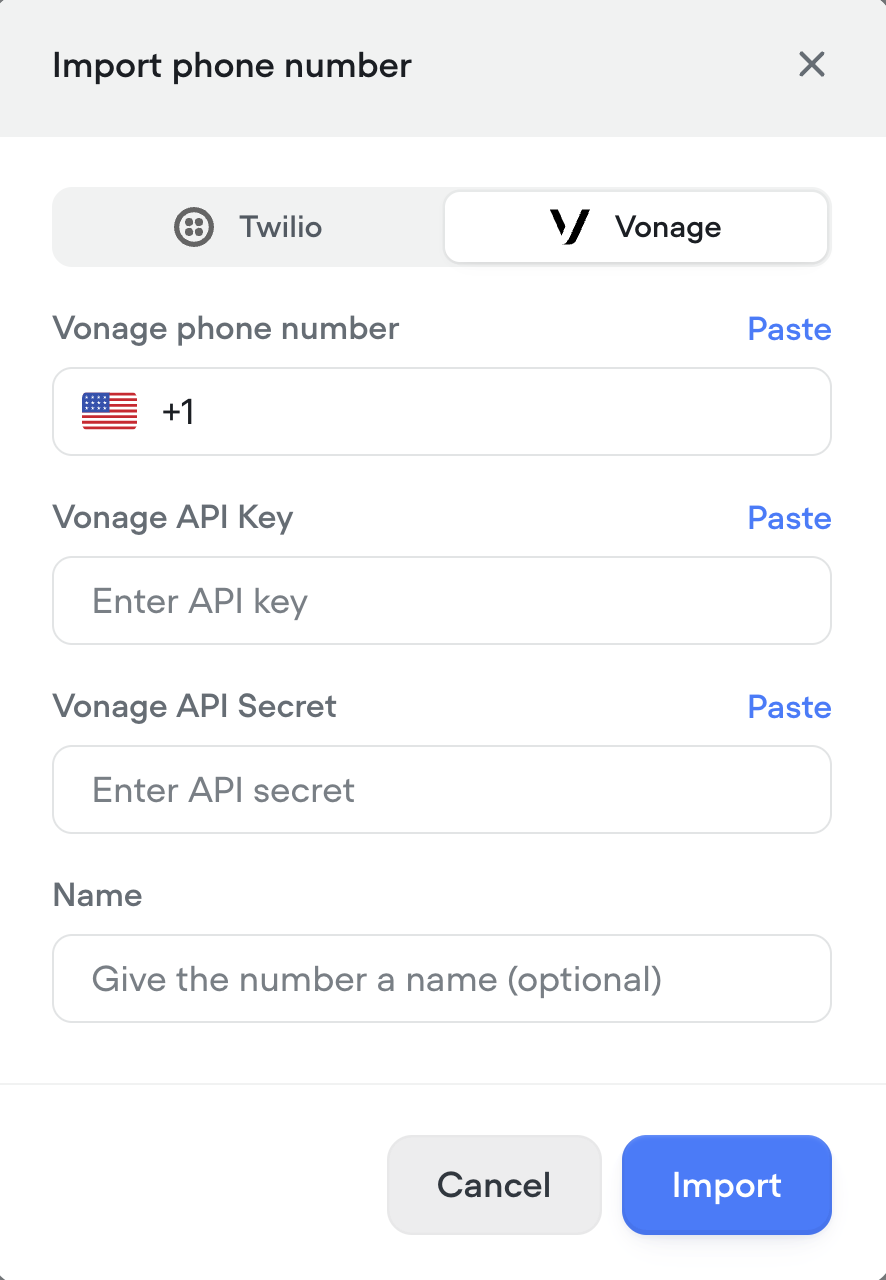
3. **Enable the integration in Voiceflow (from Agent)**
1. Open your Voiceflow agent and go to the *Integrations* > *Telephony* tab.
2. Follow the same steps as above to import your Vonage account if not already added.
4. **Assign a phone number to your agent**
1. Open your agent and go to the *Integrations* > *Telephony* tab.
2. Under *Phone Numbers*, click *Assign existing number*.

3. Choose a number and the environment (Development/Production) to route calls to.
> 📘
>
> Reminder: Agents come with two built-in environments: the **development** and **production** environments. The development environment is what you edit with the Voiceflow canvas, while the production environment is the version that is automatically created (or updated) when you publish your agent.
5. **Test the integration by calling your agent from a real phone.**
## Change the Agent Assigned to a Phone Number
1. Go to the *Integrations* > *Telephony* tab for the agent you want to unassign.
2. Under Phone Numbers, click the *Unassign* option in the more menu next to the number.
3. Navigate to the same tab in the agent you want to reassign the number to.
4. Click *Assign existing number* and select the newly unassigned number.
5. Choose the environment and click *Assign number*.
## Best Practices & Tips
* Assign separate phone numbers for your Development and Production agent environments. This ensures that test calls don't interfere with production traffic.
* Verify the caller experience by dialing the phone numbers yourself before publicizing them to end users.
Updated 3 months ago
---
[Open sourced react-chat](/docs/react-chat)[Outbound calls](/docs/outbound-calls)
Ask AI
* [Table of Contents](#)
* + [Setting up voice with Twilio](#setting-up-voice-with-twilio)
+ [Setting up voice with Vonage](#setting-up-voice-with-vonage)
+ [Change the Agent Assigned to a Phone Number](#change-the-agent-assigned-to-a-phone-number)
+ [Best Practices & Tips](#best-practices--tips)
