
🚀 高级 Unity MCP 集成
![]()
此软件包实现了模型上下文协议 (MCP)与 Unity 编辑器之间的无缝集成,使 AI 助手能够实时理解您的 Unity 项目并与之交互。通过此集成,AI 助手可以访问场景层级结构、项目设置等信息,并直接在 Unity 编辑器上下文中执行代码。
📚 功能
直接浏览和操作项目文件
访问有关 Unity 项目的实时信息
了解场景层次结构和游戏对象
直接在 Unity 编辑器中执行 C# 代码
监控日志和错误
控制编辑器的播放模式
等待代码执行
Related MCP server: MCP Linear App
🚀 入门
先决条件
Unity 2021.3 或更高版本
Node.js 18+(用于运行 MCP 服务器)
安装
1.安装 Unity 包
您有多种安装 Unity 包的选项:
选项 A:包管理器(Git URL)
打开 Unity 包管理器(
Window > Package Manager)单击
+按钮并选择Add package from git URL...输入存储库URL:
https://github.com/quazaai/UnityMCPIntegration.git单击
Add
选项 B:导入自定义包
克隆此存储库或将其下载为 unityPackage
在 Unity 中,转到
Assets > Import Package > Custom Package选择
UnityMCPIntegration.unitypackage文件
2. 设置 MCP 服务器
您有两种方式运行 MCP 服务器:
选项 A:直接运行服务器
导航到
mcpServer (likely <path-to-project>\Library\PackageCache\com.quaza.unitymcp@d2b8f1260bca\mcpServer\)目录安装依赖项:
npm install运行服务器:
node build/index.js
选项 B:添加到 MCP 主机配置
将服务器添加到您的 MCP 主机配置中,用于 Claude Desktop、自定义实施等
演示视频
通过 Smithery 安装
要通过Smithery自动为 Claude Desktop 安装 Unity MCP Integration:
🔧 使用方法
调试和监控
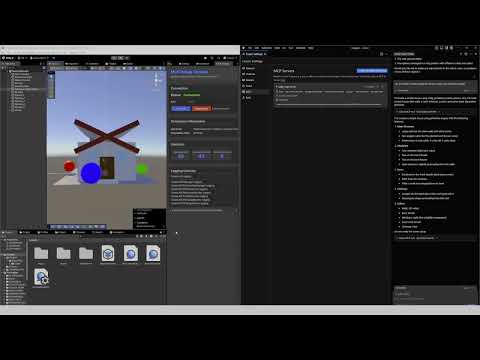
您可以在 Unity 中打开 MCP Debug 窗口来监控连接并测试功能:
转到
Window > MCP Debug使用调试窗口可以:
检查连接状态
测试代码执行
查看日志
监视事件
可用工具
Unity MCP 集成为 AI 助手提供了多种工具:
Unity 编辑器工具
get_editor_state :获取有关 Unity 项目和编辑器状态的全面信息
get_current_scene_info :获取当前场景的详细信息
get_game_objects_info :获取场景中特定游戏对象的信息
execute_editor_command :直接在 Unity 编辑器中执行 C# 代码
get_logs :检索和过滤 Unity 控制台日志
verify_connection :检查是否存在与 Unity Editor 的活动连接
文件系统工具
read_file :读取 Unity 项目中文件的内容
read_multiple_files :一次读取多个文件
write_file :创建或用新内容覆盖文件
edit_file :使用 diff 预览对现有文件进行有针对性的编辑
list_directory :获取目录中的文件和文件夹列表
directory_tree :获取目录和文件的层次视图
search_files :查找与搜索模式匹配的文件
get_file_info :获取有关特定文件或目录的元数据
find_assets_by_type :查找特定类型的所有资产(例如,材料、预制件)
list_scripts :获取项目中所有 C# 脚本的列表
文件路径可以是绝对路径,也可以是相对于 Unity 项目的 Assets 文件夹的相对路径。例如, "Scenes/MyScene.unity"指的是<project>/Assets/Scenes/MyScene.unity 。
🛠️ 建筑
该集成由两个主要部分组成:
Unity 插件 (C#) :驻留在 Unity 编辑器中并提供对编辑器 API 的访问
MCP 服务器 (TypeScript/Node.js) :实现 MCP 协议并与 Unity 插件通信
它们之间的通信通过 WebSocket 进行,传输命令和数据的 JSON 消息。
文件系统访问
Unity MCP 集成现在包含强大的文件系统工具,允许 AI 助手:
浏览、阅读和编辑 Unity 项目中的文件
创建新文件和目录
搜索特定文件或资产类型
分析项目结构
使用差异预览进行有针对性的代码更改
出于安全考虑,所有文件操作均限制在 Unity 项目目录中。系统会智能处理绝对路径和相对路径,始终根据项目的 Assets 文件夹进行解析,以方便操作。
用法示例:
获取目录列表:
list_directory(path: "Scenes")读取脚本文件:
read_file(path: "Scripts/Player.cs")编辑配置文件:
edit_file(path: "Resources/config.json", edits: [{oldText: "value: 10", newText: "value: 20"}], dryRun: true)查找所有材料:
find_assets_by_type(assetType: "Material")
👥 贡献
欢迎贡献!贡献方式如下:
分叉存储库
创建功能分支(
git checkout -b feature/amazing-feature)进行更改
提交您的更改(
git commit -m 'Add some amazing feature')推送到分支(
git push origin feature/amazing-feature)打开拉取请求
开发设置
Unity 端:
在 Unity 中打开项目
修改
UnityMCPConnection/Editor目录中的 C# 脚本
服务器端:
导航到
mcpServer目录安装依赖项:
npm install更改
src目录中的 TypeScript 文件构建服务器:
npm run build运行服务器:
node build/index.js
📄 许可证
该项目根据 MIT 许可证获得许可 - 有关详细信息,请参阅 LICENSE 文件。
📞 支持
如果您遇到任何问题或有疑问,请在 GitHub 存储库上提交问题。