
Used as the runtime environment for the MCP server component, facilitating communication between the AI assistant and the Unity Editor through WebSocket connections.
Used for implementing the MCP server that communicates with the Unity plugin, handling the JSON message protocol for commands and data transfer.
Provides real-time access to Unity projects, allowing browsing and manipulation of project files, scene hierarchies, and game objects. Enables direct C# code execution in the Unity Editor, monitoring of logs and errors, and control of the Editor's play mode.
Click on "Install Server".
Wait a few minutes for the server to deploy. Once ready, it will show a "Started" state.
In the chat, type
@followed by the MCP server name and your instructions, e.g., "@Unity MCP Integrationshow me all GameObjects in the current scene"
That's it! The server will respond to your query, and you can continue using it as needed.
Here is a step-by-step guide with screenshots.
🚀 Advacned Unity MCP Integration
![]()
This package provides a seamless integration between Model Context Protocol (MCP) and Unity Editor, allowing AI assistants to understand and interact with your Unity projects in real-time. With this integration, AI assistants can access information about your scene hierarchy, project settings, and execute code directly in the Unity Editor context.
📚 Features
Browse and manipulate project files directly
Access real-time information about your Unity project
Understand your scene hierarchy and game objects
Execute C# code directly in the Unity Editor
Monitor logs and errors
Control the Editor's play mode
Wait For Code Execution
Related MCP server: MCP Linear App
🚀 Getting Started
Prerequisites
Unity 2021.3 or later
Node.js 18+ (for running the MCP server)
Installation
1. Install Unity Package
You have several options to install the Unity package:
Option A: Package Manager (Git URL)
Open the Unity Package Manager (
Window > Package Manager)Click the
+button and selectAdd package from git URL...Enter the repository URL:
https://github.com/quazaai/UnityMCPIntegration.gitClick
Add
Option B: Import Custom Package
Clone this repository or download it as a unityPackage
In Unity, go to
Assets > Import Package > Custom PackageSelect the
UnityMCPIntegration.unitypackagefile
2. Set up the MCP Server
You have two options to run the MCP server:
Option A: Run the server directly
Navigate to the
mcpServer (likely <path-to-project>\Library\PackageCache\com.quaza.unitymcp@d2b8f1260bca\mcpServer\)directoryInstall dependencies:
npm installRun the server:
node build/index.js
Option B: Add to MCP Host configuration
Add the server to your MCP Host configuration for Claude Desktop, Custom Implementation etc
Demo Video
Installing via Smithery
To install Unity MCP Integration for Claude Desktop automatically via Smithery:
🔧 Usage
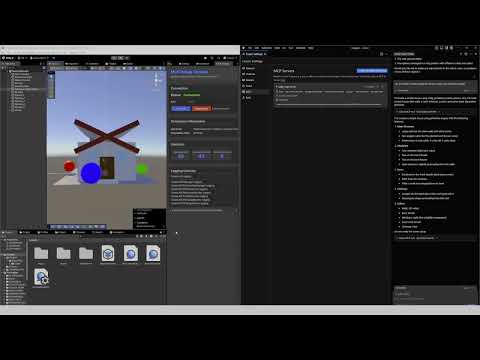
Debugging and Monitoring
You can open the MCP Debug window in Unity to monitor the connection and test features:
Go to
Window > MCP DebugUse the debug window to:
Check connection status
Test code execution
View logs
Monitor events
Available Tools
The Unity MCP integration provides several tools to AI assistants:
Unity Editor Tools
get_editor_state: Get comprehensive information about the Unity project and editor state
get_current_scene_info: Get detailed information about the current scene
get_game_objects_info: Get information about specific GameObjects in the scene
execute_editor_command: Execute C# code directly in the Unity Editor
get_logs: Retrieve and filter Unity console logs
verify_connection: Check if there's an active connection to Unity Editor
Filesystem Tools
read_file: Read contents of a file in your Unity project
read_multiple_files: Read multiple files at once
write_file: Create or overwrite a file with new content
edit_file: Make targeted edits to existing files with diff preview
list_directory: Get a listing of files and folders in a directory
directory_tree: Get a hierarchical view of directories and files
search_files: Find files matching a search pattern
get_file_info: Get metadata about a specific file or directory
find_assets_by_type: Find all assets of a specific type (e.g. Material, Prefab)
list_scripts: Get a listing of all C# scripts in the project
File paths can be absolute or relative to the Unity project's Assets folder. For example, "Scenes/MyScene.unity" refers to <project>/Assets/Scenes/MyScene.unity.
🛠️ Architecture
The integration consists of two main components:
Unity Plugin (C#): Resides in the Unity Editor and provides access to Editor APIs
MCP Server (TypeScript/Node.js): Implements the MCP protocol and communicates with the Unity plugin
Communication between them happens via WebSocket, transferring JSON messages for commands and data.
File System Access
The Unity MCP integration now includes powerful filesystem tools that allow AI assistants to:
Browse, read, and edit files in your Unity project
Create new files and directories
Search for specific files or asset types
Analyze your project structure
Make targeted code changes with diff previews
All file operations are restricted to the Unity project directory for security. The system intelligently handles both absolute and relative paths, always resolving them relative to your project's Assets folder for convenience.
Example usages:
Get a directory listing:
list_directory(path: "Scenes")Read a script file:
read_file(path: "Scripts/Player.cs")Edit a configuration file:
edit_file(path: "Resources/config.json", edits: [{oldText: "value: 10", newText: "value: 20"}], dryRun: true)Find all materials:
find_assets_by_type(assetType: "Material")
👥 Contributing
Contributions are welcome! Here's how you can contribute:
Fork the repository
Create a feature branch (
git checkout -b feature/amazing-feature)Make your changes
Commit your changes (
git commit -m 'Add some amazing feature')Push to the branch (
git push origin feature/amazing-feature)Open a Pull Request
Development Setup
Unity Side:
Open the project in Unity
Modify the C# scripts in the
UnityMCPConnection/Editordirectory
Server Side:
Navigate to the
mcpServerdirectoryInstall dependencies:
npm installMake changes to the TypeScript files in the
srcdirectoryBuild the server:
npm run buildRun the server:
node build/index.js
📄 License
This project is licensed under the MIT License - see the LICENSE file for details.
📞 Support
If you encounter any issues or have questions, please file an issue on the GitHub repository.