Jupyter MCP Server

local-only server

The server can only run on the client’s local machine because it depends on local resources.

Integrations

  • Provides interaction with Jupyter notebooks running in JupyterLab, allowing adding and executing code cells, creating markdown cells, and interacting with notebook content programmatically.

  • Offers functionality to download Earth data granules from NASA Earth Data, supporting parameters for folder name, dataset short name, count, temporal range, and bounding box.

🪐 ✨ Jupyter MCP 서버

Jupyter MCP 서버는 JupyterLab에서 실행되는 📓 Jupyter 노트북과의 상호작용을 제공하는 MCP( Model Context Protocol ) 서버 구현입니다(로컬 JupyterLab에서도 작동).
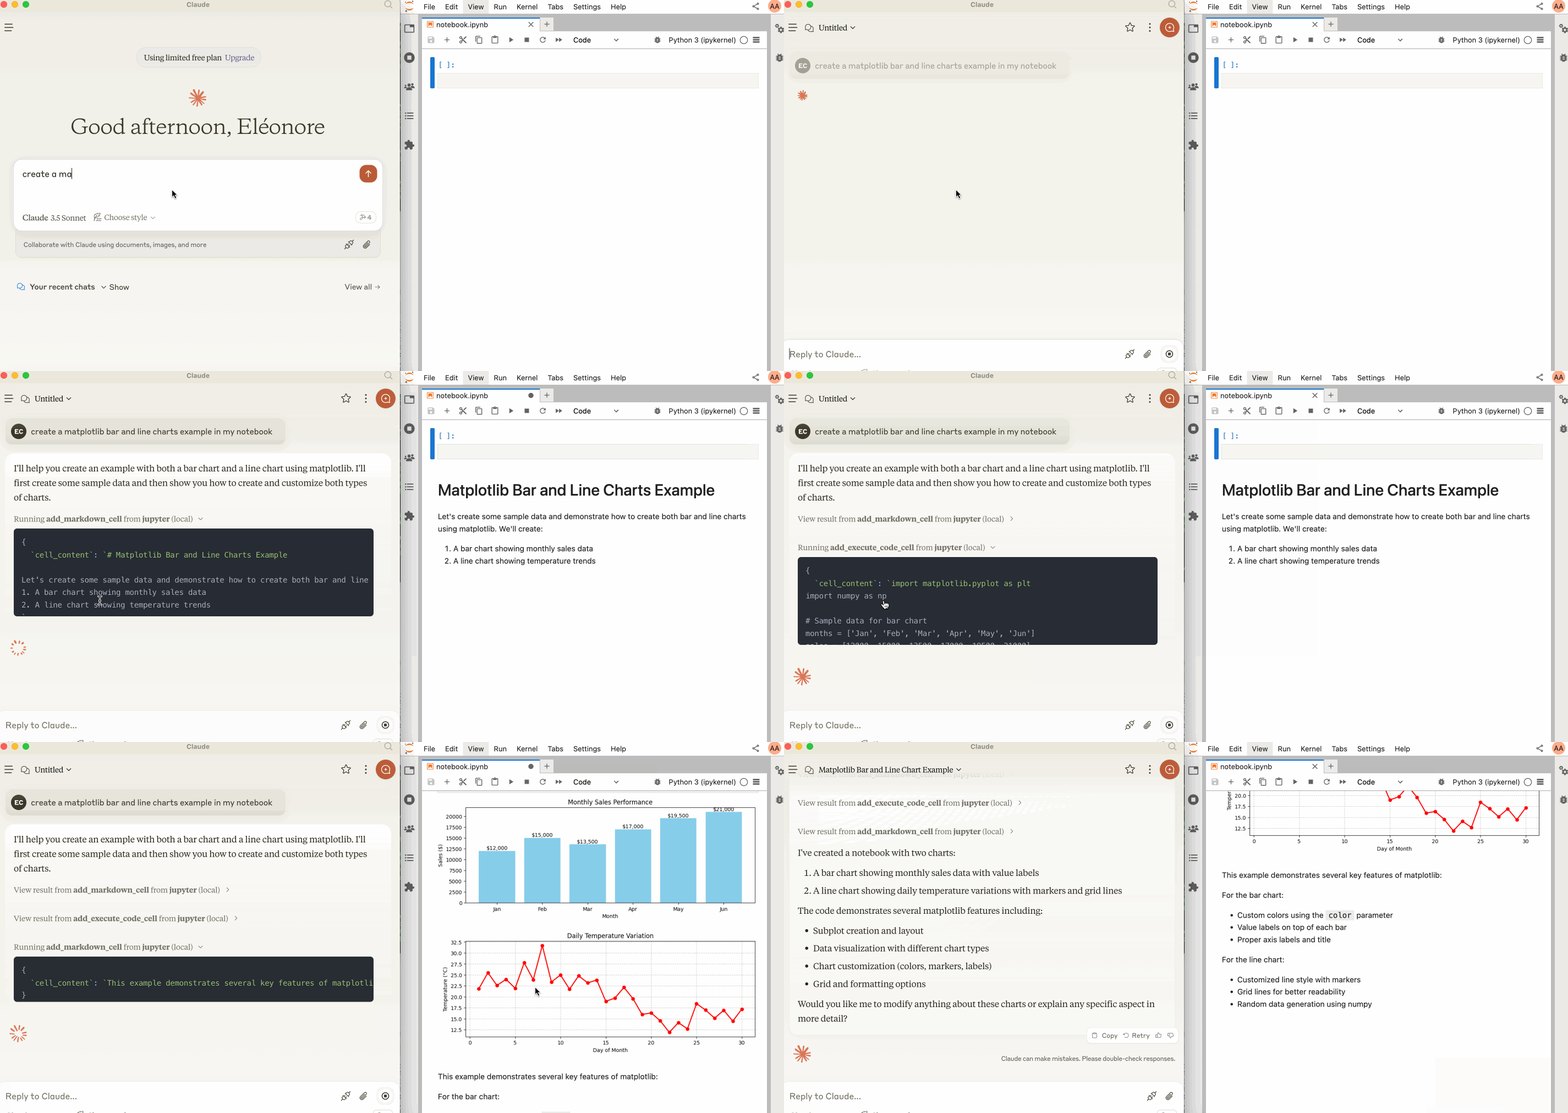
JupyterLab 시작하기

다음이 설치되어 있는지 확인하세요. Jupyter Real Time Collaboration을 통해 노트북에서 수정한 내용을 확인할 수 있으므로 협업 패키지가 필요합니다.

지엑스피1

그런 다음, 다음 명령으로 JupyterLab을 시작합니다.

jupyter lab --port 8888 --IdentityProvider.token MY_TOKEN --ip 0.0.0.0

make jupyterlab 실행할 수도 있습니다.

[!메모]

--ip 0.0.0.0 으로 설정하면 Docker 컨테이너에서 실행되는 MCP 서버가 로컬 JupyterLab에 액세스할 수 있습니다.

Claude Desktop과 함께 사용

Claude Desktop은 이 페이지에서 macOS 및 Windows용으로 다운로드할 수 있습니다.

Linux의 경우 nix 기반의 이 비공식 빌드 스크립트를 사용하여 성공했습니다.

# ⚠️ UNOFFICIAL # You can also run `make claude-linux` NIXPKGS_ALLOW_UNFREE=1 nix run github:k3d3/claude-desktop-linux-flake \ --impure \ --extra-experimental-features flakes \ --extra-experimental-features nix-command

Claude Desktop과 함께 사용하려면 다음을 claude_desktop_config.json 에 추가하세요(자세한 내용은 MCP 문서 웹사이트 에서 확인하세요).

[!중요한]

SERVER_URLTOKEN 의 포트가 jupyter lab 명령에서 사용된 포트와 일치하는지 확인하세요.

NOTEBOOK_PATH 는 JupyterLab이 시작된 디렉토리를 기준으로 해야 합니다.

macOS 및 Windows에서의 Claude 구성

{ "mcpServers": { "jupyter": { "command": "docker", "args": [ "run", "-i", "--rm", "-e", "SERVER_URL", "-e", "TOKEN", "-e", "NOTEBOOK_PATH", "datalayer/jupyter-mcp-server:latest" ], "env": { "SERVER_URL": "http://host.docker.internal:8888", "TOKEN": "MY_TOKEN", "NOTEBOOK_PATH": "notebook.ipynb" } } } }

Linux에서의 Claude 구성

CLAUDE_CONFIG=${HOME}/.config/Claude/claude_desktop_config.json cat <<EOF > $CLAUDE_CONFIG { "mcpServers": { "jupyter": { "command": "docker", "args": [ "run", "-i", "--rm", "-e", "SERVER_URL", "-e", "TOKEN", "-e", "NOTEBOOK_PATH", "--network=host", "datalayer/jupyter-mcp-server:latest" ], "env": { "SERVER_URL": "http://localhost:8888", "TOKEN": "MY_TOKEN", "NOTEBOOK_PATH": "notebook.ipynb" } } } } EOF cat $CLAUDE_CONFIG

구성 요소

도구

현재 서버는 2가지 도구를 제공합니다.

  1. add_execute_code_cell
  • Jupyter Notebook에 코드 셀을 추가하고 실행합니다.
  • 입력:
    • cell_content (문자열): 실행할 코드.
  • 반환: 셀 출력.
  1. add_markdown_cell
  • Jupyter Notebook에 마크다운 셀을 추가합니다.
  • 입력:
    • cell_content (문자열): 마크다운 콘텐츠.
  • 반환: 성공 메시지.

건물

소스에서 Docker 이미지를 빌드할 수 있습니다.

make build-docker

Smithery를 통해 설치

Smithery를 통해 Claude Desktop에 Jupyter MCP 서버를 자동으로 설치하려면:

npx -y @smithery/cli install @datalayer/jupyter-mcp-server --client claude
-
security - not tested
F
license - not found
-
quality - not tested

모델 컨텍스트 프로토콜을 통해 Jupyter 노트북과의 상호작용을 지원하여 JupyterLab 환경 내에서 코드 실행과 마크다운 삽입을 지원합니다.

  1. Start JupyterLab
    1. Use with Claude Desktop
      1. Claude Configuration on macOS and Windows
      2. Claude Configuration on Linux
    2. Components
      1. Tools
    3. Building
      1. Installing via Smithery
        ID: et849kq742