Jupyter MCP Server

local-only server

The server can only run on the client’s local machine because it depends on local resources.

Integrations

  • Provides interaction with Jupyter notebooks running in JupyterLab, allowing adding and executing code cells, creating markdown cells, and interacting with notebook content programmatically.

  • Offers functionality to download Earth data granules from NASA Earth Data, supporting parameters for folder name, dataset short name, count, temporal range, and bounding box.

🪐 ✨ Jupyter MCP サーバー

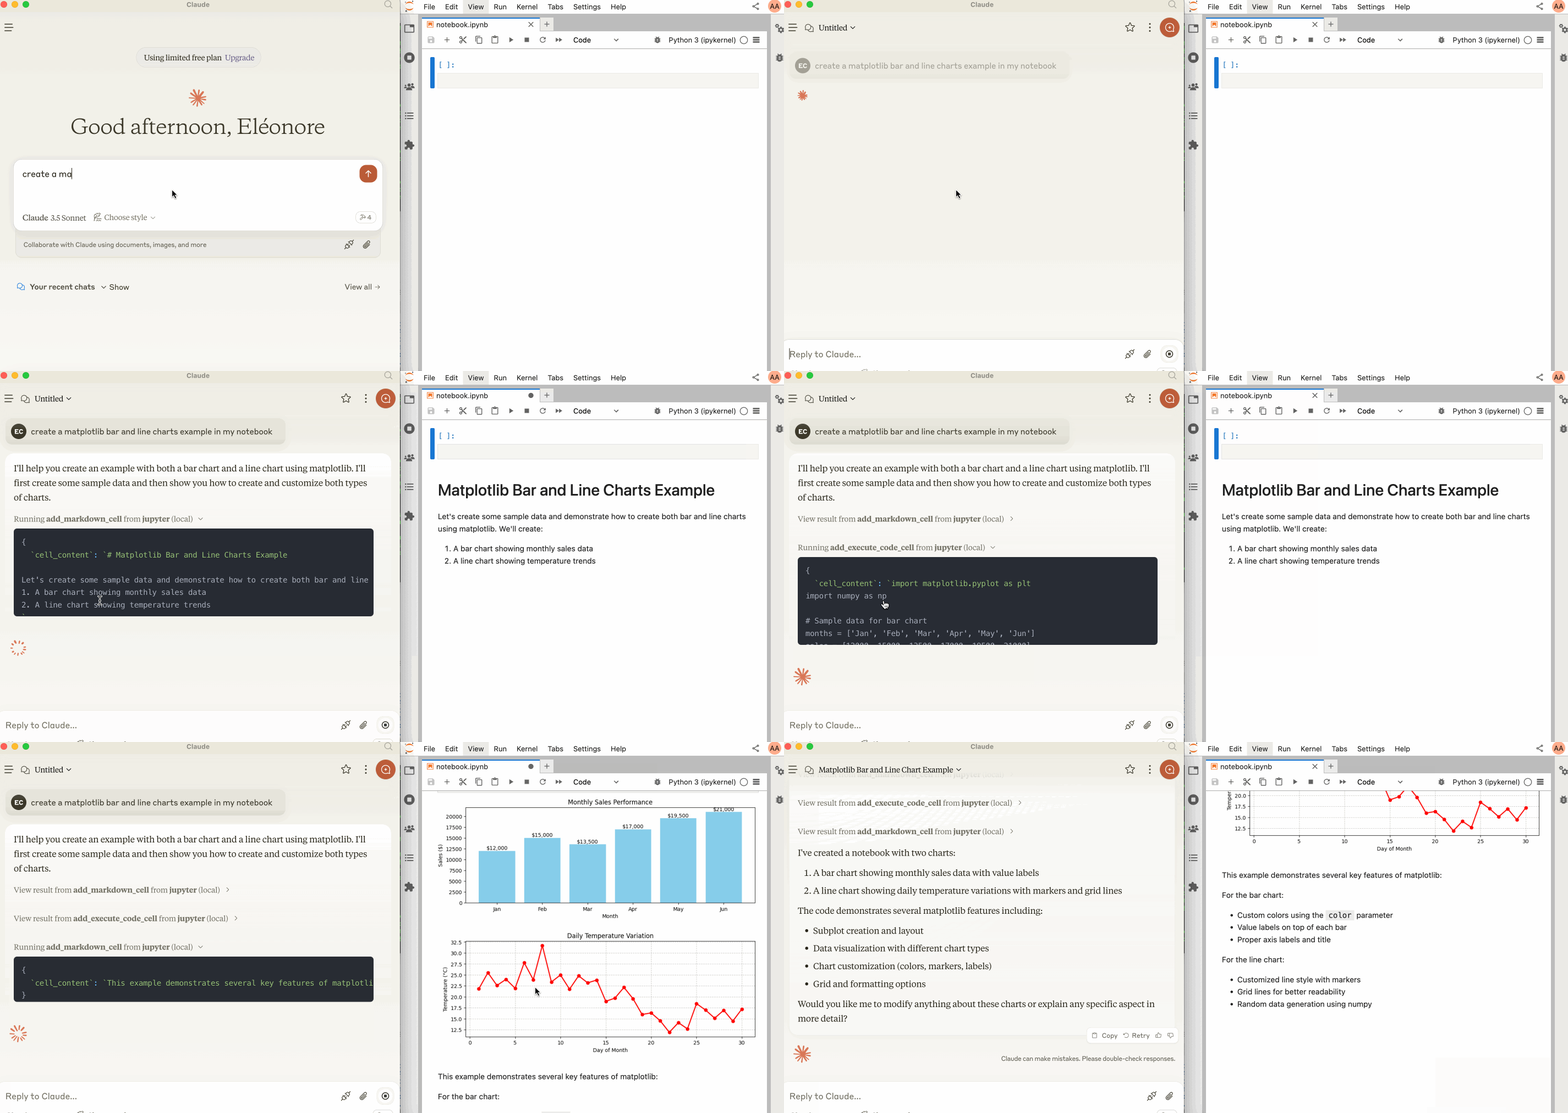
Jupyter MCP サーバーは、任意の JupyterLab で実行されている 📓 Jupyter ノートブックとのやり取りを提供するモデル コンテキスト プロトコル(MCP) サーバー実装です (💻 ローカル JupyterLab でも動作します)。
JupyterLabを起動する

以下のパッケージがインストールされていることを確認してください。Jupyter Real Time Collaborationにより、ノートブックに加えられた変更内容を確認できるため、コラボレーションパッケージが必要です。

pip install jupyterlab jupyter-collaboration ipykernel pip uninstall -y pycrdt datalayer_pycrdt pip install datalayer_pycrdt

次に、以下のコマンドでJupyterLabを起動します。

jupyter lab --port 8888 --IdentityProvider.token MY_TOKEN --ip 0.0.0.0

make jupyterlabを実行することもできます。

[!注記]

--ip0.0.0.0に設定され、Docker コンテナで実行されている MCP サーバーがローカルの JupyterLab にアクセスできるようになります。

Claude Desktop で使用する

Claude Desktop は、macOS および Windows 向けにこのページからダウンロードできます。

Linuxでは、 nixベースのこの非公式ビルドスクリプトを使用することで成功しました。

# ⚠️ UNOFFICIAL # You can also run `make claude-linux` NIXPKGS_ALLOW_UNFREE=1 nix run github:k3d3/claude-desktop-linux-flake \ --impure \ --extra-experimental-features flakes \ --extra-experimental-features nix-command

これを Claude Desktop で使用するには、 claude_desktop_config.jsonに次のコードを追加します (詳細については、 MCP ドキュメント Web サイトを参照してください)。

[!重要]

SERVER_URLTOKENのポートが、 jupyter labコマンドで使用されているポートと一致していることを確認します。

NOTEBOOK_PATH 、JupyterLab が起動されたディレクトリを基準にする必要があります。

macOSとWindowsでのClaudeの構成

{ "mcpServers": { "jupyter": { "command": "docker", "args": [ "run", "-i", "--rm", "-e", "SERVER_URL", "-e", "TOKEN", "-e", "NOTEBOOK_PATH", "datalayer/jupyter-mcp-server:latest" ], "env": { "SERVER_URL": "http://host.docker.internal:8888", "TOKEN": "MY_TOKEN", "NOTEBOOK_PATH": "notebook.ipynb" } } } }

LinuxでのClaudeの設定

CLAUDE_CONFIG=${HOME}/.config/Claude/claude_desktop_config.json cat <<EOF > $CLAUDE_CONFIG { "mcpServers": { "jupyter": { "command": "docker", "args": [ "run", "-i", "--rm", "-e", "SERVER_URL", "-e", "TOKEN", "-e", "NOTEBOOK_PATH", "--network=host", "datalayer/jupyter-mcp-server:latest" ], "env": { "SERVER_URL": "http://localhost:8888", "TOKEN": "MY_TOKEN", "NOTEBOOK_PATH": "notebook.ipynb" } } } } EOF cat $CLAUDE_CONFIG

コンポーネント

ツール

サーバーは現在 2 つのツールを提供しています:

  1. add_execute_code_cell
  • Jupyter ノートブックにコード セルを追加して実行します。
  • 入力:
    • cell_content (文字列): 実行されるコード。
  • 戻り値: セル出力。
  1. add_markdown_cell
  • Jupyter ノートブックにマークダウン セルを追加します。
  • 入力:
    • cell_content (文字列): Markdown コンテンツ。
  • 戻り値: 成功メッセージ。

建物

Docker イメージをソースからビルドできます。

make build-docker

Smithery経由でインストール

Smithery経由で Claude Desktop 用の Jupyter MCP サーバーを自動的にインストールするには:

npx -y @smithery/cli install @datalayer/jupyter-mcp-server --client claude
-
security - not tested
F
license - not found
-
quality - not tested

モデル コンテキスト プロトコルを介して Jupyter ノートブックとのやり取りを可能にし、JupyterLab 環境内でのコード実行とマークダウン挿入をサポートします。

  1. Start JupyterLab
    1. Use with Claude Desktop
      1. Claude Configuration on macOS and Windows
      2. Claude Configuration on Linux
    2. Components
      1. Tools
    3. Building
      1. Installing via Smithery
        ID: et849kq742