Notion MCP サーバー
このプロジェクトは、Notion API用のMCP サーバーを実装します。
インストール
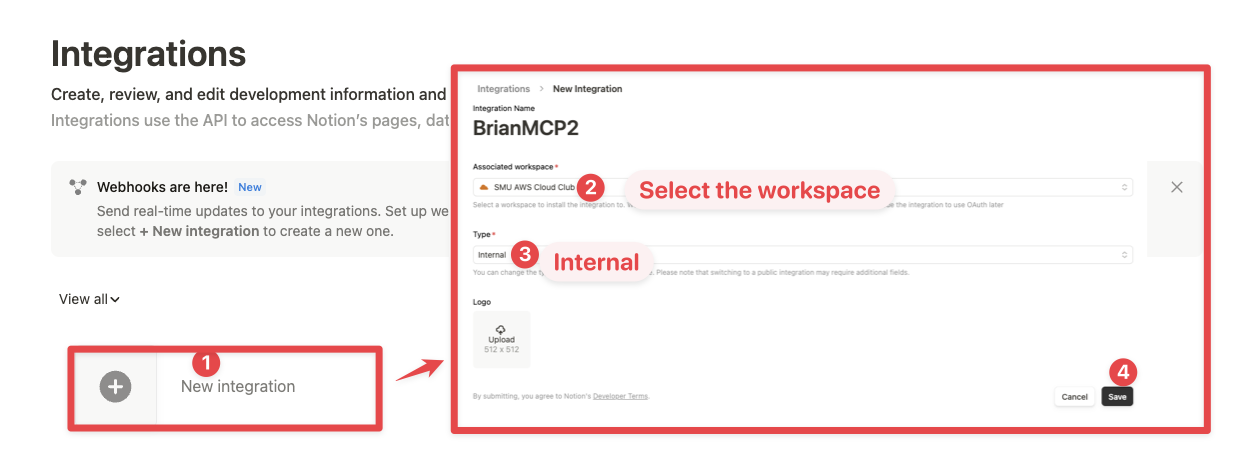
1. Notionでの統合の設定:
https://www.notion.so/profile/integrationsにアクセスし、新しい内部統合を作成するか、既存の統合を選択します。
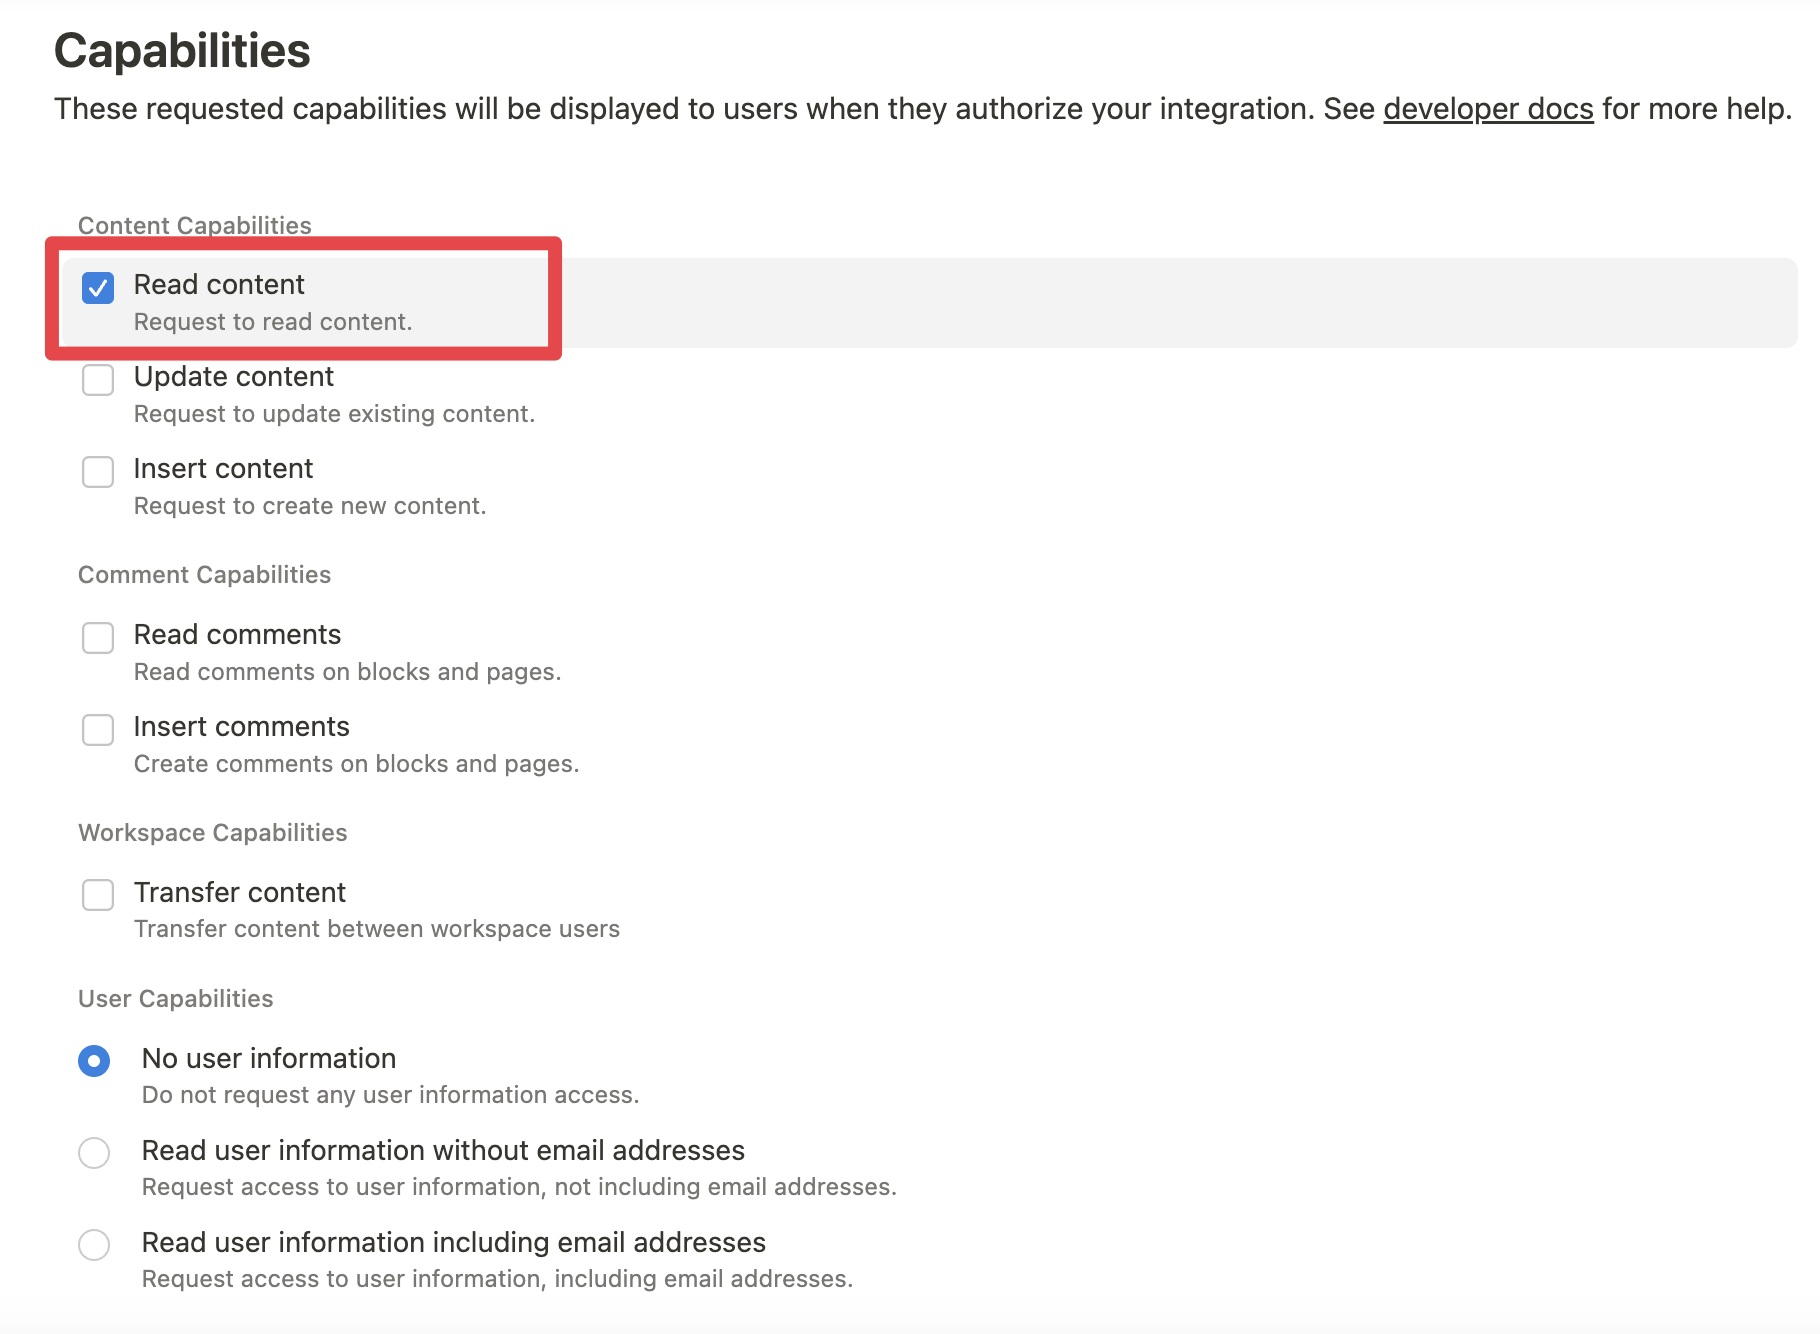
Notion APIの公開範囲は限定されています(例えば、MCP経由でデータベースを削除することはできません)。しかし、ワークスペースデータをLLMに公開することで、データへのリスクはゼロではありません。セキュリティを重視するユーザーは、統合機能をさらに設定することをお勧めします。
たとえば、「構成」タブから「コンテンツの読み取り」アクセス権のみを付与することで、読み取り専用の統合トークンを作成できます。
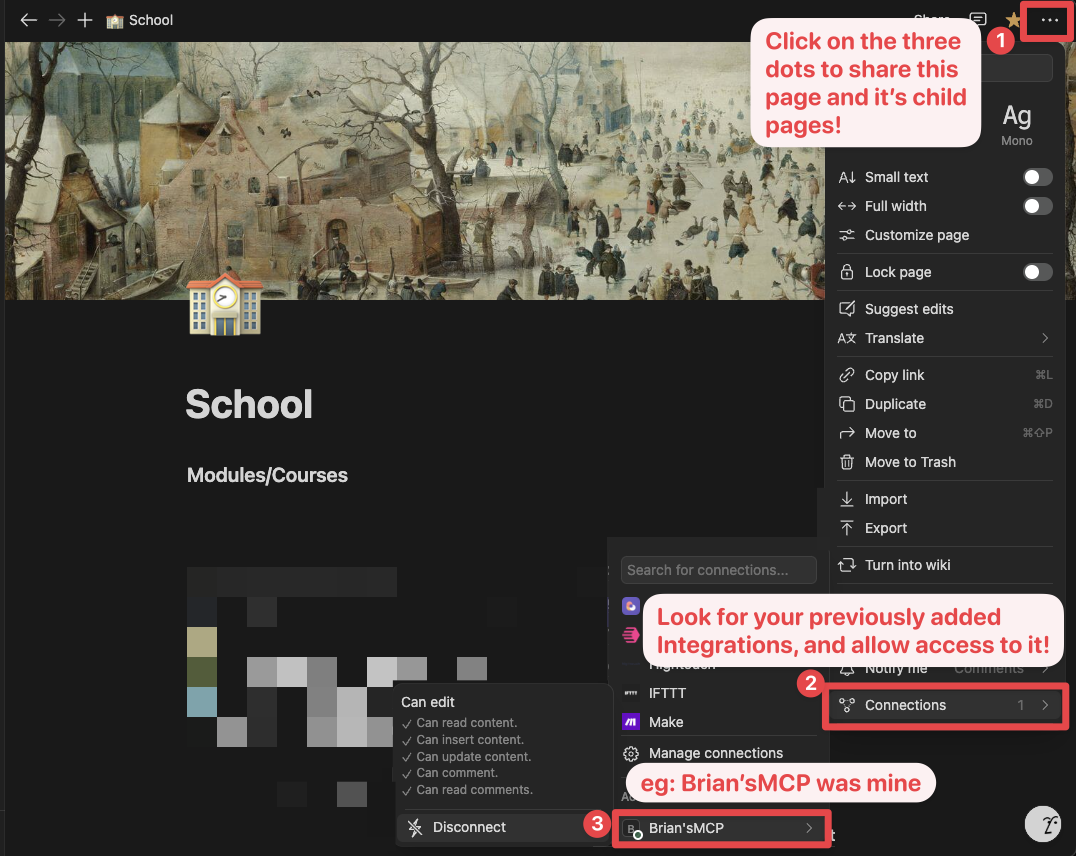
2. コンテンツを統合に接続する:
関連するページとデータベースが統合に接続されていることを確認します。
これを行うには、そのページにアクセスし、3 つのドットをクリックして、「統合に接続」を選択する必要があります。
3. クライアントに MCP 構成を追加する:
npm を使用する場合:
.cursor/mcp.jsonまたはclaude_desktop_config.jsonに次のコードを追加します (MacOS: ~/Library/Application\ Support/Claude/claude_desktop_config.json )
Docker の使用:
Docker を使用して MCP サーバーを実行するには、次の 2 つのオプションがあります。
オプション 1: 公式 Docker Hub イメージを使用する:
.cursor/mcp.jsonまたはclaude_desktop_config.jsonに以下を追加します。
このアプローチ:
公式Docker Hubイメージを使用
環境変数を介してJSONエスケープを適切に処理します
より信頼性の高い構成方法を提供します
オプション 2: ローカルで Docker イメージをビルドする:
Dockerイメージをローカルでビルドして実行することもできます。まず、Dockerイメージをビルドします。
次に、 .cursor/mcp.jsonまたはclaude_desktop_config.jsonに次のコードを追加します。
ntn_****統合シークレットに置き換えることを忘れないでください。統合設定タブから確認することができます。
例
次の命令を使用して
AIはタスクを達成するために、 v1/searchとv1/comments 2つのAPI呼び出しを正しく計画します。
同様に、次の命令を実行すると、「Notion MCP」という名前の新しいページが親ページ「Development」に追加されます。
コンテンツIDを直接参照することもできます
発達
建てる
実行する
公開