Not MCP 服务器
该项目为Notion API实现了一个MCP 服务器。
安装
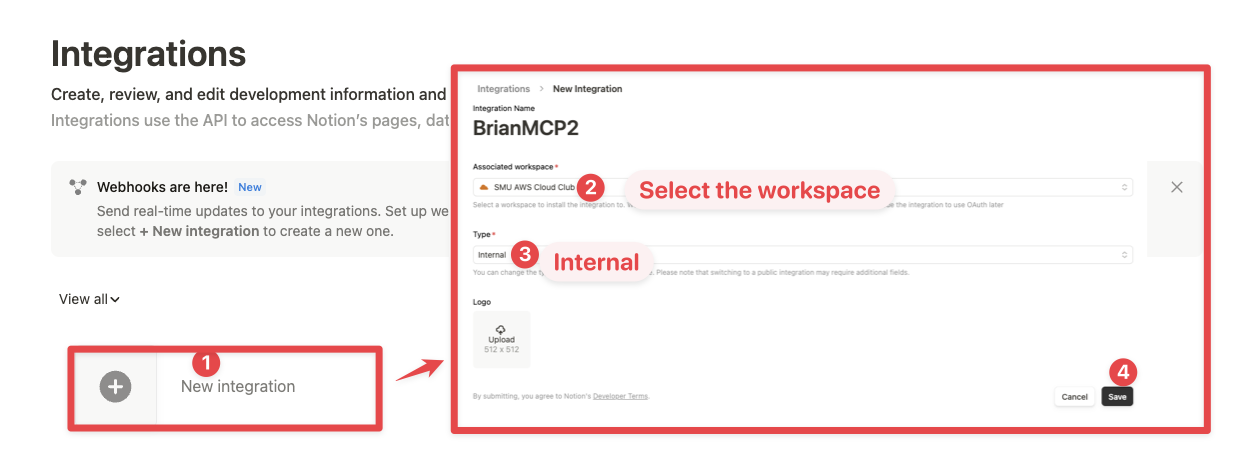
1.在Notion中设置集成:
转到https://www.notion.so/profile/integrations并创建一个新的内部集成或选择一个现有的集成。
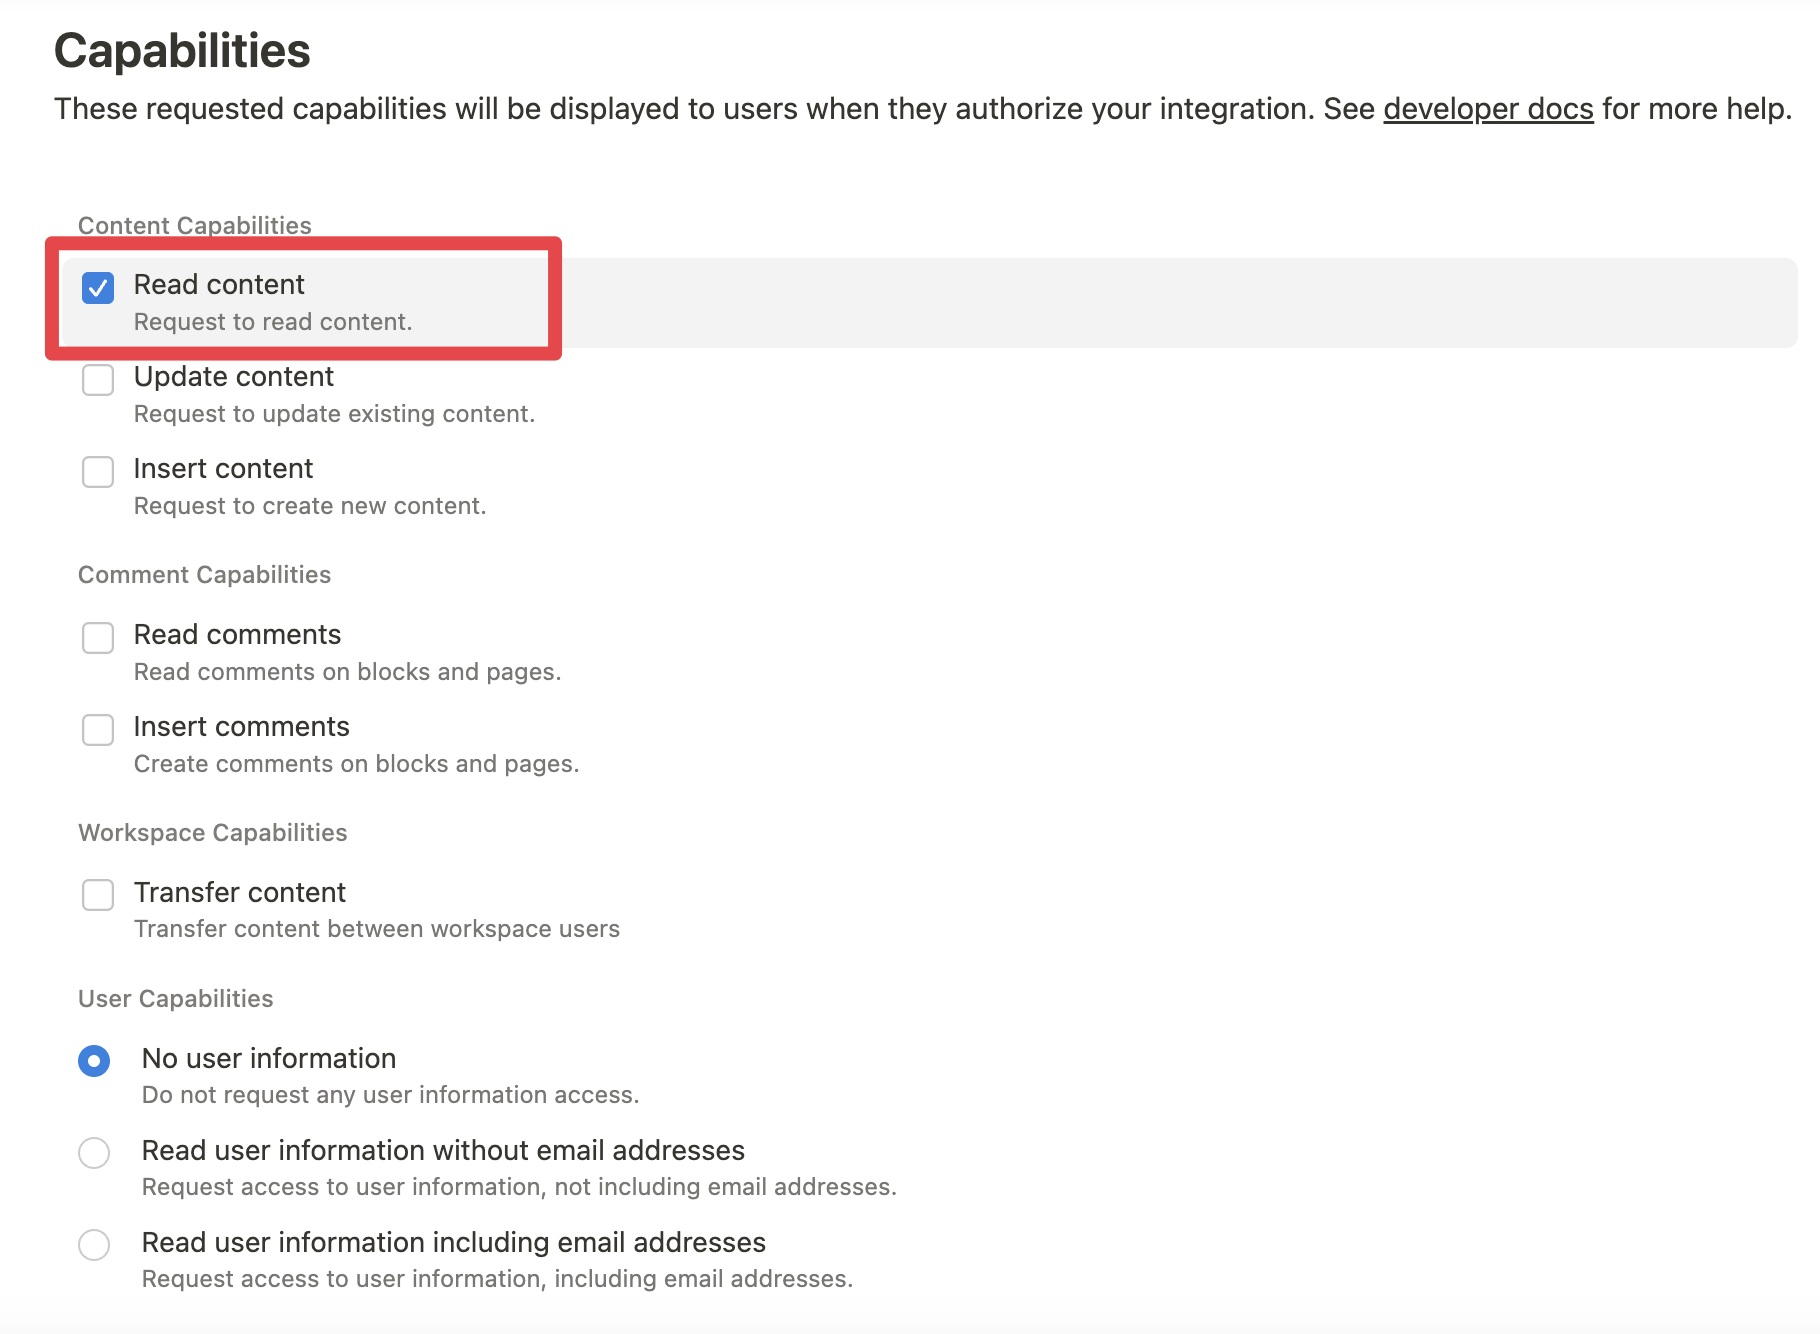
虽然我们限制了 Notion API 的公开范围(例如,您将无法通过 MCP 删除数据库),但将工作区数据暴露给 LLM 仍会带来不小的风险。注重安全的用户可能需要进一步配置集成的功能。
例如,您可以通过从“配置”选项卡仅授予“读取内容”访问权限来创建只读集成令牌:
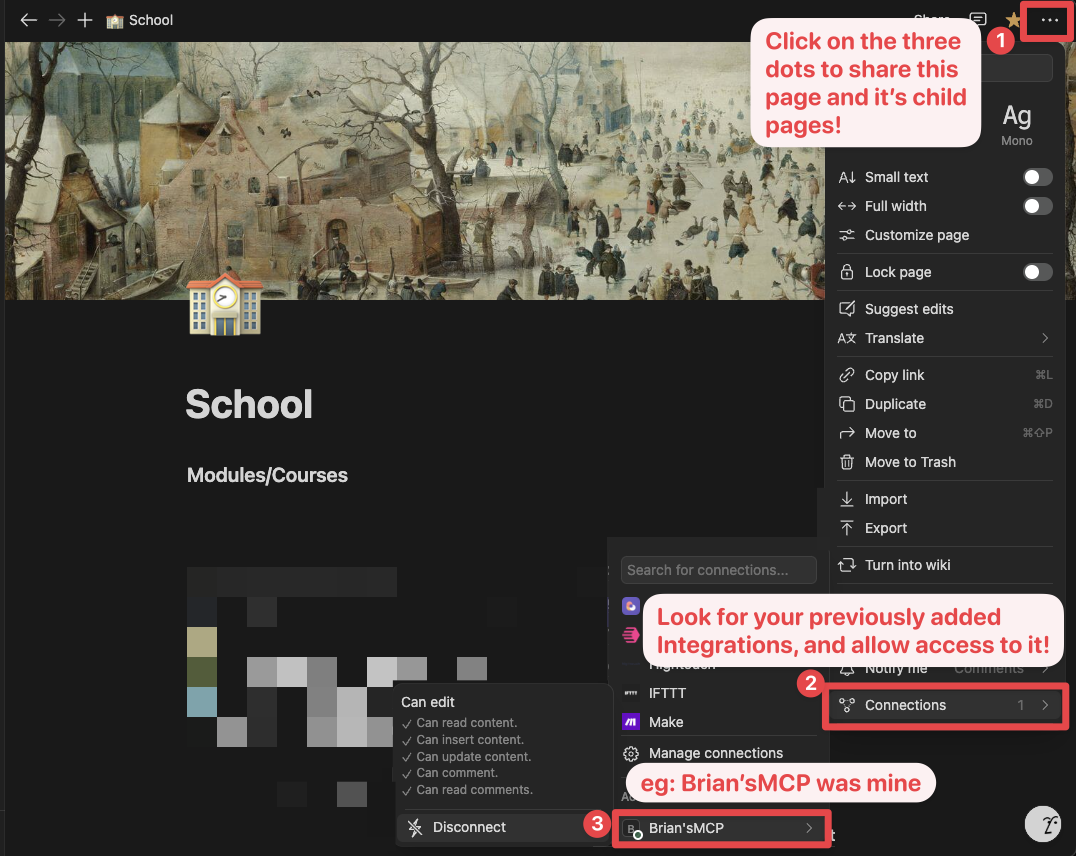
2. 将内容与集成连接起来:
确保相关页面和数据库已连接到您的集成。
为此,您需要访问该页面,单击 3 个点,然后选择“连接到集成”。
3. 将 MCP 配置添加到您的客户端:
使用 npm:
将以下内容添加到您的.cursor/mcp.json或claude_desktop_config.json (MacOS: ~/Library/Application\ Support/Claude/claude_desktop_config.json )
使用 Docker:
使用 Docker 运行 MCP 服务器有两种选择:
选项 1:使用官方 Docker Hub 镜像:
将以下内容添加到您的.cursor/mcp.json或claude_desktop_config.json :
这种方法:
使用官方 Docker Hub 镜像
通过环境变量正确处理 JSON 转义
提供更可靠的配置方法
选项 2:在本地构建 Docker 镜像:
您也可以在本地构建并运行 Docker 镜像。首先,构建 Docker 镜像:
然后,将以下内容添加到您的.cursor/mcp.json或claude_desktop_config.json中:
别忘了将ntn_****替换成你的集成密钥。你可以在集成配置选项卡中找到它:
示例
使用以下指令
AI 将正确规划两个 API 调用( v1/search和v1/comments ,以完成任务
类似地,以下指令将导致名为“Notion MCP”的新页面添加到父页面“Development”
您也可以直接引用内容ID
发展
建造
执行
发布