
This server allows you to generate and upscale images using the LetzAI public API.
Create images: Generate images based on text prompts, with customizable settings for mode, dimensions, quality, creativity, watermark, and system version.
Upscale images: Enhance image resolution using either an image ID or URL, with adjustable strength for the upscaling process.
Click on "Install Server".
Wait a few minutes for the server to deploy. Once ready, it will show a "Started" state.
In the chat, type
@followed by the MCP server name and your instructions, e.g., "@Letz AI MCPcreate an image of a sunset over mountains with a lake reflection"
That's it! The server will respond to your query, and you can continue using it as needed.
Here is a step-by-step guide with screenshots.
LetzAI MCP Setup Guide
This guide will walk you through the process of setting up and using the LetzAI MCP (Model Context Protocol) for image generation.
Prerequisites
Before you begin, ensure that you have the following:
Node.js installed on your system. You can download it from Node.js official site.
Claude Desktop App installed. If you don't have it, download it from Claude Desktop App.
LetzAI API Key. You can obtain it by visiting LetzAI API.
Related MCP server: Vibe Worldbuilding MCP
Setup Steps
1. Download the Git Folder
Download the repository containing the LetzAI MCP project and place it in a location outside of your Downloads folder. For example:
Alternatively, you can use git clone to clone the repository:
2. Install Dependencies
Navigate to the project folder using your terminal or command prompt:
Run the following command to install all required dependencies:
3. Compile the Project
After installing the dependencies, compile the TypeScript files into JavaScript using the following command:
This will generate the compiled JavaScript files in the build folder.
4. Restart Claude App
After running npx tsc, you must restart the Claude Desktop App for it to recognize the updated MCP configuration and compiled files.
5. Set Up MCP Configuration in Claude Desktop App

Open the Claude Desktop App.
Click on the Menu Icon in the top-left corner.
From the dropdown, select File.
Navigate to Settings.
Under the Developer section, you will see an option for Edit Config.
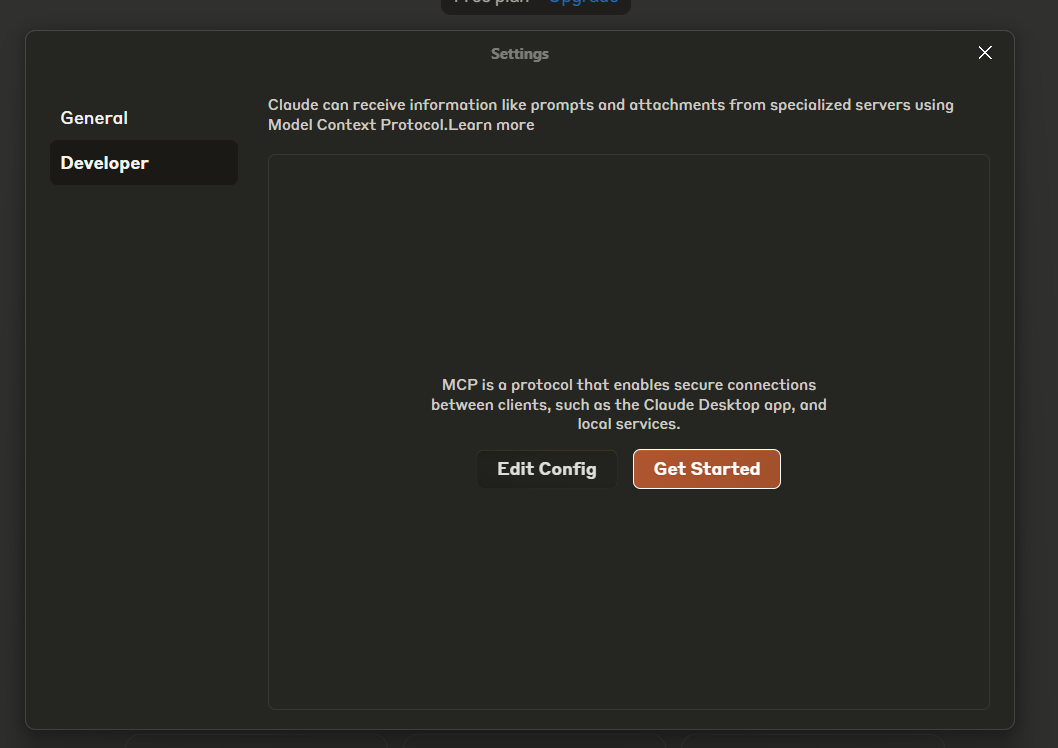
Click on Edit Config — this will open the configuration folder.
Locate the file
claude_desktop_config.jsonand edit it as needed.
Windows Configuration:
Ubuntu Configuration:
macOS Configuration:
Configuration Explanation
command: The command to run the application. We use
nodeto run the JavaScript file generated by TypeScript.args: This is the path to the compiled
index.jsfile. Make sure the path is correct according to where your files are located after compilation. If you've placed the folder atC:\\Users\\username\\desktop\\letzai-mcp, the path will be:
6. Run the MCP Server
Now that everything is set up, you can start using the LetzAI MCP in the Claude Desktop App. The server should be ready for image generation tasks once the app is running with the correct API key in the environment.
Important: After making changes to the configuration, you must restart Claude for the changes to take effect.
7. Testing the New MCP in Claude
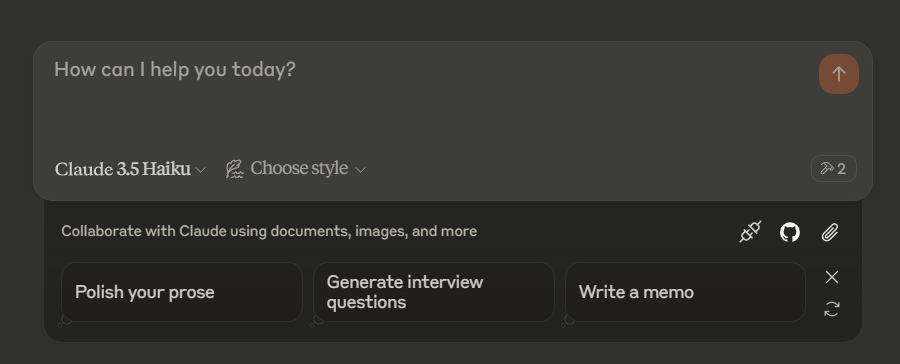 Click on the hammer icon to view the installed MCP tools.
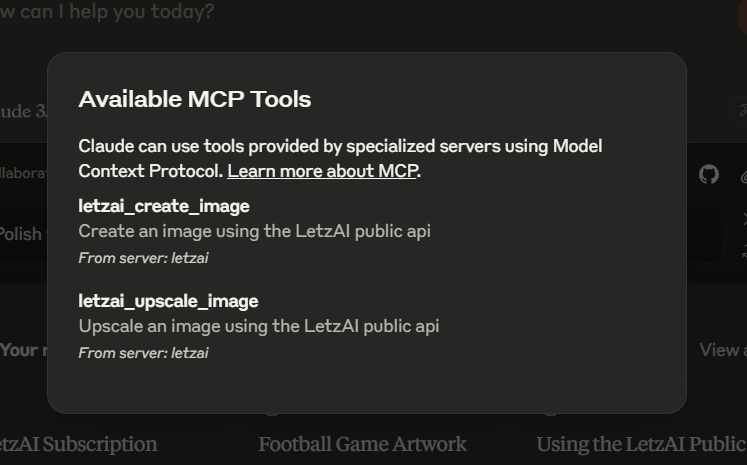
Once you've set up the MCP in the Claude Desktop App, you can test it by running the following prompt:
Create image with LetzAI using prompt: "photo of @mischstrotz drinking a beer, dressed as a knight"
This will create the image based on the provided prompt, using the model @mischstrotz from LetzAI. Claude will open the image in your preferred browser.
Upscale this image with strength 1:
This will upscale the image using the strength parameter 1. You can pass entire URLs, or just the LetzAI Image IDs e.g. d6a67077-f156-46d7-a1a2-1dc49e83dd91
Troubleshooting
Node.js not found: Ensure that Node.js is installed and added to your system's PATH environment variable.
Invalid API Key: Double-check that you have correctly added your API key under the
LETZAI_API_KEYvariable in the Claude Desktop App settings.File Path Issues: Make sure that the path to the
index.jsfile is correct. If you're unsure about the path, use the absolute path to the file.
For more detailed documentation and support, visit LetzAI Docs.