
MCP-YNU - FastMCP サーバー
各ディレクトリからツール、リソース、プロンプトを自動的に読み込む FastMCP を使用した動的 MCP サーバー実装。
特徴
tools/、resources/、prompts/ディレクトリからのモジュールの動的ロードモジュールの自動検出と登録
シンプルな構成と拡張性
コードの明確さと静的解析を向上させる型ヒント
サーバーアクティビティを監視するための包括的なログ記録
Related MCP server: MCP Remote Server
最近の更新
コードベース全体に型ヒントを追加しました
MCPインスタンス処理の改善
ログ機能の追加
MITライセンスを追加
参照リンクを含むドキュメントを更新しました
ディレクトリ構造
mcp-ynu/
├── tools/          # Directory for tool modules
│   ├── __init__.py
│   ├── example.py
├── resources/      # Directory for resource modules
│   ├── __init__.py
│   ├── example.py
├── prompts/        # Directory for prompt modules
│   ├── __init__.py
│   ├── example.py
├── logger.py       # Logger implementation
├── main.py         # Main implementation
├── mcp_server.py   # MCP server implementation
├── README.md       # Project documentation
├── LICENSE         # MIT License
└── pyproject.toml  # Project configuration
使用法
適切なディレクトリにモジュールを作成する
from mcp_server import mcp経由で mcp をインポートします。サーバーを実行します。
python main.pyサンプルモジュール
ツールモジュールの例 (tools/example.py)
from mcp_server import mcp
import httpx
@mcp.tool()
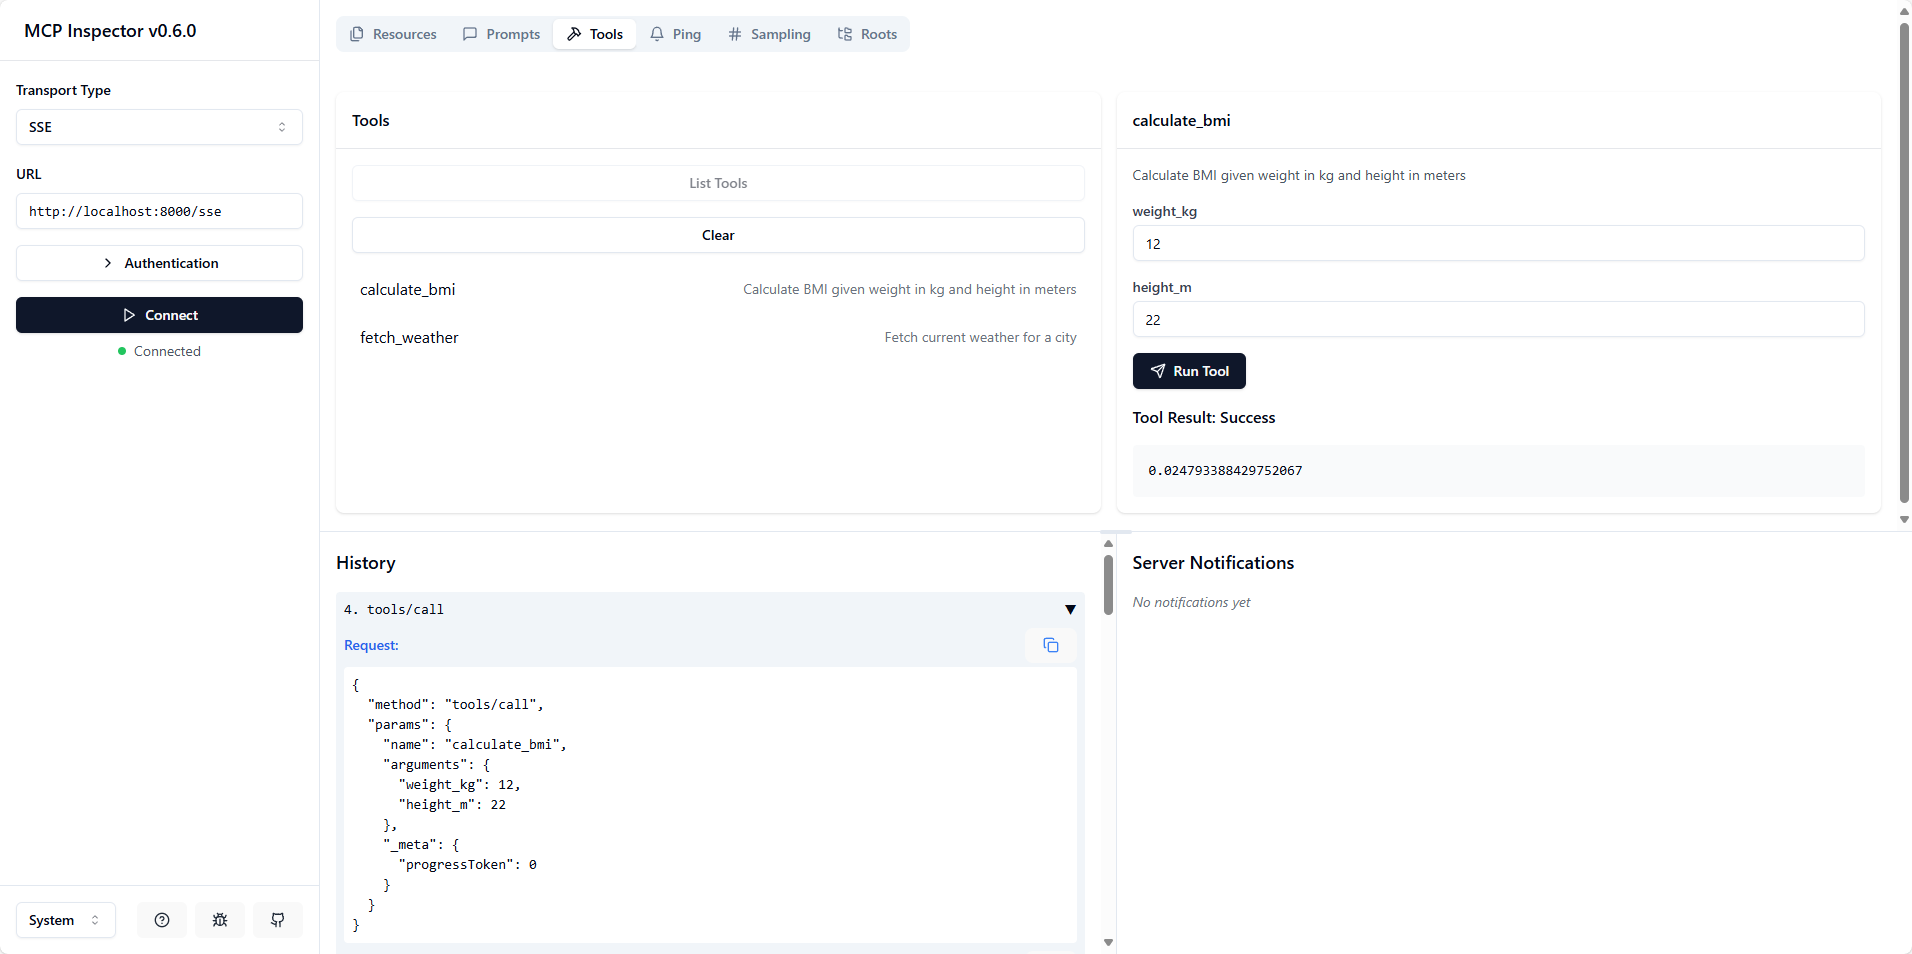
def calculate_bmi(weight_kg: float, height_m: float) -> float:
"""Calculate BMI given weight in kg and height in meters"""
return weight_kg / (height_m**2)
@mcp.tool()
async def fetch_weather(city: str) -> str:
"""Fetch current weather for a city"""
async with httpx.AsyncClient() as client:
response = await client.get(f"https://api.weather.com/{city}")
return response.textリソースモジュールの例 (resources/example.py)
from mcp_server import mcp

@mcp.resource("config://app")
def get_config() -> str:
    """Static configuration data"""
    return "App configuration here"


@mcp.resource("users://{user_id}/profile")
def get_user_profile(user_id: str) -> str:
    """Dynamic user data"""
    return f"Profile data for user {user_id}"
プロンプトモジュールの例 (prompts/example.py)
from mcp_server import mcp
from mcp.server.fastmcp.prompts import base

@mcp.prompt()
def review_code(code: str) -> str:
    return f"Please review this code:\n\n{code}"


@mcp.prompt()
def debug_error(error: str) -> list[base.Message]:
    return [
        base.UserMessage("I'm seeing this error:"),
        base.UserMessage(error),
        base.AssistantMessage("I'll help debug that. What have you tried so far?"),
    ]
デバッグ
.envのMCP_TRANSPORT_TYPEを更新し、python main.pyを実行して mcp サーバーを起動します。npx @modelcontextprotocol/inspectorを実行してinspectを開きます。URL
http://localhost:<mcp_server_port>/sseでSSEトランスポート タイプを選択するか、コマンドpythonと引数/path/to/main.pyでSTDIOトランスポート タイプを選択します。
要件
Python >= 3.10
ファストMCP
参考リンク
ライセンス
このプロジェクトは MIT ライセンスに基づいてライセンスされています - 詳細についてはLICENSEファイルを参照してください。