
The Locust MCP Server enables you to run configurable load tests with seamless AI integration.
Execute load tests: Run tests with configurable parameters (users, spawn rate, runtime)
Flexible modes: Supports both headless and UI-based execution
Custom scenarios: Define custom task scenarios in your test scripts
Real-time output: Monitor test execution as it happens
Protocol support: Built-in HTTP/HTTPS protocol handling
API access: Easy-to-use API for programmatic test execution
AI integration: Seamlessly works with Model Context Protocol for AI-powered development environments
Enables running Locust load tests with configurable parameters (users, spawn rate, runtime) for HTTP/HTTPS performance testing through a simple API.
Click on "Install Server".
Wait a few minutes for the server to deploy. Once ready, it will show a "Started" state.
In the chat, type
@followed by the MCP server name and your instructions, e.g., "@Locust MCP Serverrun a load test on my API with 100 users for 2 minutes"
That's it! The server will respond to your query, and you can continue using it as needed.
Here is a step-by-step guide with screenshots.
🚀 ⚡️ locust-mcp-server
A Model Context Protocol (MCP) server implementation for running Locust load tests. This server enables seamless integration of Locust load testing capabilities with AI-powered development environments.
✨ Features
Simple integration with Model Context Protocol framework
Support for headless and UI modes
Configurable test parameters (users, spawn rate, runtime)
Easy-to-use API for running Locust load tests
Real-time test execution output
HTTP/HTTPS protocol support out of the box
Custom task scenarios support
Related MCP server: Web-QA
🔧 Prerequisites
Before you begin, ensure you have the following installed:
Python 3.13 or higher
uv package manager (Installation guide)
📦 Installation
Clone the repository:
git clone https://github.com/qainsights/locust-mcp-server.gitInstall the required dependencies:
uv pip install -r requirements.txtSet up environment variables (optional): Create a
.envfile in the project root:
LOCUST_HOST=http://localhost:8089  # Default host for your tests
LOCUST_USERS=3                     # Default number of users
LOCUST_SPAWN_RATE=1               # Default user spawn rate
LOCUST_RUN_TIME=10s               # Default test duration
🚀 Getting Started
Create a Locust test script (e.g.,
hello.py):
from locust import HttpUser, task, between

class QuickstartUser(HttpUser):
    wait_time = between(1, 5)

    @task
    def hello_world(self):
        self.client.get("/hello")
        self.client.get("/world")

    @task(3)
    def view_items(self):
        for item_id in range(10):
            self.client.get(f"/item?id={item_id}", name="/item")
            time.sleep(1)

    def on_start(self):
        self.client.post("/login", json={"username":"foo", "password":"bar"})
Configure the MCP server using the below specs in your favorite MCP client (Claude Desktop, Cursor, Windsurf and more):
{
"mcpServers": {
"locust": {
"command": "/Users/naveenkumar/.local/bin/uv",
"args": [
"--directory",
"/Users/naveenkumar/Gits/locust-mcp-server",
"run",
"locust_server.py"
]
}
}
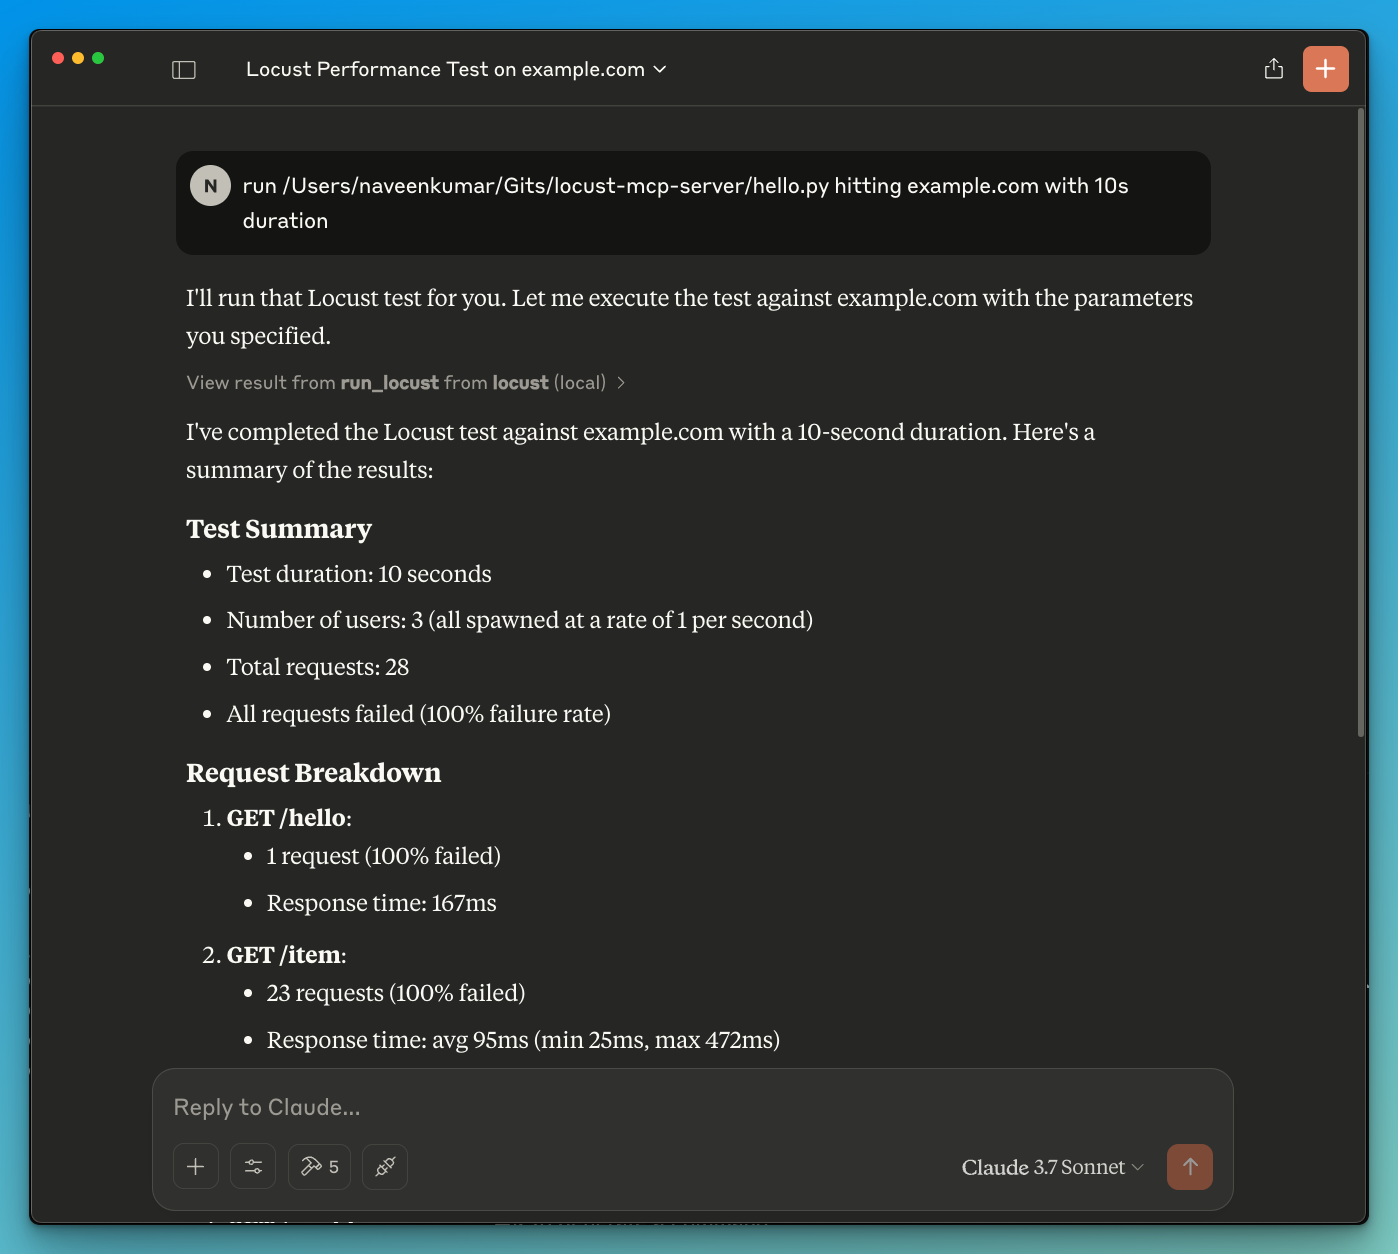
}Now ask the LLM to run the test e.g.
run locust test for hello.py. The Locust MCP server will use the following tool to start the test:
run_locust: Run a test with configurable options for headless mode, host, runtime, users, and spawn rate
📝 API Reference
Run Locust Test
run_locust(
    test_file: str,
    headless: bool = True,
    host: str = "http://localhost:8089",
    runtime: str = "10s",
    users: int = 3,
    spawn_rate: int = 1
)
Parameters:
test_file: Path to your Locust test scriptheadless: Run in headless mode (True) or with UI (False)host: Target host to load testruntime: Test duration (e.g., "30s", "1m", "5m")users: Number of concurrent users to simulatespawn_rate: Rate at which users are spawned
✨ Use Cases
LLM powered results analysis
Effective debugging with the help of LLM
🤝 Contributing
Contributions are welcome! Please feel free to submit a Pull Request.
📄 License
This project is licensed under the MIT License - see the LICENSE file for details.