MCPゲートウェイ
英語 |简体中文
ライセンス
このプロジェクトは、GNU General Public License v3.0 に基づいてライセンスされています。詳細については、 LICENSEファイルを参照してください。
Related MCP server: Maya MCP
プロジェクト概要
MCP GatewayはPythonで構築されたアプリケーションです。複数のバックエンドMCPサーバー(通信プロトコルがStdioまたはSSEのどちらであっても)に接続し、それらの機能を集約する中央ゲートウェイとして機能します。最終的には、これらの集約された機能を、統合されたSSEエンドポイント( /sse )を介して上流のMCPクライアントに公開します。
主な利点:
簡素化されたクライアント構成: MCP クライアントは、MCP ゲートウェイの単一のアドレスに接続するだけですべてのバックエンド サービスの機能にアクセスできるため、各バックエンド サーバーを個別に構成する必要がなくなります。
**機能の集約とオーケストレーション:**さまざまなソースからの多様な機能を備えた MCP ツールを集約し、特定のタスク ドメインに重点を置いた、より強力でカスタマイズされたエージェントを構築するための基盤を提供します。
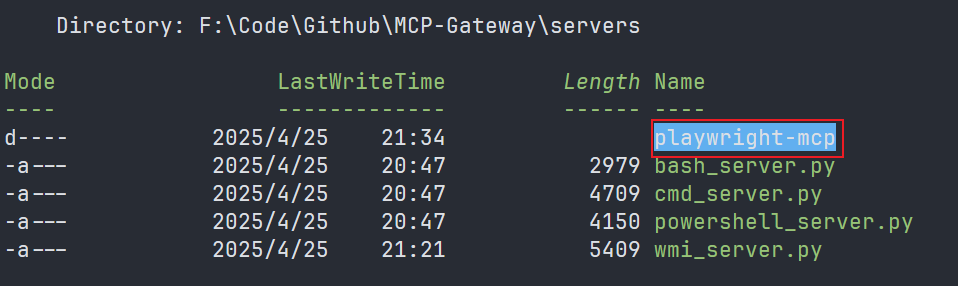
プロジェクトファイルの構造
組み込みMCPサーバー
このプロジェクトには、追加の構成なしで直接使用し、 config.jsonで有効にできる 4 つのバックエンド MCP サーバー ツールが付属しています。
Bash コマンド実行ツール ( : Linux、macOS、または WSL 環境で Bash コマンドを実行します。
Windows CMD コマンド実行ツール ( : Windows 環境で CMD コマンドを実行します。
Windows PowerShell コマンド実行ツール ( : Windows 環境で PowerShell コマンドを実行します。
Windows WMI クエリ ツール ( : Windows 環境で WMI クエリを実行します。
Linux 環境で次のエラーが発生した場合:
error: Distribution `pywin32==310 @ registry+https://pypi.org/simple` can't be installed because it doesn't have a source distribution or wheel for the current platform>
wmiモジュールをアンインストールしてください:uv remove wmi
インストールとセットアップ
このプロジェクトはPythonで書かれています。環境と依存関係の管理にはuv使用をお勧めします。
クローンリポジトリ
git clone https://github.com/trtyr/MCP-Gateway.git cd MCP-Gateway仮想環境の作成と有効化
# Create virtual environment uv venv # Activate virtual environment # Linux/macOS source .venv/bin/activate # Windows (Command Prompt/PowerShell) .venv\Scripts\activate依存関係をインストールする
# Install all required dependencies based on pyproject.toml uv sync
これらの手順を完了すると、プロジェクトを実行する準備が整います。
クイックスタート
プロジェクトヘルプを取得する
使用可能なすべての起動オプションを表示するには、 -hまたは--help引数を使用できます。
出力は次のようになります。
プロジェクトを開始する
uv run python main.pyでサーバーを起動します。host、 host 、 log-level portできます。
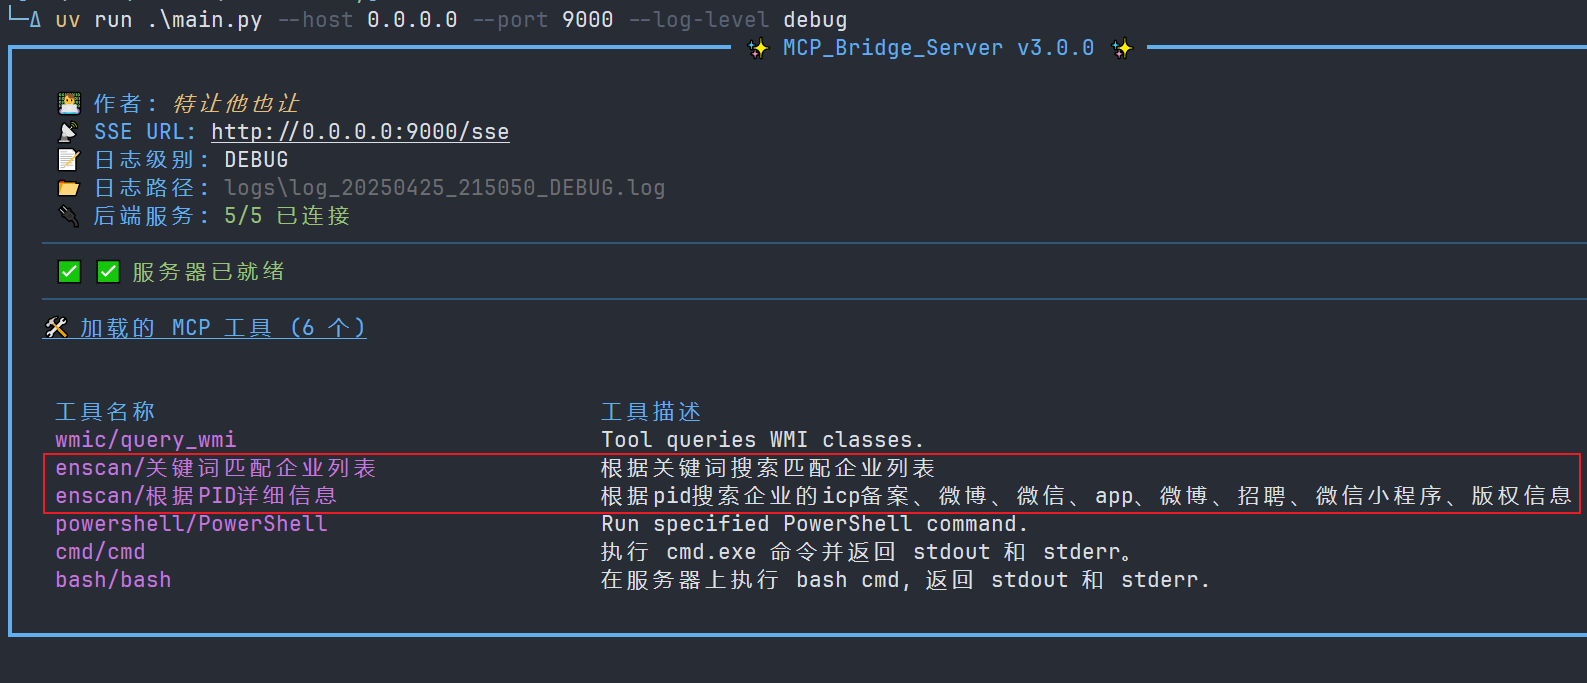
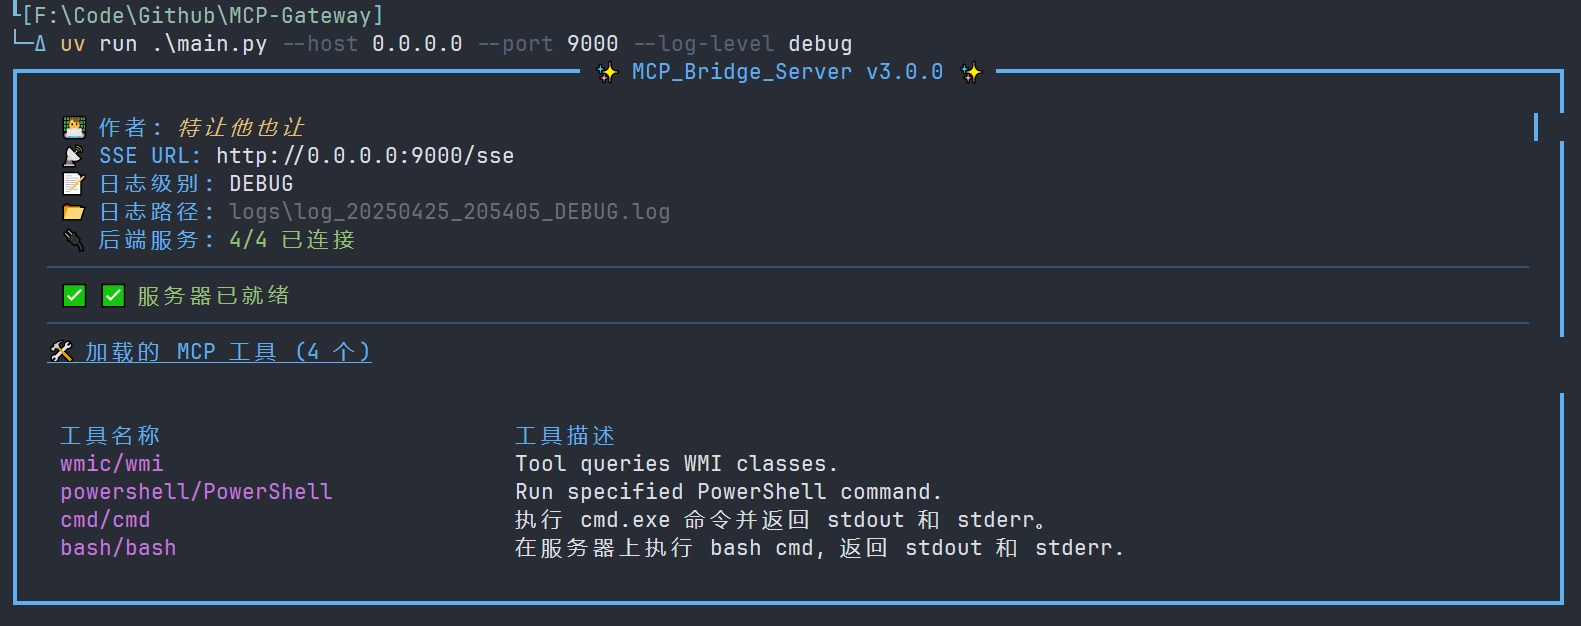
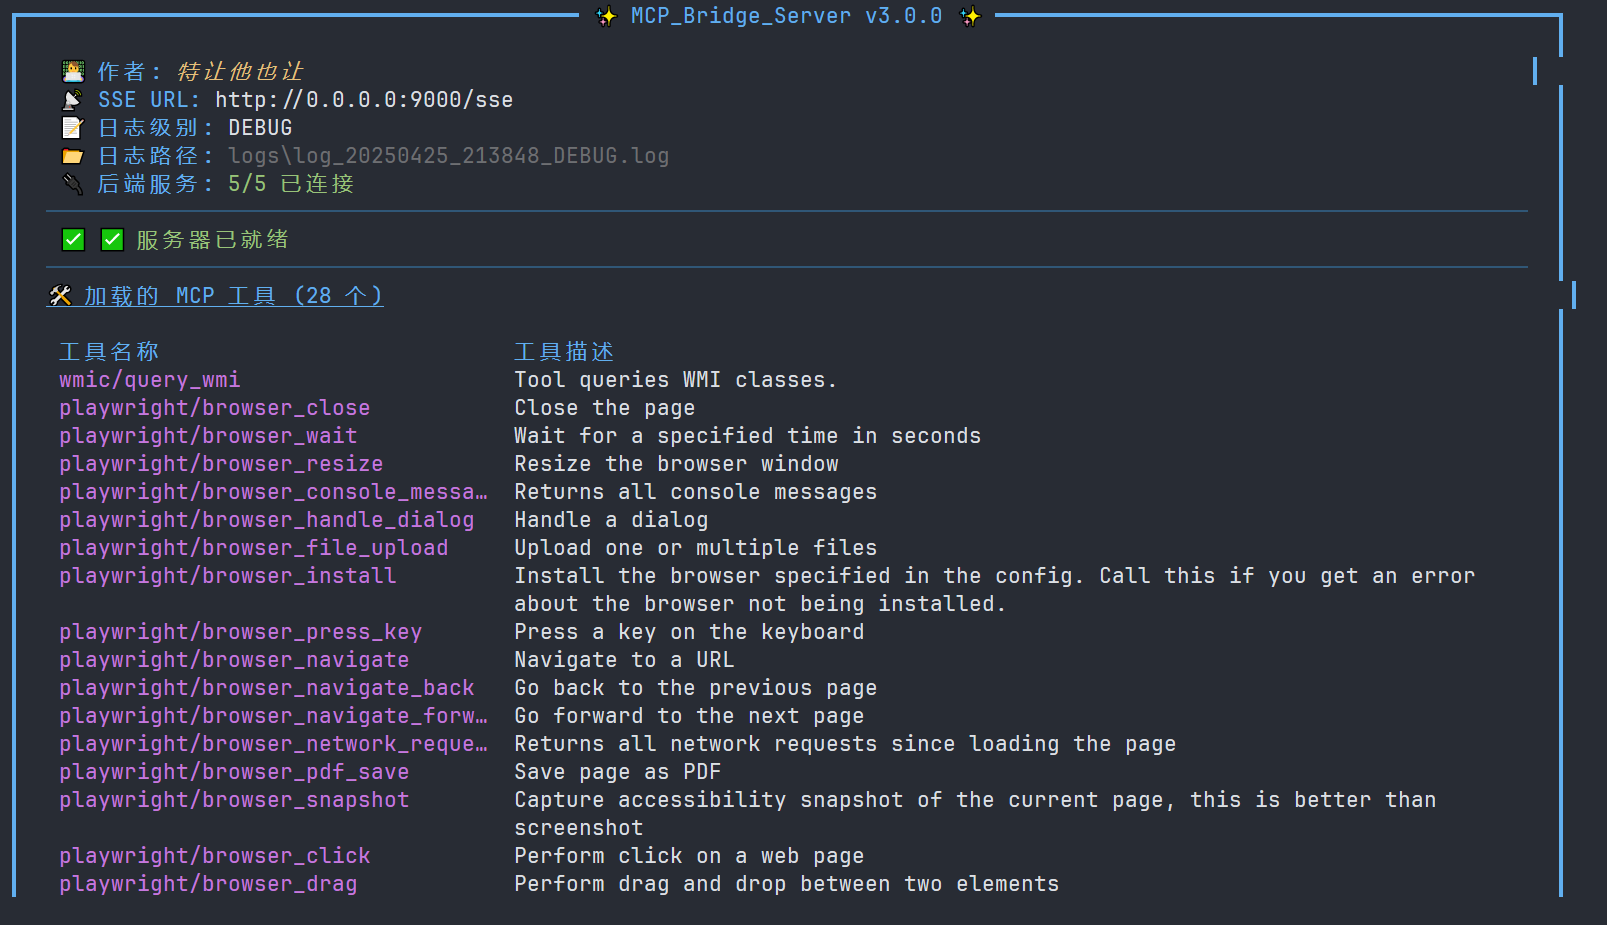
起動すると、以下の画像のように、サーバーの状態、接続情報、読み込まれたツールを示す、美しく整えられたコンソール出力が表示されます。
MCPクライアント接続
MCP Gateway を起動した後、MCP 互換クライアント (Cline、Cursor、Claude Desktop、カスタム クライアントなど) を使用して、Gateway によって提供される SSE エンドポイントに接続できます。
デフォルトのアドレスはhttp://<Server_IP_Address>:9000/sse (デフォルト ポートを使用している場合) です。
例(ChatWise Connect を使用):
SSE接続タイプを選択します。ゲートウェイの SSE URL を入力します (例:
http://127.0.0.1:9000/sse)。Connectをクリックします。
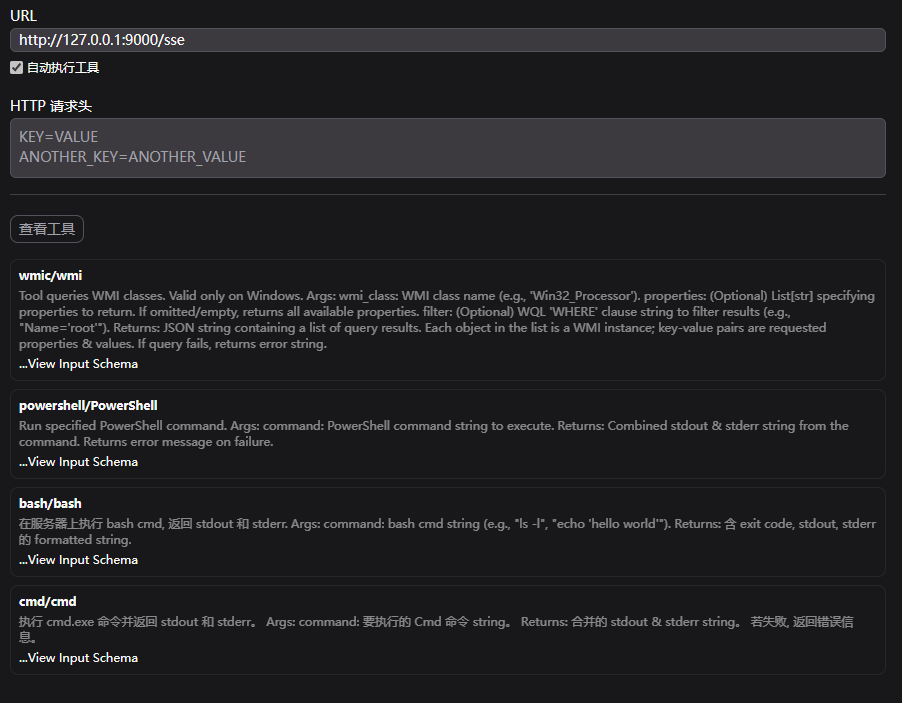
接続が成功すると、ゲートウェイを介して集約されたすべてのバックエンド MCP ツールがクライアントに表示されます。

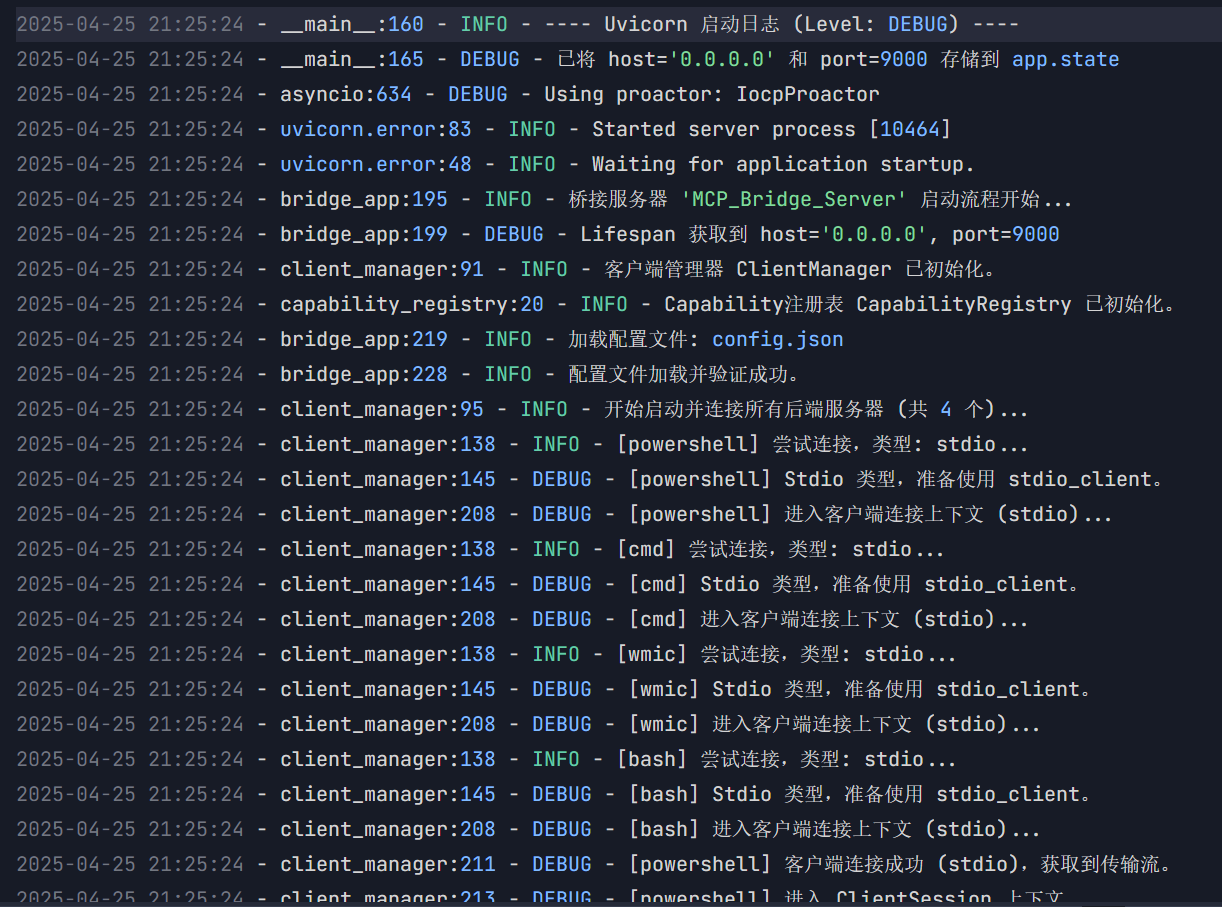
ログ
ランタイムログは、プロジェクトのルートディレクトリのlogsフォルダに自動的に保存されます。ログファイル名にはタイムスタンプとログレベルが含まれるため、問題を簡単に追跡できます。
設定ファイル ( config.json )
コア設定ファイルconfig.jsonプロジェクトのルートディレクトリにあります。このファイルには、MCP Gateway が接続して管理する必要があるバックエンド MCP サーバーが定義されています。
各エントリはバックエンドサーバーを表します。キーはバックエンドサーバーに割り当てた一意の名前(この名前はバックエンドサーバーの機能のプレフィックスとして使用されます)で、値はサーバーの設定を含むオブジェクトです。
次の 2 種類のバックエンド サーバー接続がサポートされています。
stdio: 標準入出力 (stdin/stdout) を介して、ローカルで開始された MCP サーバー プロセスと通信します。sse: Server-Sent Events (SSE) プロトコルを介して、リモートまたはローカルで実行されている MCP サーバーと通信します。
stdioタイプの設定
ライフサイクルをゲートウェイによって管理する必要があるローカル MCP サーバー プロセスに適しています。
構成フィールド:
type(必須):"stdio"である必要があります。command(必須): サーバープロセスを起動するために使用される実行可能コマンド (例:python、uv、node、またはスクリプト/実行可能ファイルへの絶対パス)。args(必須):commandに渡される引数のリスト (文字列のリスト)。env(オプション): 子プロセスに設定する環境変数の辞書 (Dict[str, str])。省略された場合、子プロセスはゲートウェイの環境を継承します。
例:
動作原理: MCPゲートウェイは起動時に、指定されたcommandとargs (およびオプションのenv )を使用して子プロセスを起動します。ゲートウェイは、この子プロセスの標準入出力を介してバックエンドのMCPサーバーと通信します。ゲートウェイがシャットダウンする際、これらの子プロセスを終了させようとします。
SSEタイプの構成
すでに実行中の MCP サーバー (ローカルまたはリモート) に接続する場合や、接続前にゲートウェイがローカル SSE サーバー プロセスを開始する必要がある場合に適しています。
構成フィールド:
type(必須):"sse"にする必要があります。url(必須): バックエンド MCP サーバーの SSE エンドポイント URL (完全な HTTP/HTTPS アドレス)。command(オプション): 指定すると、ゲートウェイは起動時にこのコマンドを実行してローカル SSE サーバーを起動します。args(オプション、commandが指定されている場合のみ):commandに渡される引数のリスト。env(オプション、commandが指定されている場合のみ): ローカルで起動された子プロセスに設定する環境変数。
例1: すでに実行中のリモートSSEサーバーに接続する
例2: ゲートウェイはローカルSSEサーバーを起動し、接続します
仕組み:
指定された: ゲートウェイは指定された
urlに直接接続しようとします。url:ゲートウェイはまずcommandとargsを使用してローカルプロセスを起動します(このプロセスはurlに対応するアドレスとポートをリッスンすると想定されます)。その後、urlへの接続を試行する前に、少しの間(client_manager.pyで定義されているLOCAL_SSE_STARTUP_DELAY)、待機します。ゲートウェイがシャットダウンすると、このローカルプロセスの終了が試行されます。
構成追加の例
サードパーティの MCP サーバーをconfig.jsonに追加する方法の例を次に示します。
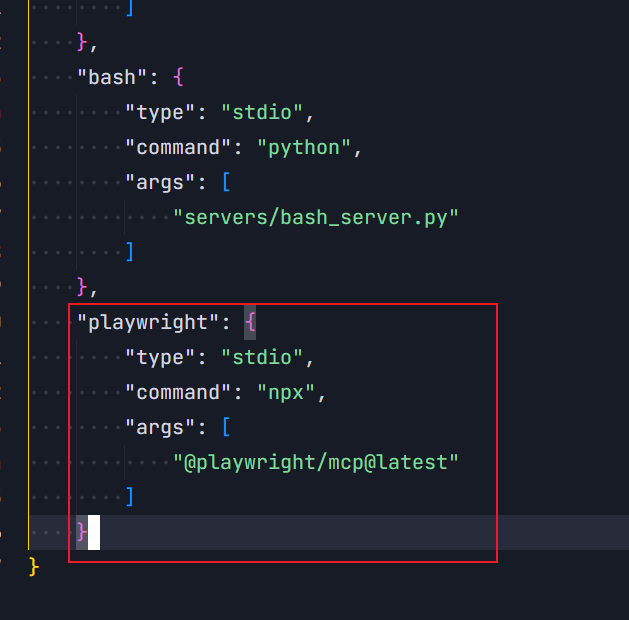
Stdio の例: Playwright MCP
Playwright の MCP サーバー ( @playwright/mcp ) を統合するとします。
起動方法を理解する:Playwright MCPは通常、
npx @playwright/mcp@latestを使用して起動されます。これは、npxを介して実行されるNode.jsパッケージです。config.json:{ // ... other server configurations ... "playwright": { "type": "stdio", "command": "npx", "args": ["@playwright/mcp@latest"] } // ... other server configurations ... }ここで、
commandはnpxであり、argsは Playwright MCP パッケージの名前とバージョンが含まれます。ゲートウェイを再起動します
config.json保存し、MCP ゲートウェイを再起動します。
起動すると、コンソール ログとクライアントにplaywright/... (例: playwright/browse ) という名前のツールが表示されます。
SSE の例: ENScan_GO (ローカル開始)
./enscan --mcpで起動でき、 http://localhost:8080で SSE サービスを提供する Go プログラムである ENScan_GO を統合するとします。
実行可能ファイルを取得する: ENScan_GO 実行可能ファイル (例:
enscan-v1.2.1-windows-amd64.exe) をダウンロードし、アクセス可能な場所 (例:servers/ディレクトリまたはシステム PATH) に配置します。config.json:{ // ... other server configurations ... "enscan": { "type": "sse", "url": "http://127.0.0.1:8080/sse", // Address ENScan_GO listens on // Note: Ensure path separators are correct on Windows, or use an absolute path "command": "servers/enscan-v1.2.1-windows-amd64.exe", // Path to the executable "args": ["--mcp"] // Startup arguments } // ... other server configurations ... }ここでは、
type``sseとして指定し、リッスンするurlを提供し、commandとargsを使用して、このローカル SSE サーバーを起動する方法をゲートウェイに指示します。ゲートウェイを再起動します
config.json保存し、MCP ゲートウェイを再起動します。
ゲートウェイはまずENScan_GOプロセスを起動し、次にhttp://127.0.0.1:8080/sseに接続します。起動後、 enscan/...という名前のツールが表示されます。