<div align="center">
<h1>Authenticator App MCP 服务器</h1>
<p>
🌐 可用语言:
<a href="README.md">English</a>
</p>
<a href="https://smithery.ai/server/@firstorderai/authenticator_mcp"><img alt="Smithery Badge" src="https://smithery.ai/badge/@firstorderai/authenticator_mcp"></a>
</div>
<br/>
一个安全的 MCP(模型上下文协议)服务器,使 AI 代理能够与 Authenticator App 进行交互。它提供对 2FA 验证码和密码的无缝访问,使 AI 代理能够协助完成自动登录流程,同时确保安全性。这个工具架起了 AI 助手与安全认证之间的桥梁,让你更轻松地在不同平台和网站上管理凭据。
## 工作原理
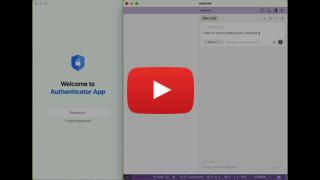
1. 打开你所用的 AI 代理集成聊天界面(例如 Cursor 的代理模式)。
2. 请求 AI 代理获取你在指定网站和账户上的 2FA 验证码或密码。
3. AI 代理将安全地获取这些凭据,并可使用它们自动完成登录流程。
此 MCP 服务器专为配合 [Authenticator App · 2FA](#安装-authenticator-app--2fa-桌面版) 使用而设计。
[](https://youtu.be/4zZqrES6FBc)
## 快速开始
许多 AI 客户端使用配置文件来管理 MCP 服务器。
你可以在配置文件中添加如下内容来配置 `authenticator-mcp` 工具。
> 注意:使用该服务器前,你需要创建一个 Authenticator App 的 **访问令牌**。如何创建访问令牌的说明请见 [此处](#创建访问令牌)。
### macOS / Linux
```json
{
"mcpServers": {
"Authenticator App MCP": {
"command": "npx",
"args": ["-y", "authenticator-mcp", "--access-token=YOUR-KEY"]
}
}
}
```
### Windows
```json
{
"mcpServers": {
"Authenticator App MCP": {
"command": "cmd",
"args": ["/c", "npx", "-y", "authenticator-mcp", "--access-token=YOUR-KEY"]
}
}
}
```
或者你也可以在 `env` 字段中设置 `AUTHENTICATOR_ACCESS_TOKEN`。
## 安装 Authenticator App · 2FA 桌面版
[<img src="https://firstorder.ai/store/msstore.svg" alt="Download on the Microsoft Store" height="50" style="margin-right: 10px">](https://apps.microsoft.com/detail/9n6gl0bvkphn?utm_source=mcp) [<img src="https://firstorder.ai/store/appstore_mac.svg" alt="Download on the Mac App Store" height="50">](https://apps.apple.com/app/apple-store/id6470149516?pt=126691301&mt=8&platform=mac&utm_source=mcp) [<img src="https://firstorder.ai/store/download_deb.svg" alt="Download the Ubuntu/Debian .deb" height="50">](https://firstorder.ai/downloads/authenticator.deb)
## 创建访问令牌
1. 启动 `Authenticator App · 2FA` 桌面版。
2. 进入 `设置`,找到 `MCP 服务器` 部分。
3. 将 MCP 服务器功能切换为 `开启`,然后生成访问令牌。
请注意,访问令牌**仅显示一次**。请务必立即复制,并将其添加至你的 MCP 客户端配置中。