[](https://mseep.ai/app/firstorderai-authenticator-mcp)
<div align="center">
<h1>Authenticator App MCP Server</h1>
<p>
🌐 Available in:
<a href="README.zh.md">中文 (Chinese)</a>
</p>
[](https://archestra.ai/mcp-catalog/firstorderai__authenticator_mcp)
<a href="https://smithery.ai/server/@firstorderai/authenticator_mcp"><img alt="Smithery Badge" src="https://smithery.ai/badge/@firstorderai/authenticator_mcp"></a>
</div>
<br/>
A secure MCP (Model Context Protocol) server that enables AI agents to interact with the Authenticator App. It provides seamless access to 2FA codes and passwords, allowing AI agents to assist with automated login processes while maintaining security. This tool bridges the gap between AI assistants and secure authentication, making it easier to manage your credentials across different platforms and websites.
<a href="https://glama.ai/mcp/servers/@firstorderai/authenticator_mcp">
<img width="380" height="200" src="https://glama.ai/mcp/servers/@firstorderai/authenticator_mcp/badge" alt="Authenticator App Server MCP server" />
</a>
## How it works
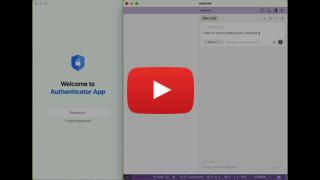
1. Open your AI agent's integrated chat interface (such as Cursor's agent mode).
2. Ask AI agent to retrieve your 2FA code or password for your desired website and account.
3. AI agent will securely fetch these credentials, then can utilize them to automate your login process.
This MCP server is specifically designed for use with [Authenticator App · 2FA](#install-authenticator-app--2fa-desktop-version).
[](https://youtu.be/4zZqrES6FBc)
## Getting Started
Many AI clients use a configuration file to manage MCP servers.
The `authenticator-mcp` tool can be configured by adding the following to your configuration file.
> NOTE: You will need to create a Authenticator App **access token** to use this server. Instructions on how to create a Authenticator App access token can be found [here](#creating-an-access-token).
### MacOS / Linux
```json
{
"mcpServers": {
"Authenticator App MCP": {
"command": "npx",
"args": ["-y", "authenticator-mcp", "--access-token=YOUR-KEY"]
}
}
}
```
### Windows
```json
{
"mcpServers": {
"Authenticator App MCP": {
"command": "cmd",
"args": ["/c", "npx", "-y", "authenticator-mcp", "--access-token=YOUR-KEY"]
}
}
}
```
Or you can set `AUTHENTICATOR_ACCESS_TOKEN` in the `env` field.
## Install Authenticator App · 2FA Desktop version
[<img src="https://firstorder.ai/store/msstore.svg" alt="Download on the Microsoft Store" height="50" style="margin-right: 10px">](https://apps.microsoft.com/detail/9n6gl0bvkphn?utm_source=mcp) [<img src="https://firstorder.ai/store/appstore_mac.svg" alt="Download on the Mac App Store" height="50">](https://apps.apple.com/app/apple-store/id6470149516?pt=126691301&mt=8&platform=mac&utm_source=mcp) [<img src="https://firstorder.ai/store/download_deb.svg" alt="Download the Ubuntu/Debian .deb" height="50">](https://firstorder.ai/downloads/authenticator.deb)
## Creating an Access Token
1. Launch the desktop version of `Authenticator App · 2FA`.
2. Navigate to `Settings` and locate the `MCP Server` section.
3. Enable the MCP Server by toggling it `ON`, then proceed to generate your access token.
Please note that the access token will only be displayed once. Be sure to copy it immediately and add it to your MCP client configuration.