
Facilitates the processing of massive documentation by providing specialized chunking and analysis strategies tailored for Markdown content.
Enables free local inference for performing recursive sub-queries and semantic analysis on massive contexts using models like gemma3 and llama3.
Allows for deterministic data extraction and pattern matching against loaded contexts by executing Python code in a sandboxed subprocess.
Enables filtering and analysis of structured XML data within large-scale contexts using both LLM reasoning and deterministic tools.
Click on "Install Server".
Wait a few minutes for the server to deploy. Once ready, it will show a "Started" state.
In the chat, type
@followed by the MCP server name and your instructions, e.g., "@Massive Context MCPsummarize this massive log file and find the main error patterns"
That's it! The server will respond to your query, and you can continue using it as needed.
Here is a step-by-step guide with screenshots.
Massive Context MCP


Handle massive contexts (10M+ tokens) with chunking, sub-queries, and free local inference via Ollama.
Based on the Recursive Language Model pattern. Inspired by richardwhiteii/rlm.
Core Idea
Instead of feeding massive contexts directly into the LLM:
Load context as external variable (stays out of prompt)
Inspect structure programmatically
Chunk strategically (lines, chars, or paragraphs)
Sub-query recursively on chunks
Aggregate results for final synthesis
Quick Start
Installation
Option 1: PyPI (Recommended)
With Optional Extras:
Option 2: Claude Desktop One-Click
Download the .mcpb from Releases and double-click to install.
Option 3: From Source
Wire to Claude Code / Claude Desktop
Add to ~/.claude/.mcp.json (Claude Code) or claude_desktop_config.json (Claude Desktop):
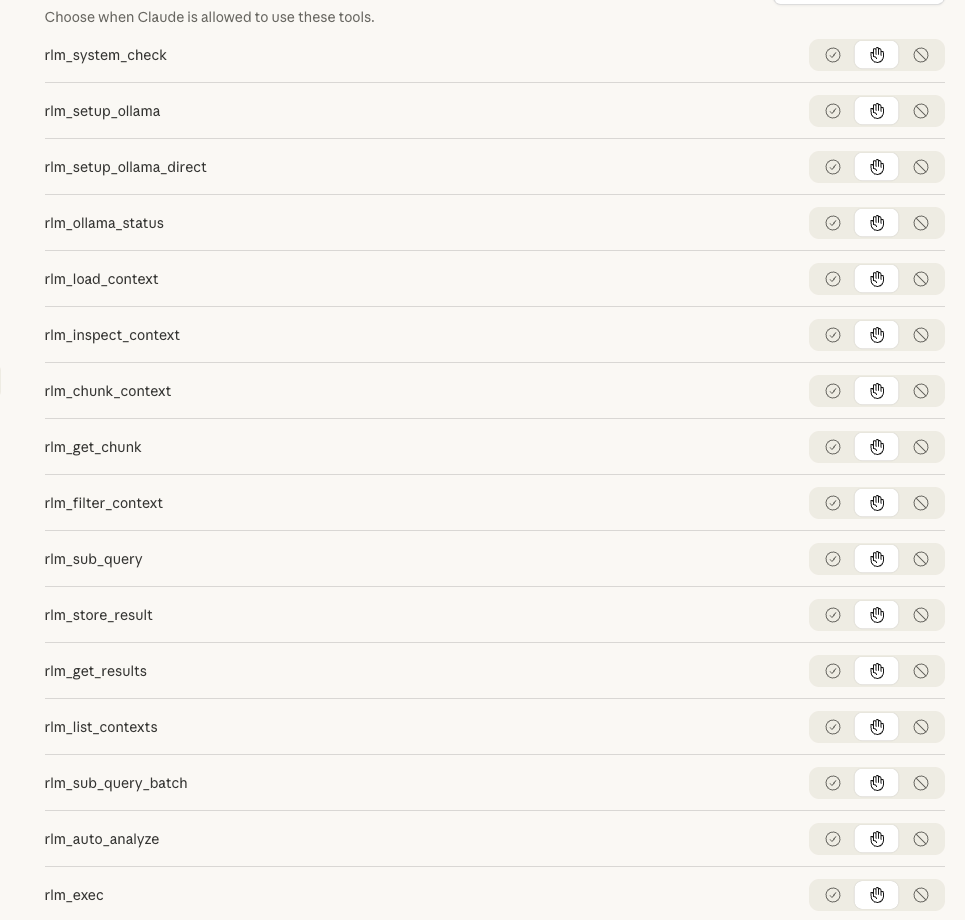
Tools
Setup & Status Tools
Tool | Purpose |
| Check system requirements — verify macOS, Apple Silicon, 16GB+ RAM, Homebrew |
| Install via Homebrew — managed service, auto-updates, requires Homebrew |
| Install via direct download — no sudo, fully headless, works on locked-down machines |
| Check Ollama availability — detect if free local inference is available |
Analysis Tools
Tool | Purpose |
| One-step analysis — auto-detects type, chunks, and queries |
| Load context as external variable |
| Get structure info without loading into prompt |
| Chunk by lines/chars/paragraphs |
| Retrieve specific chunk |
| Filter with regex (keep/remove matching lines) |
| Execute Python code against loaded context (sandboxed) |
| Make sub-LLM call on chunk |
| Process multiple chunks in parallel |
| Store sub-call result for aggregation |
| Retrieve stored results |
| List all loaded contexts |
Quick Analysis with rlm_auto_analyze
For most use cases, just use rlm_auto_analyze — it handles everything automatically:
What it does automatically:
Detects content type (Python, JSON, Markdown, logs, prose, code)
Selects optimal chunking strategy
Adapts the query for the content type
Runs parallel sub-queries
Returns aggregated results
Supported goals:
Goal | Description |
| Summarize content purpose and key points |
| Identify errors, issues, potential problems |
| List functions, classes, schema, headings |
| Find vulnerabilities and security issues |
| Answer a custom question about the content |
Programmatic Analysis with rlm_exec
For deterministic pattern matching and data extraction, use rlm_exec to run Python code directly against a loaded context. This is closer to the paper's REPL approach and provides full control over analysis logic.
Tool: rlm_exec
Purpose: Execute arbitrary Python code against a loaded context in a sandboxed subprocess.
Parameters:
code(required): Python code to execute. Set theresultvariable to capture output.context_name(required): Name of a previously loaded context.timeout(optional, default 30): Maximum execution time in seconds.
Features:
Context available as read-only
contextvariablePre-imported modules:
re,json,collectionsSubprocess isolation (won't crash the server)
Timeout enforcement
Works on any system with Python (no Docker needed)
Example — Finding patterns in a loaded context:
Example Response:
Example — Extracting structured data:
When to use :
Use Case | Tool | Why |
Extract all dates, IDs, amounts |
| Regex is deterministic and fast |
Find security vulnerabilities |
| Requires reasoning and context |
Parse JSON/XML structure |
| Standard libraries work perfectly |
Summarize themes or tone |
| Natural language understanding needed |
Count word frequencies |
| Simple computation, no AI needed |
Answer "Why did X happen?" |
| Requires inference and reasoning |
Tip: For large contexts, combine both — use rlm_exec to filter/extract, then rlm_sub_query for semantic analysis of filtered results.
Code Firewall Integration (Optional)
For enhanced security, integrate code-firewall-mcp to filter dangerous code patterns before execution:
When installed, rlm_exec can automatically check code against a blacklist of known dangerous patterns (e.g., os.system(), eval(), subprocess with shell=True). The firewall uses structural similarity matching — normalizing code to its skeleton and comparing against blacklisted patterns via embeddings.
How it works:
Code is parsed to a syntax tree and normalized (identifiers →
_, strings →"S")Normalized structure is embedded via Ollama
Similarity is checked against blacklisted patterns in ChromaDB
Code is blocked if similarity exceeds threshold (default: 0.85)
Configuration (environment variables):
RLM_FIREWALL_ENABLED=true— Enable firewall checks (auto-enabled when package installed)RLM_FIREWALL_MODE=warn|block— Warn or block on matches (default:warn)
Example blocked patterns:
os.system(user_input)— Command injectioneval(untrusted_data)— Code injectionsubprocess.Popen(..., shell=True)— Shell injection
Use rlm_firewall_status to check firewall availability and configuration.
Providers & Auto-Detection
RLM automatically detects and uses the best available provider:
Provider | Default Model | Cost | Use Case |
| (best available) | $0 or ~$0.80/1M | Default — prefers Ollama if available |
| gemma3:12b | $0 | Local inference, requires Ollama |
| claude-haiku-4-5 | ~$0.80/1M input | Cloud inference, always available |
How Auto-Detection Works
When you use provider="auto" (the default), RLM:
Checks if Ollama is running at
OLLAMA_URL(default:http://localhost:11434)Checks if gemma3:12b is available (or any gemma3 variant)
Uses Ollama if available, otherwise falls back to Claude SDK
The status is cached for 60 seconds to avoid repeated network checks.
Check Ollama Status
Use rlm_ollama_status to see what's available:
Response when Ollama is ready:
Response when Ollama is not available:
Transparent Provider Selection
All sub-query responses include which provider was actually used:
Autonomous Usage
Enable Claude to use RLM tools automatically without manual invocation:
1. CLAUDE.md Integration
Copy CLAUDE.md.example content to your project's CLAUDE.md (or ~/.claude/CLAUDE.md for global) to teach Claude when to reach for RLM tools automatically.
2. Hook Installation
Copy the .claude/hooks/ directory to your project to auto-suggest RLM when reading files >10KB:
The hook provides guidance but doesn't block reads.
3. Skill Reference
Copy the .claude/skills/ directory for comprehensive RLM guidance:
With these in place, Claude will autonomously detect when to use RLM instead of reading large files directly into context.
Setting Up Ollama (Free Local Inference)
RLM can automatically install and configure Ollama on macOS with Apple Silicon. There are two installation methods with different trade-offs:
Choosing an Installation Method
Aspect |
|
|
Sudo required | Only if Homebrew not installed | ❌ Never |
Homebrew required | ✅ Yes | ❌ No |
Auto-updates | ✅ Yes ( | ❌ Manual |
Service management | ✅ | ⚠️ |
Install location |
|
|
Locked-down machines | ⚠️ May fail | ✅ Works |
Fully headless | ⚠️ May prompt for sudo | ✅ Yes |
Recommendation:
Use Homebrew method if you have Homebrew and want managed updates
Use Direct Download for automation, locked-down machines, or when you don't have admin access
Method 1: Homebrew Installation (Recommended if you have Homebrew)
What this does:
Installs Ollama via Homebrew (
brew install ollama)Starts Ollama as a managed background service (
brew services start ollama)Pulls gemma3:12b model (~8GB download)
Requirements:
macOS with Apple Silicon (M1/M2/M3/M4)
16GB+ RAM (gemma3:12b needs ~8GB to run)
Homebrew installed
Method 2: Direct Download (Fully Headless, No Sudo)
What this does:
Downloads Ollama from https://ollama.com/download/Ollama-darwin.zip
Extracts to
~/Applications/Ollama.app(user directory, no admin needed)Starts Ollama via
ollama serve(background process)Pulls gemma3:12b model
Requirements:
macOS with Apple Silicon (M1/M2/M3/M4)
16GB+ RAM
No special permissions needed!
Note on PATH: After direct installation, the CLI is at:
Add to your shell config if needed:
For Systems with Less RAM
Use a smaller model on either installation method:
Manual Setup
If you prefer manual installation or are on a different platform:
Install Ollama from https://ollama.ai or via Homebrew:
brew install ollamaStart the service:
brew services start ollama # or: ollama servePull the model:
ollama pull gemma3:12bVerify it's working:
rlm_ollama_status()
Provider Selection
RLM automatically uses Ollama when available. You can also force a specific provider:
Usage Example
Basic Pattern
Processing a 2MB Document
Tested with H.R.1 Bill (2MB):
Result: Comprehensive topic extraction at $0 cost (with Ollama) or ~$0.02 (with Claude).
Analyzing War and Peace (3.3MB)
Literary analysis of Tolstoy's epic novel from Project Gutenberg:
Result: Complete character arc across the novel — Pierre's journey from idealist to prisoner to husband, Natásha's growth, Nikolái Rostóv's journey from soldier to landowner — all for ~$0.03.
Metric | Value |
File size | 3.35 MB |
Lines | 66,033 |
Chunks | 67 |
Sampled | 10 (15%) |
Cost | ~$0.03 |
Data Storage
Contexts persist across sessions. Chunked contexts are cached for reuse.
Learning Prompts
Use these prompts with Claude Code to explore the codebase and learn RLM patterns. The code is the single source of truth.
Understanding the Tools
Understanding the Architecture
Hands-On Learning
Extending RLM
License
MIT