
Allows integration with Apifox API testing platform for generating and testing APIs through MCP
Provides access to the MCP demo repository hosted on GitHub
Enables implementing API interfaces defined in Apifox within NestJS projects
Supports TypeScript implementation for API interfaces generated through the MCP integration
Click on "Install Server".
Wait a few minutes for the server to deploy. Once ready, it will show a "Started" state.
In the chat, type
@followed by the MCP server name and your instructions, e.g., "@Apifox MCP Serverimplement the user registration endpoint from this Apifox link"
That's it! The server will respond to your query, and you can continue using it as needed.
Here is a step-by-step guide with screenshots.
环境要求
NodeJS >= 18
Related MCP server: Lodestar MCP Server
1. 准备 Apifox MCP 服务
1.1 克隆 Apifox MCP 项目
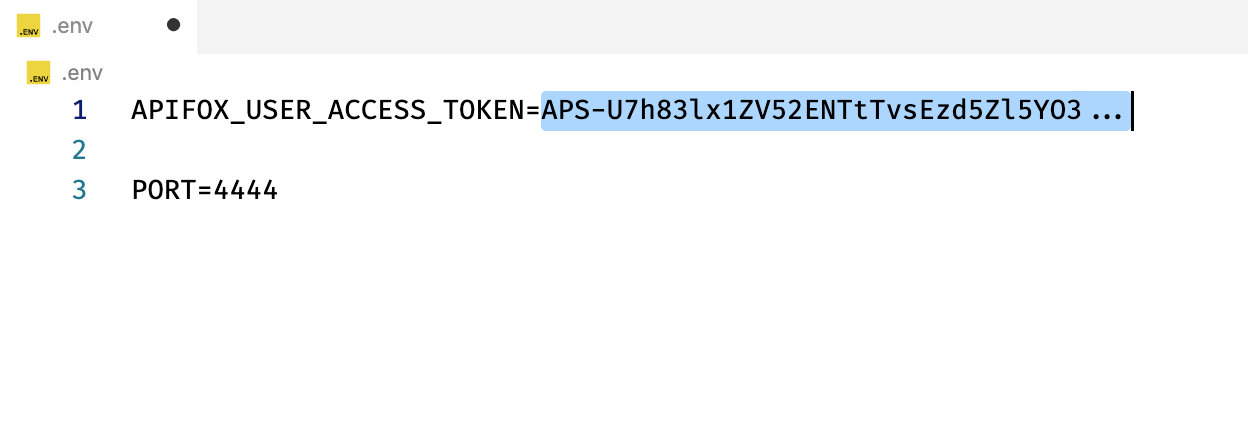
git clone https://github.com/Tzott/apifox-mcp-demo.git1.2 创建环境变量
cd apifox-mcp-demo
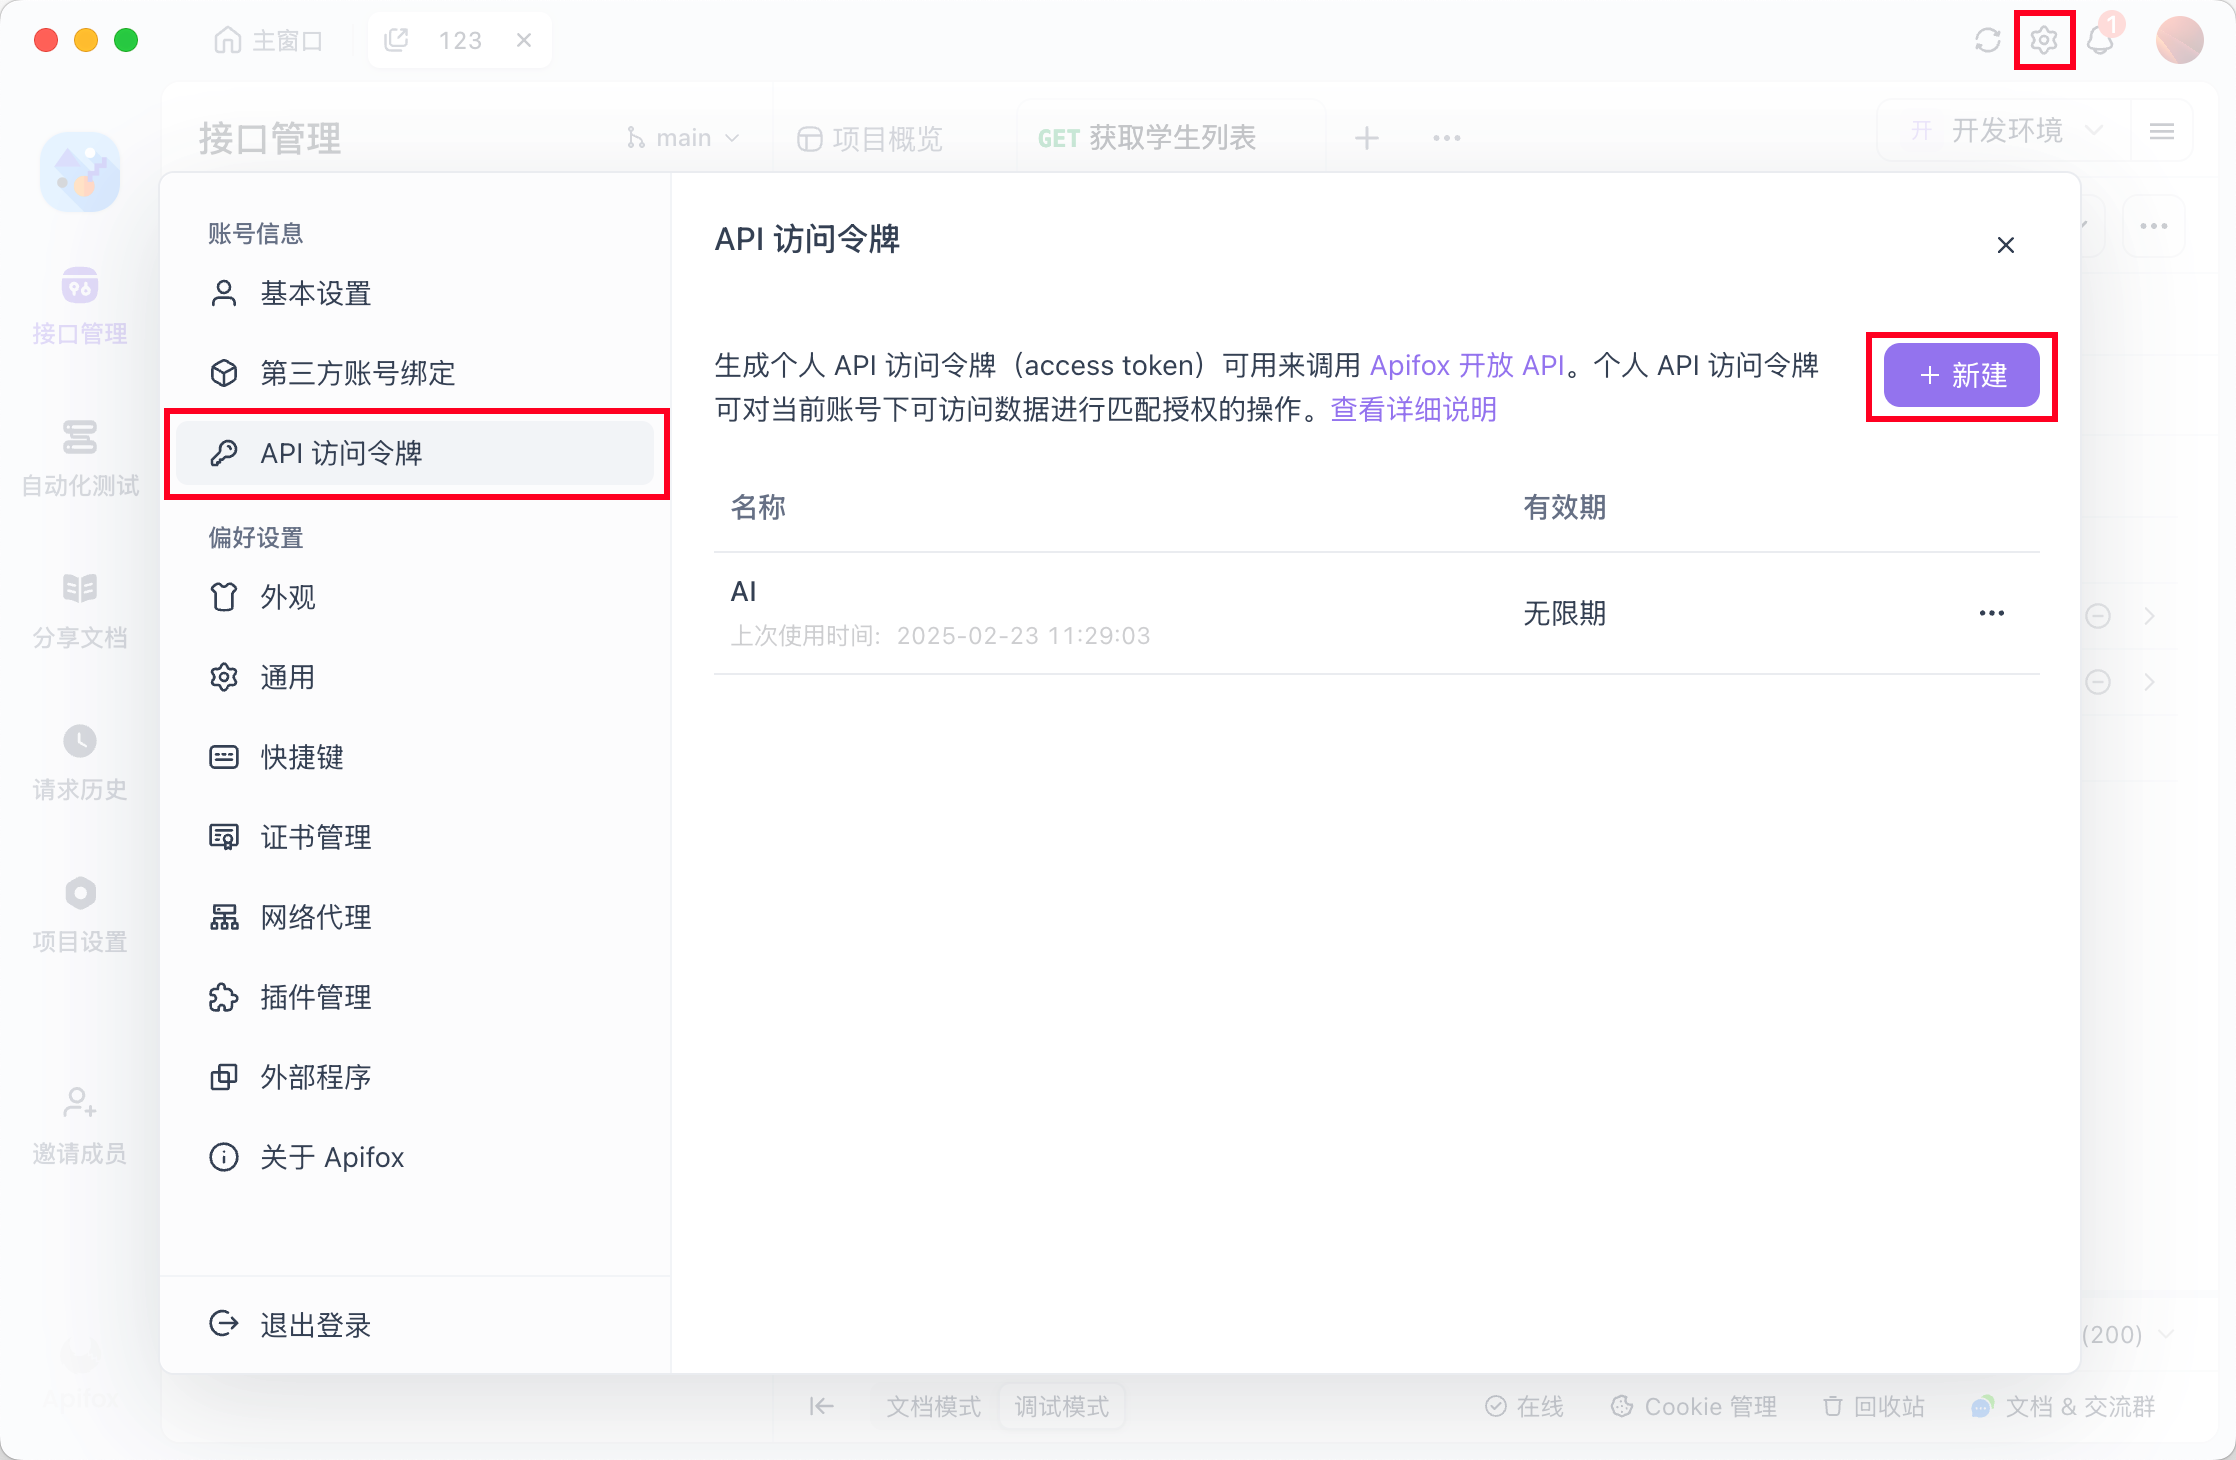
cp .env.example .env1.3 在 Apifox 客户端中创建一个Access Token ,并写入到 .env 文件中
1.4 启动 Apifox MCP 服务
# 如果没有安装 pnpm,可先运行:npm i -g pnpm

pnpm i && pnpm build && pnpm start
1.5 看到启动成功日志
> apifox-mcp-demo@0.0.1 start /Users/code/apifox-mcp-demo
> node lib/index.js
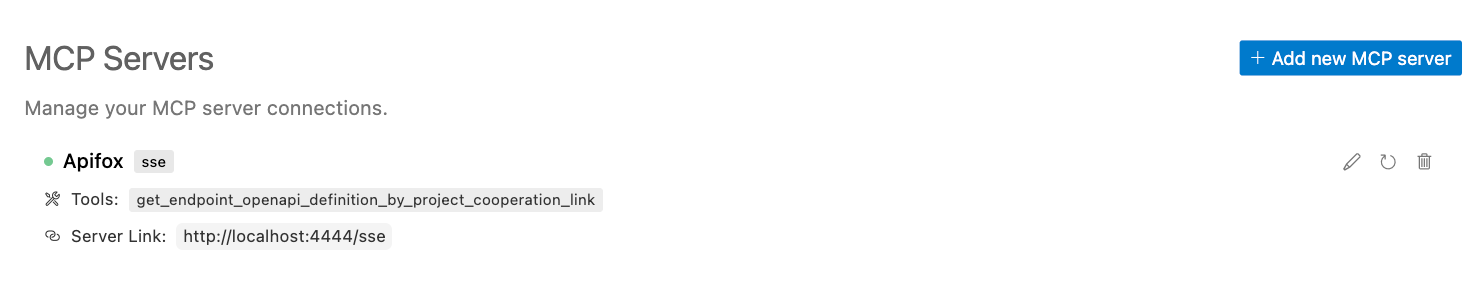
SSE endpoint: http://localhost:4444/sse
Message endpoint: http://localhost:4444/messages
HTTP server listening on port 44442. 准备 Cursor
2.1 创建一个空白的 Nestjs 项目
npm i -g @nestjs/cli
nest new nest-ai-demo
cd nest-ai-demo
2.2 添加一个 Cursor MCP 配置
从 apifox-mcp-demo 项目中复制 sse 的地址,填到 Server URL 中。

可以看到MCP 服务连接成功
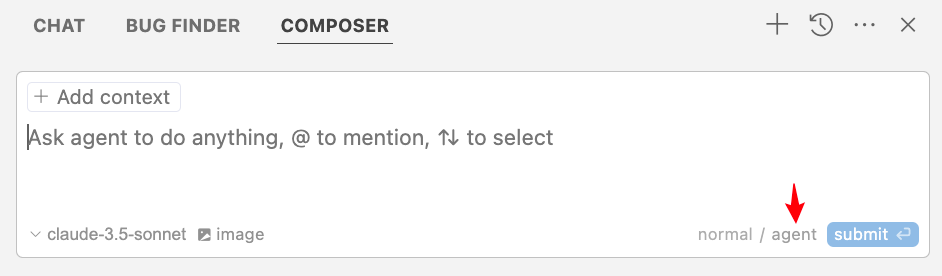
2.3 打开 Cursor Composer,并切换到 Agent 模式
2.4 复制一个 Apifox 接口的协作链接
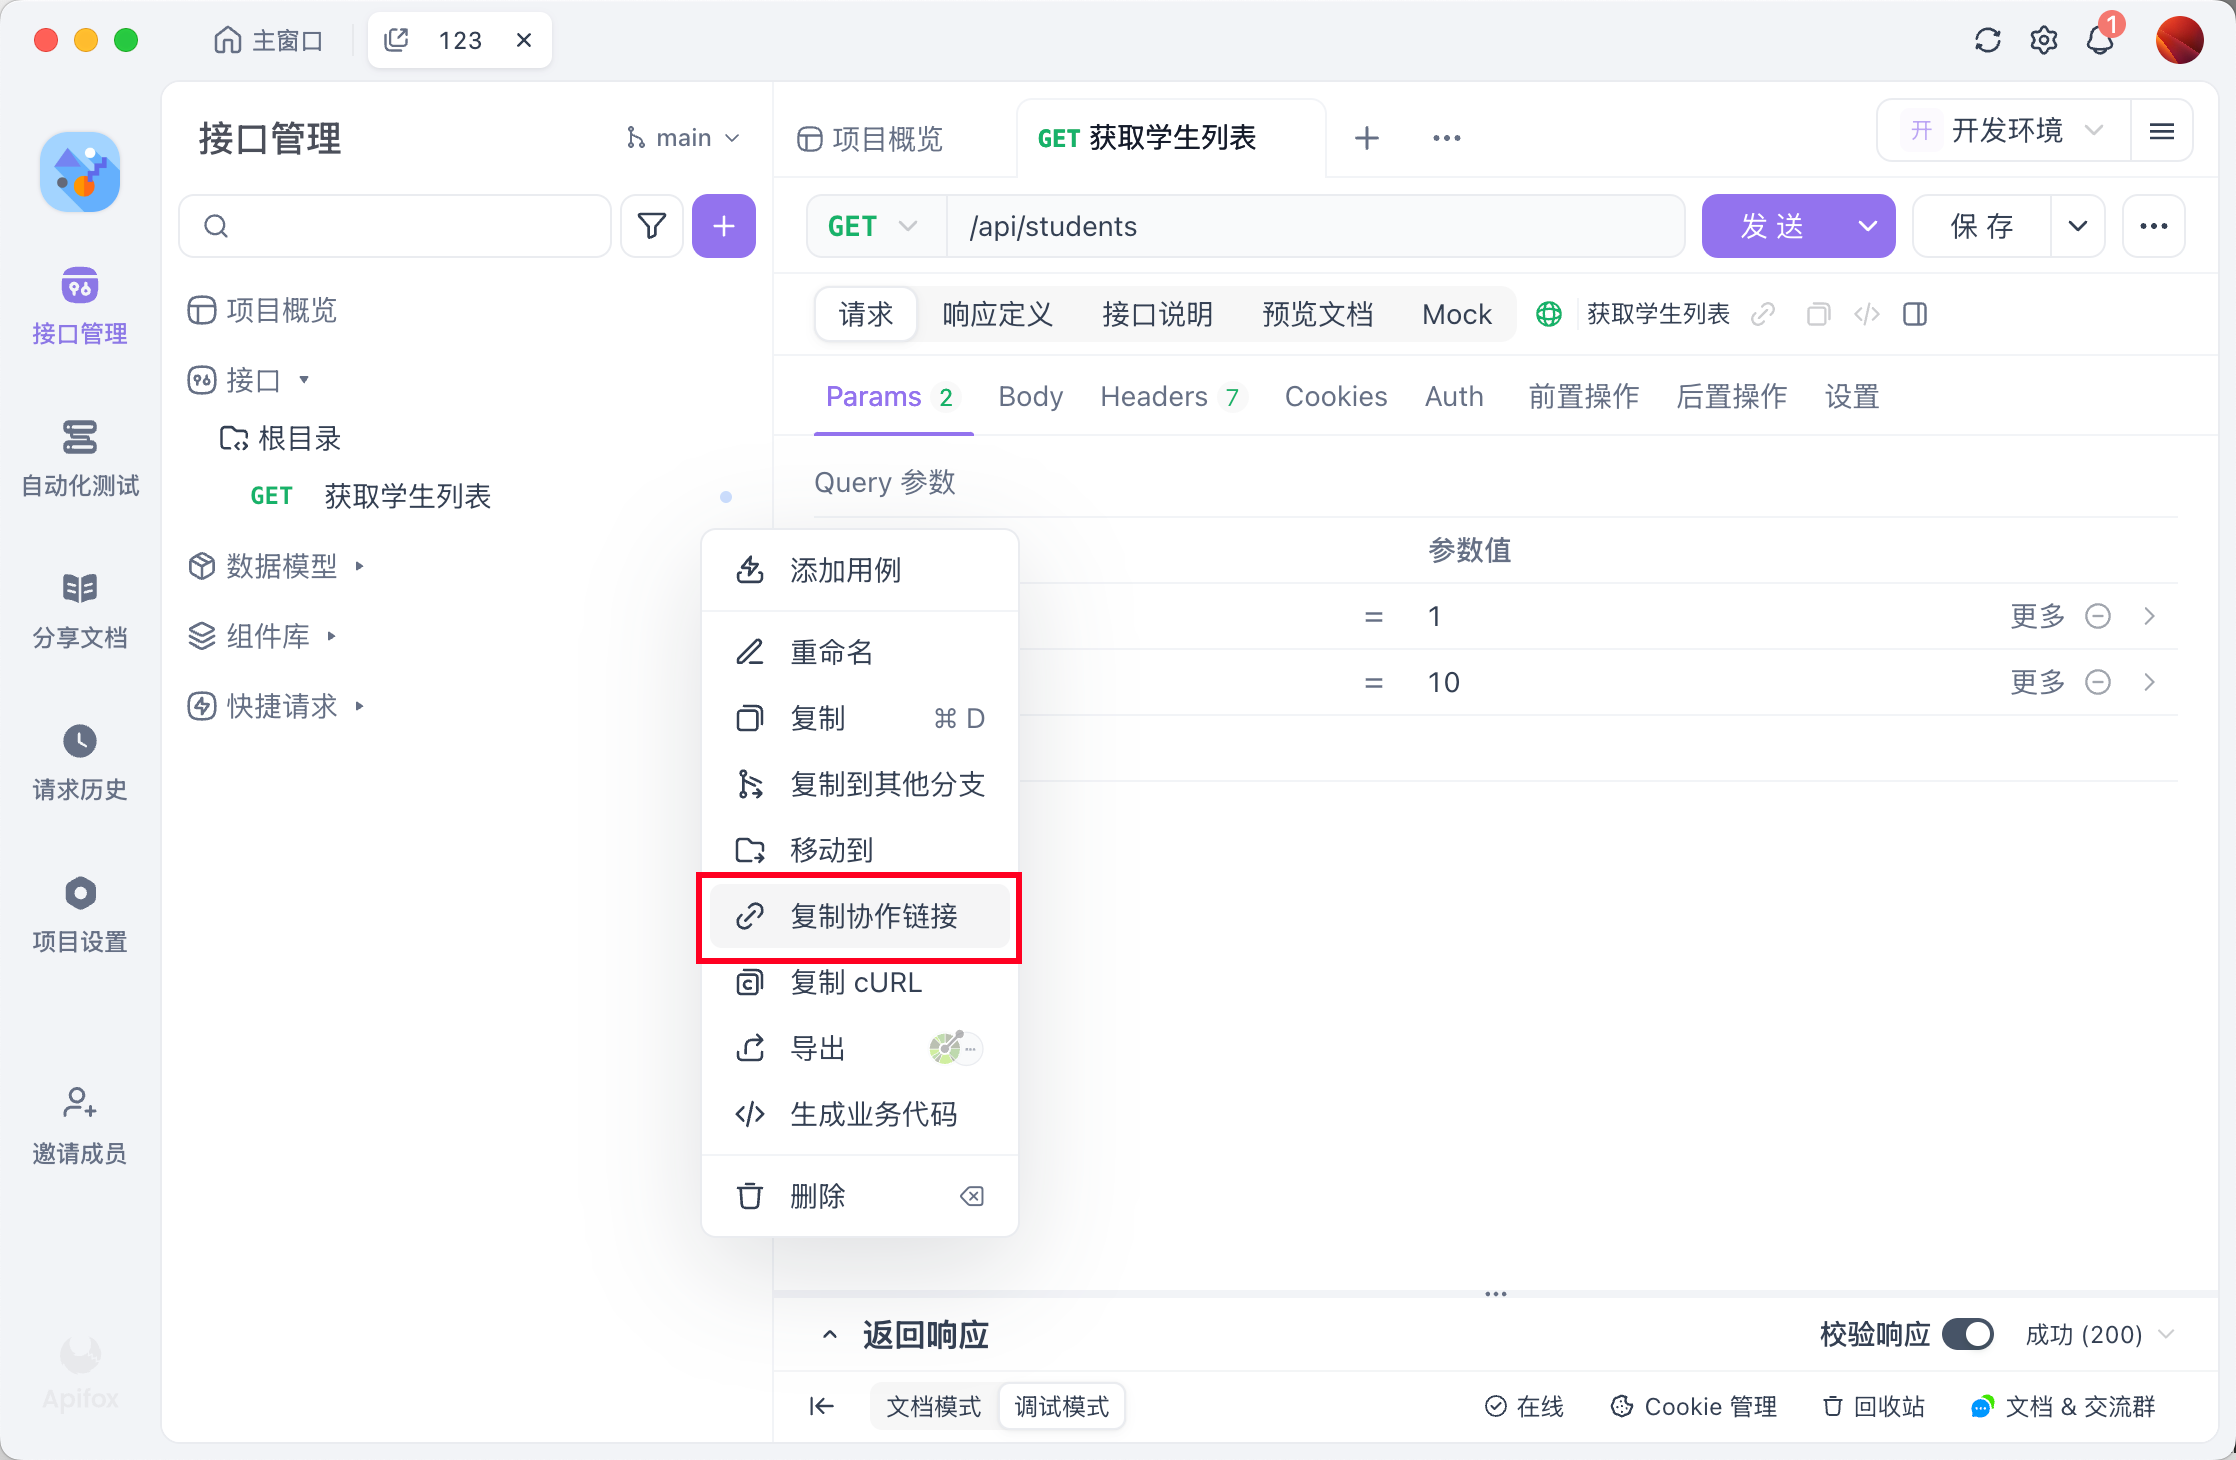
2.5 粘贴到 Composer 中,并让其实现接口
https://app.apifox.com/link/project/5898808/apis/api-263537040
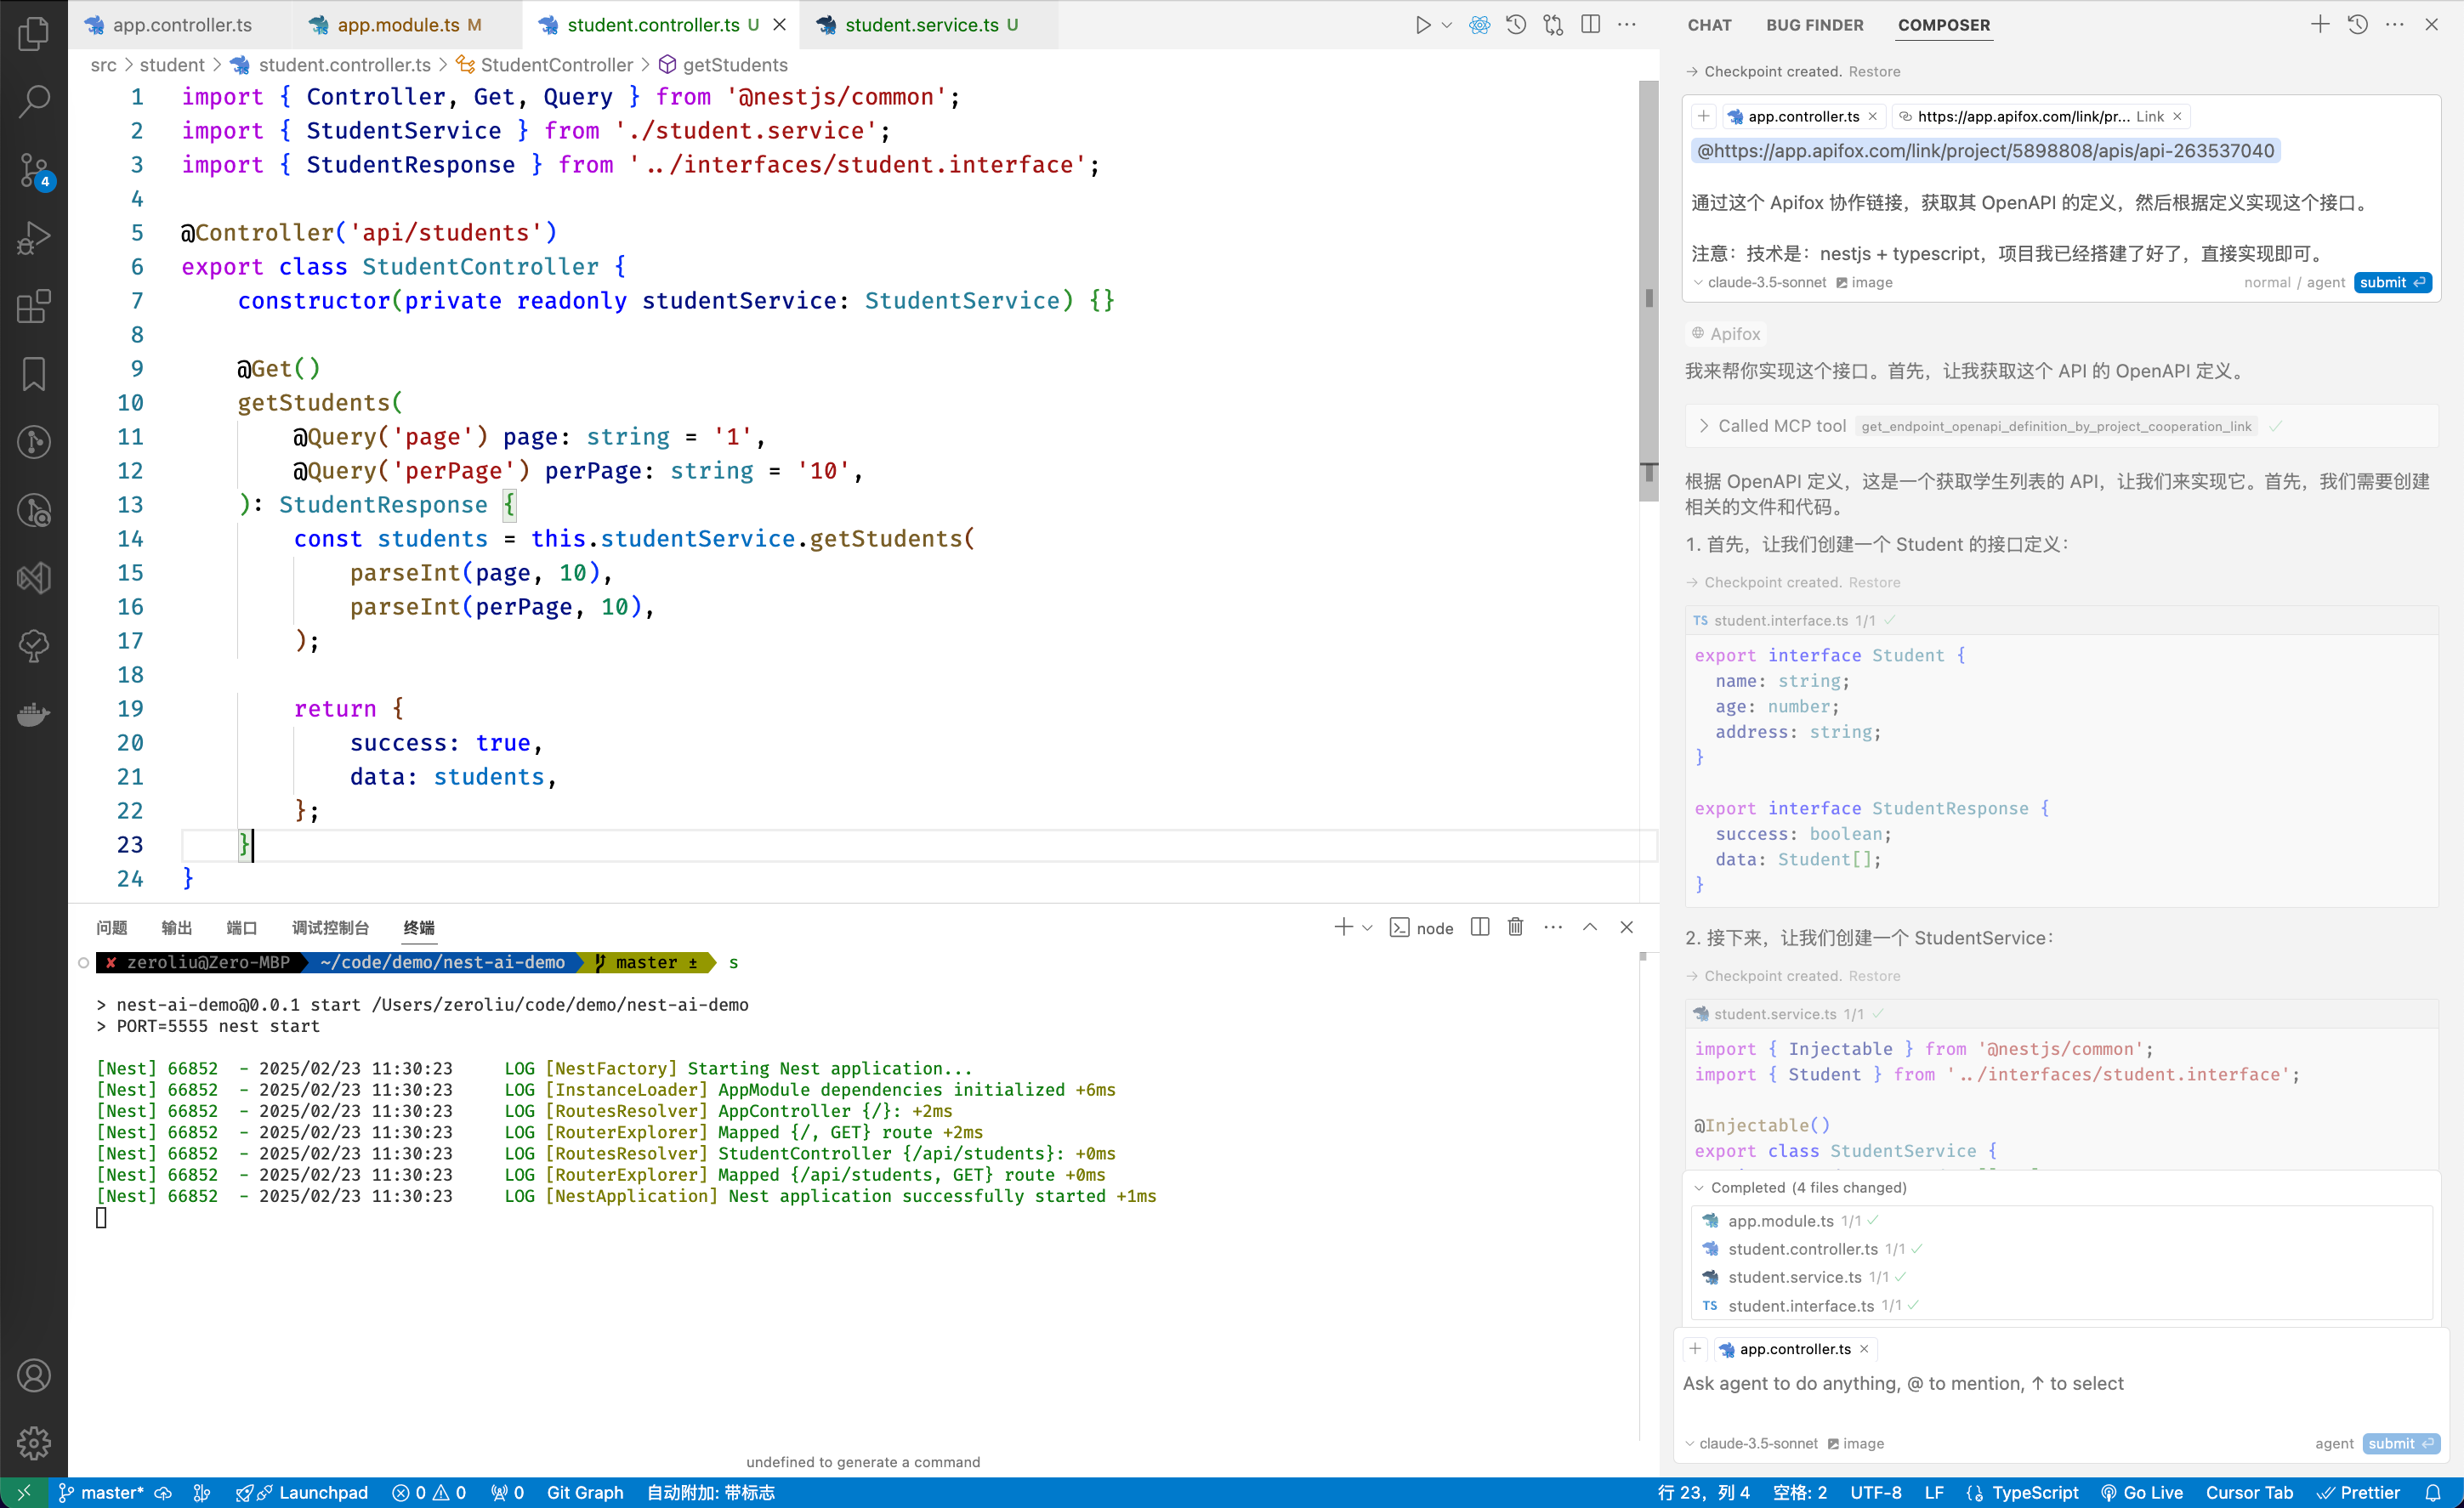
通过这个 Apifox 协作链接,获取其 OpenAPI 的定义,然后根据定义实现这个接口。
注意:技术是:nestjs + typescript,项目我已经搭建了好了,直接实现即可。2.6 Cursor Composer 实现完毕,并 Accepted 结果
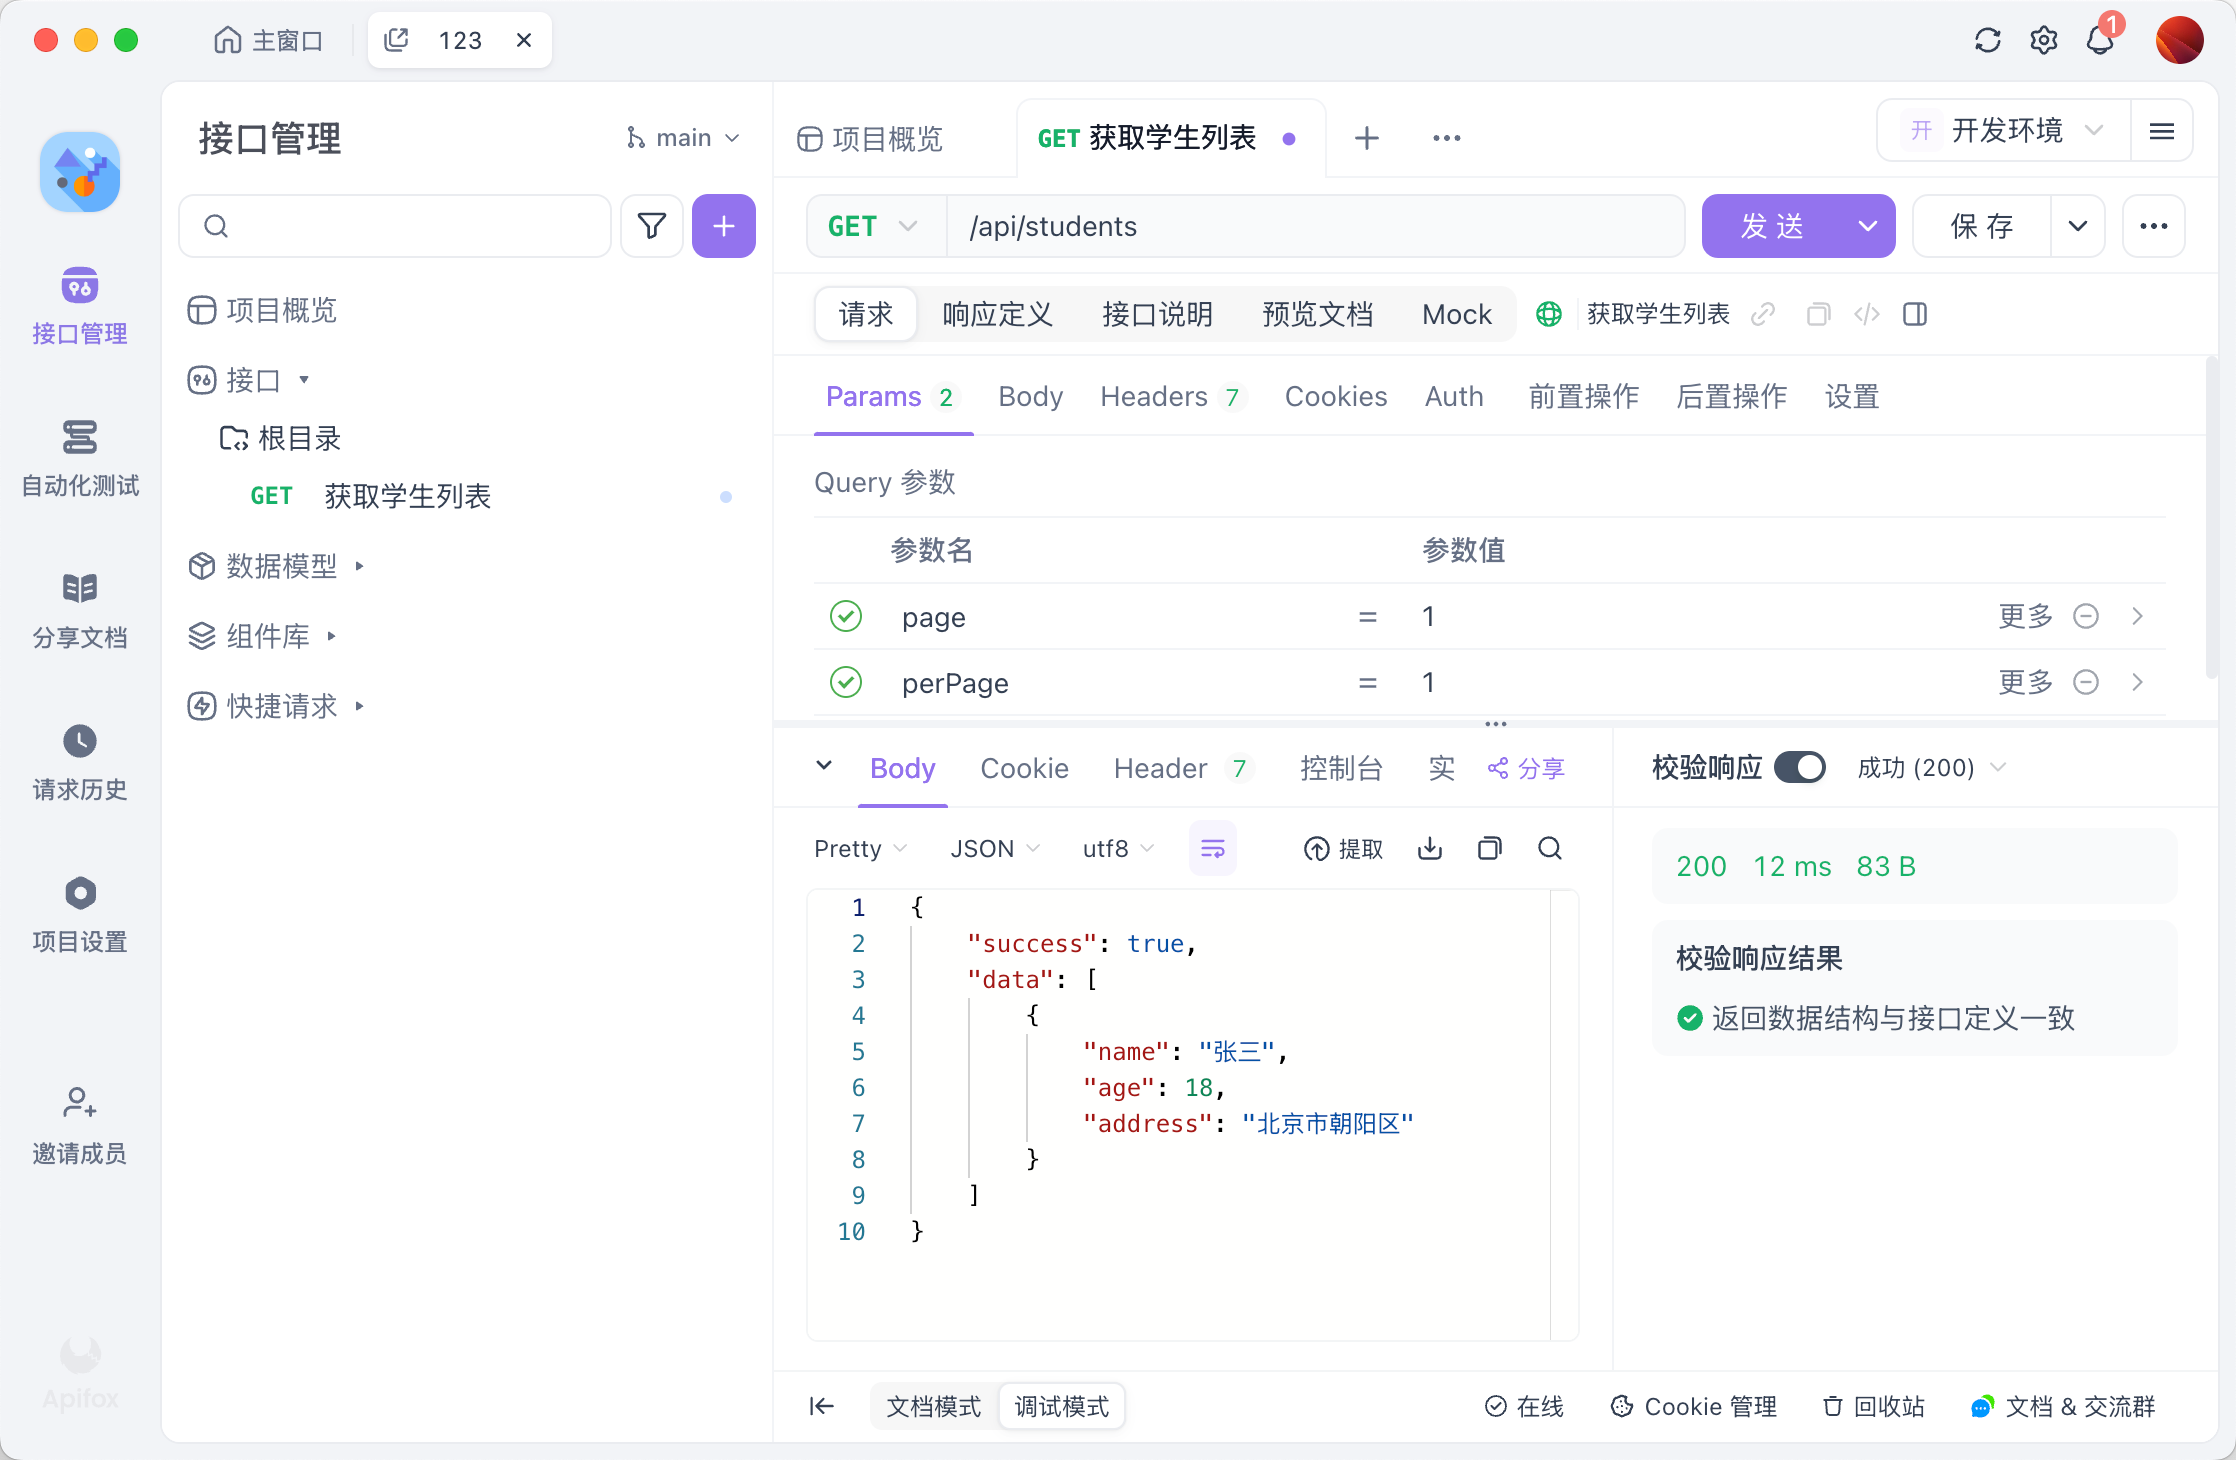
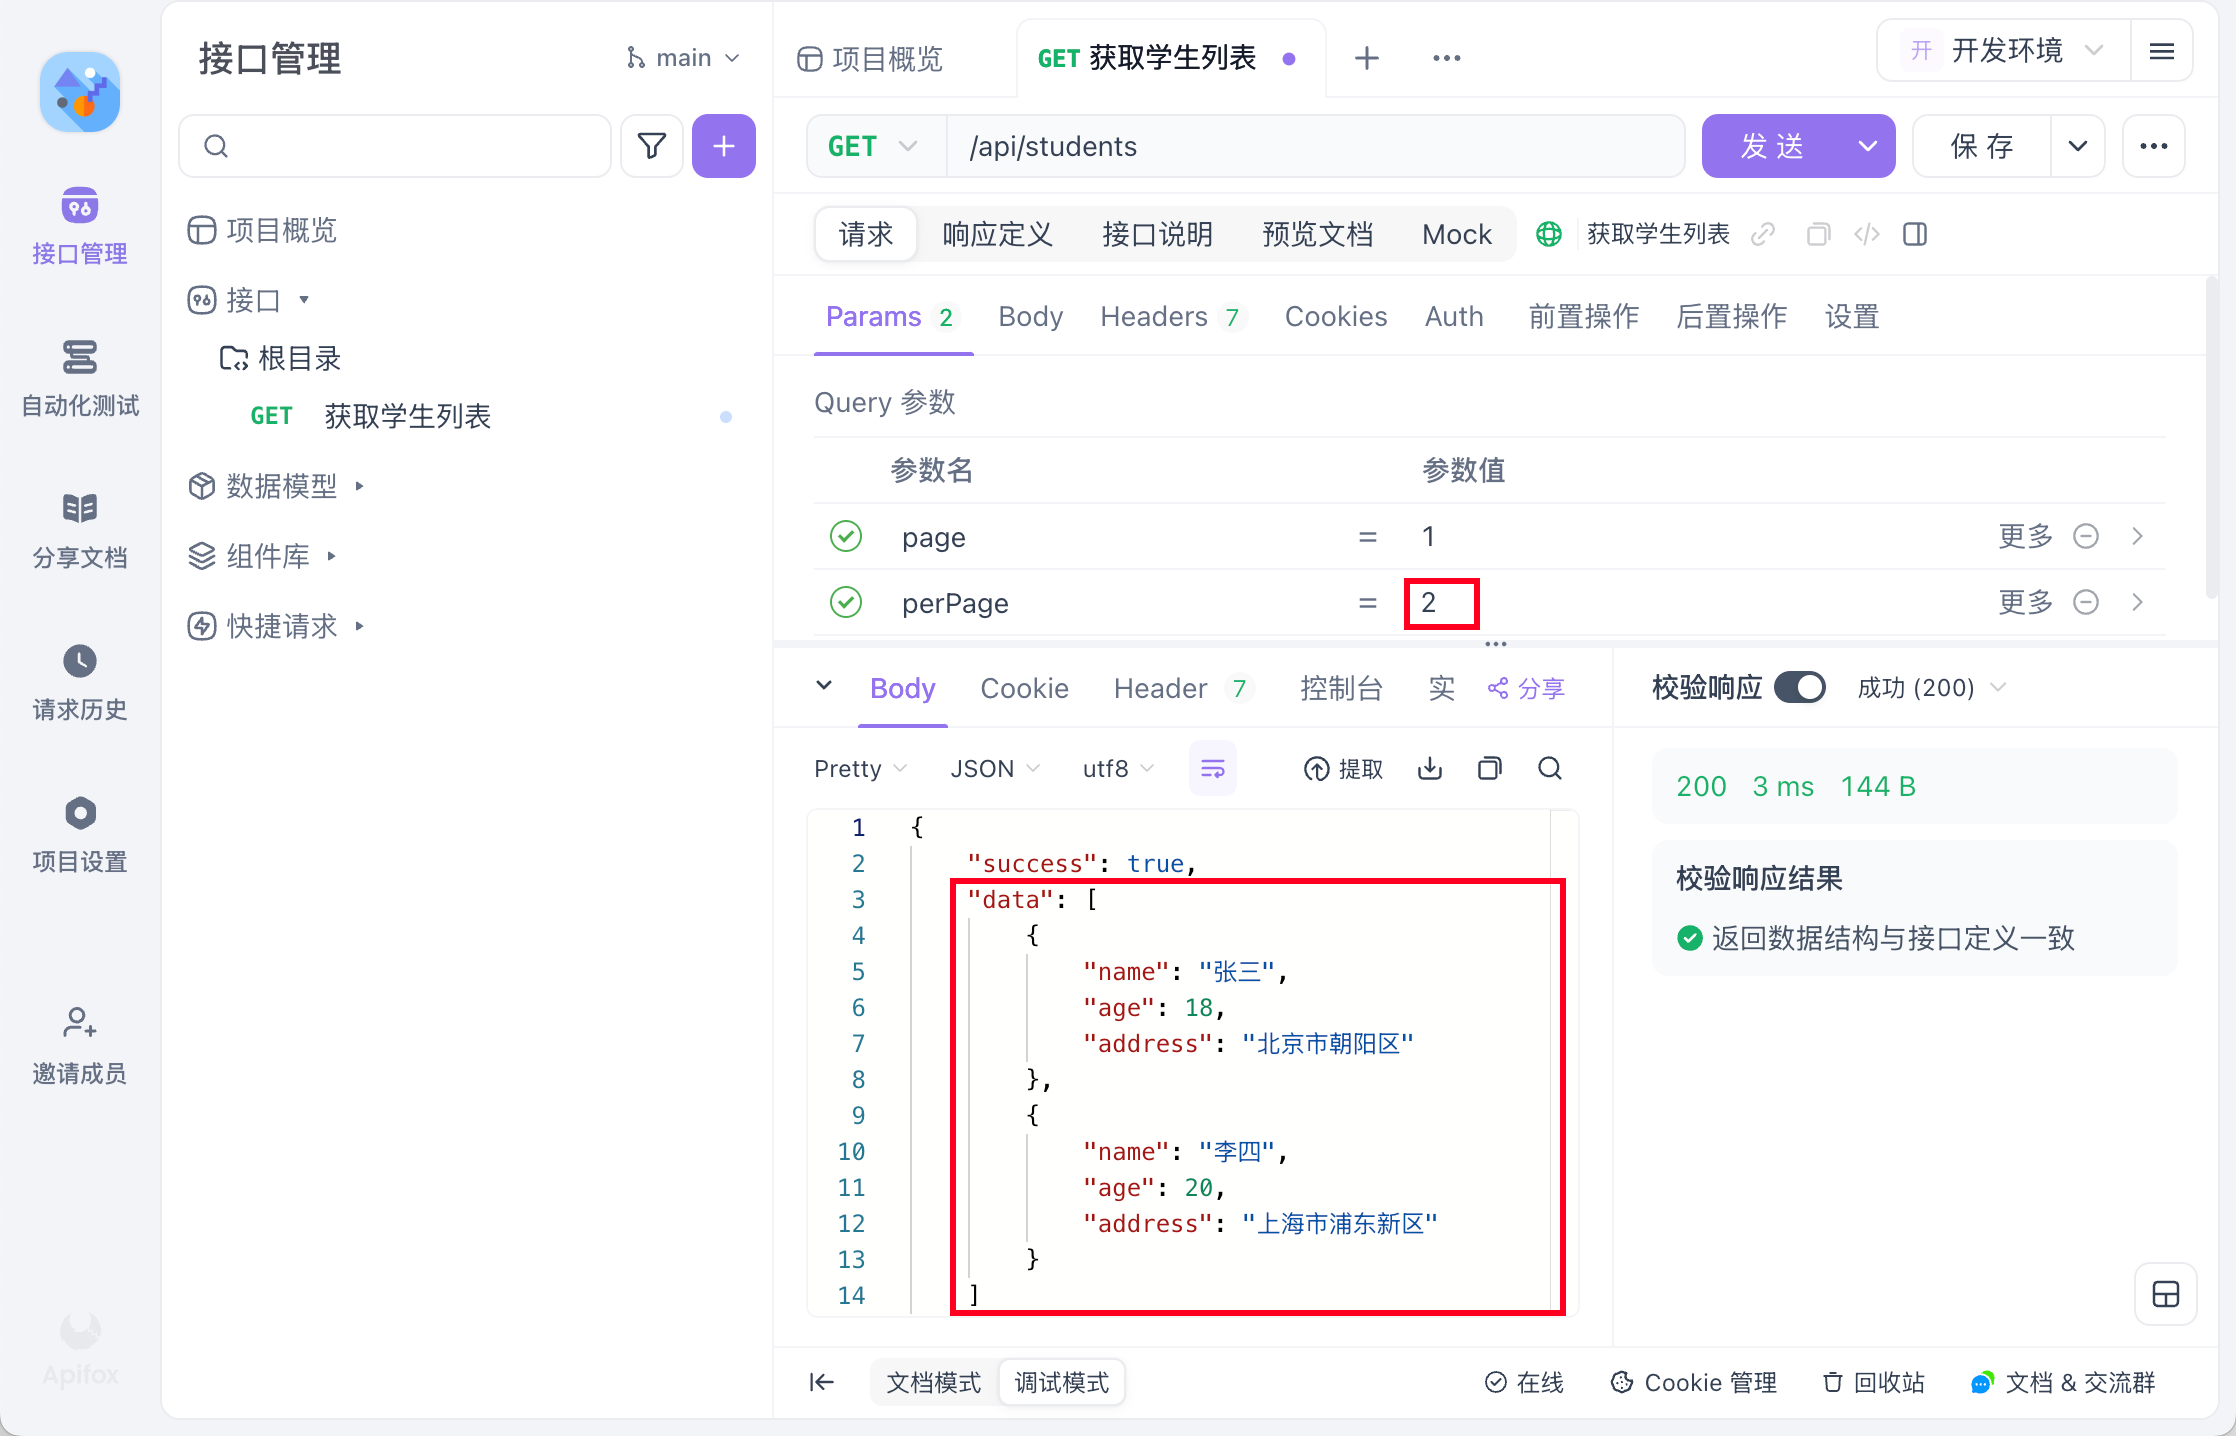
2.7 启动 Nestjs服务,通过 Apifox 调用AI 写的接口,断言通过
3. 其他
分页也简单实现了
This server cannot be installed
Resources
Unclaimed servers have limited discoverability.
Looking for Admin?
If you are the server author, to access and configure the admin panel.