
RapidAPI Marketplace API MCP Server
by johnisanerd
README.md
# RapidAPI Marketplace API
Turn the RapidAPI marketplace into structured data. This API searches RapidAPI and returns details about each API: pricing model, category, popularity score, latency, success rate, publisher, billing plans and ratings. No RapidAPI account, login, or key required.
It is one of the cheapest ways on Apify to pull marketplace data for API discovery, market research, and competitive intelligence, with simple pay-per-result pricing.
**Actor landing page:** [RapidAPI Marketplace API on Apify](https://apify.com/johnvc/rapidapi-marketplace-api?fpr=9n7kx3)
## Video Walkthrough
[](https://www.youtube.com/watch?v=jREWahDGhJM)
## Quick Start (Python + uv)
```bash
# 1. Install uv if you do not have it
curl -LsSf https://astral.sh/uv/install.sh | sh
# 2. Install dependencies
uv sync
# 3. Add your Apify API token
cp .env.example .env # then paste your token into .env
# 4. Run the example
uv run python rapidapi-marketplace-api-example.py
```
Get a free Apify API token at [apify.com](https://apify.com?fpr=9n7kx3) (find it under [Settings -> Integrations](https://console.apify.com/settings/integrations)).
## Why use this API
- **No RapidAPI account needed.** Reads public marketplace data directly.
- **Search any keyword or category.** Weather, finance, AI, social, travel, and more.
- **Rich metrics.** Popularity score, latency, success rate, and pricing model for every API.
- **Full detail on demand.** Billing plans, ratings, subscriber counts, readme, and publisher website.
- **Built for comparison.** Sort by trending, relevance, last updated, or alphabetical, then export to JSON, CSV, or Excel.
- **Cheapest in its class.** Pay-per-result pricing, priced as a loss leader.
## Usage and input parameters
```json
{
"searchTerms": ["linkedin", "weather"],
"category": "Data",
"sortBy": "ByTrending",
"order": "DESC",
"maxResults": 50,
"detailedInfo": false
}
```
| Parameter | Type | Description |
|-----------|------|-------------|
| `searchTerms` | array | Keywords to search, each searched separately. Leave this and `listingUrls` empty to return all APIs. |
| `category` | string | Optional single category filter (for example `Data`, `Finance`, `Weather`, `Social`). |
| `sortBy` | string | `ByRelevance`, `ByTrending`, `ByUpdatedAt`, or `ByAlphabetical`. |
| `order` | string | `ASC` or `DESC`. |
| `maxResults` | integer | Max results per search term (up to 1000). |
| `detailedInfo` | boolean | When true, enriches each result with billing plans, ratings, readme, subscriber count, and website. |
| `listingUrls` | array | Optional RapidAPI API or collection URLs to extract directly (always detailed). |
## Output format
Each dataset item is one API listing. Basic results look like this:
```json
{
"result_type": "api_listing",
"name": "meteostat",
"title": "meteostat",
"description": "Historical weather and climate data.",
"slugifiedName": "meteostat",
"pricing": "FREEMIUM",
"category": "Weather",
"popularityScore": 9.9,
"avgLatency": 1620,
"avgServiceLevel": 100,
"avgSuccessRate": 99,
"publisher": "meteostat",
"publisherUsername": "meteostat",
"url": "https://rapidapi.com/meteostat/api/meteostat",
"searchTerm": "weather"
}
```
With `detailedInfo: true`, each item also includes `longDescription`, `createdAt`, `status`, `ratingScore`, `ratingVotes`, `subscriptionsCount`, `websiteUrl`, `billingPlans`, `versions`, and `readme`.
## Install in Claude Cowork Desktop
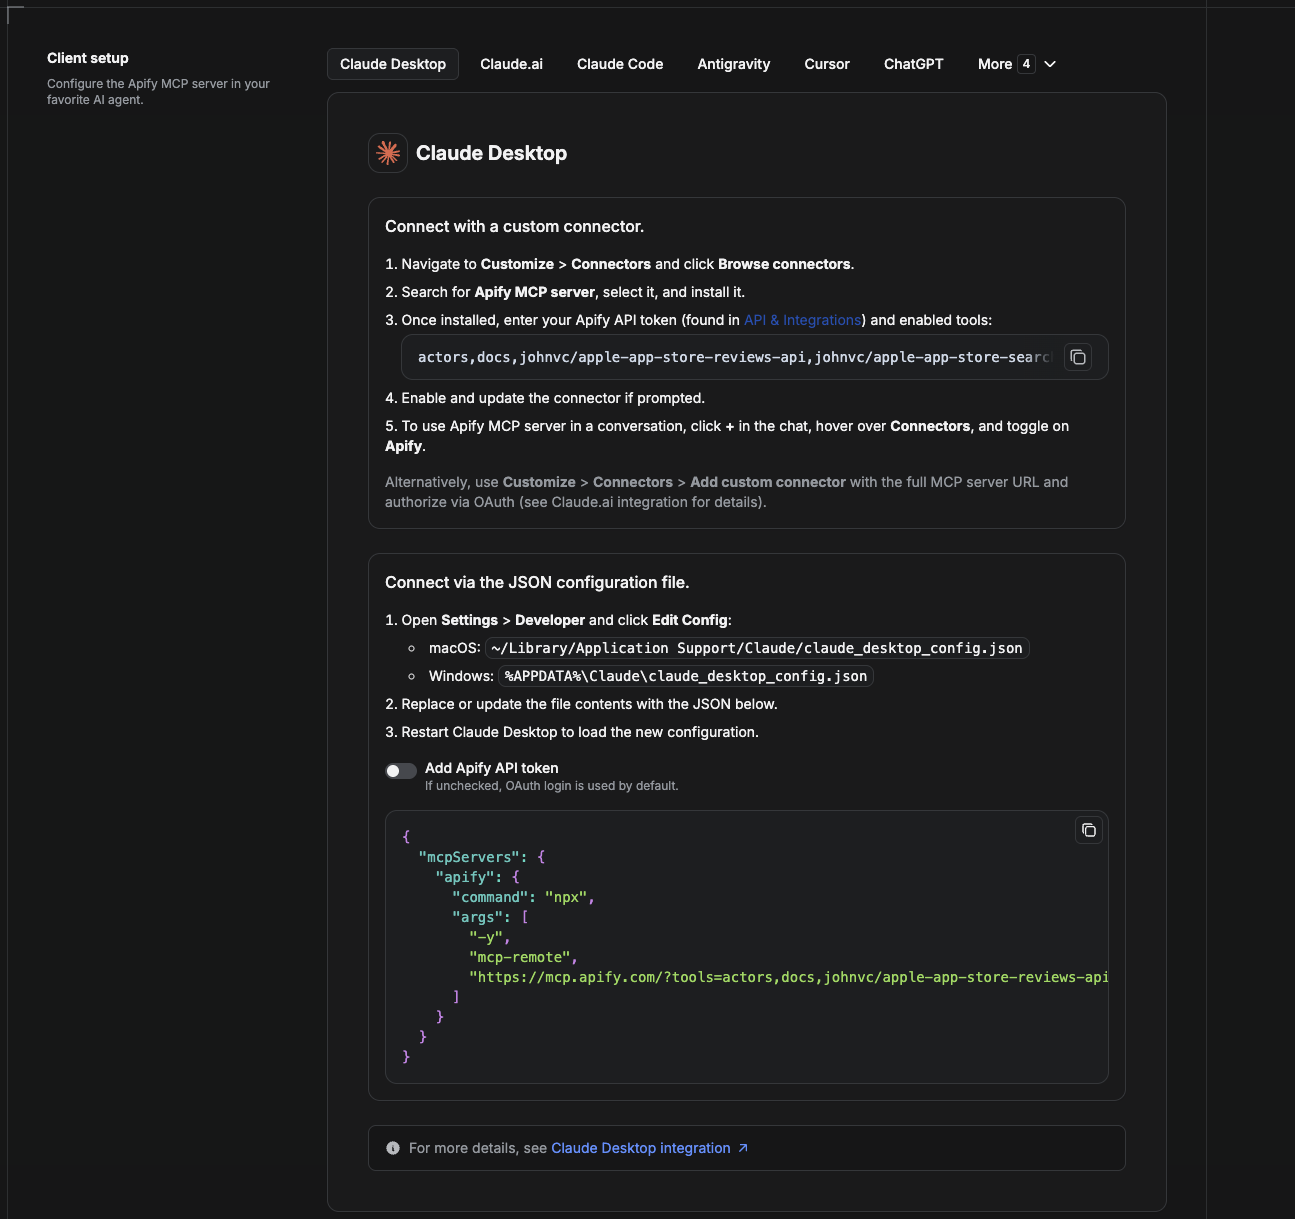
Cowork is the desktop app's automation mode. To give it the RapidAPI Marketplace API as a tool, add the Apify MCP server as a connector.
1. Open the Claude desktop app and go to **Settings -> Connectors** (or **Settings -> Developer -> Edit Config** to edit `claude_desktop_config.json` directly).
- macOS: `~/Library/Application Support/Claude/claude_desktop_config.json`
- Windows: `%APPDATA%\Claude\claude_desktop_config.json`
2. Add the Apify MCP server, preloaded with only this Actor:
```json
{
"mcpServers": {
"apify": {
"command": "npx",
"args": [
"-y",
"mcp-remote",
"https://mcp.apify.com/?tools=actors,docs,johnvc/rapidapi-marketplace-api"
]
}
}
}
```
3. Restart the app. When Cowork first calls the tool, complete the OAuth prompt in your browser, or add your Apify API token in the connector settings to skip OAuth.
4. In a Cowork chat, confirm the tool is available and ask it to run the RapidAPI Marketplace API.
Download the desktop app and start a free trial: https://claude.ai/referral/uIlpa7nPLg
More help: https://docs.apify.com/platform/integrations/claude-desktop
## Install in Claude Code
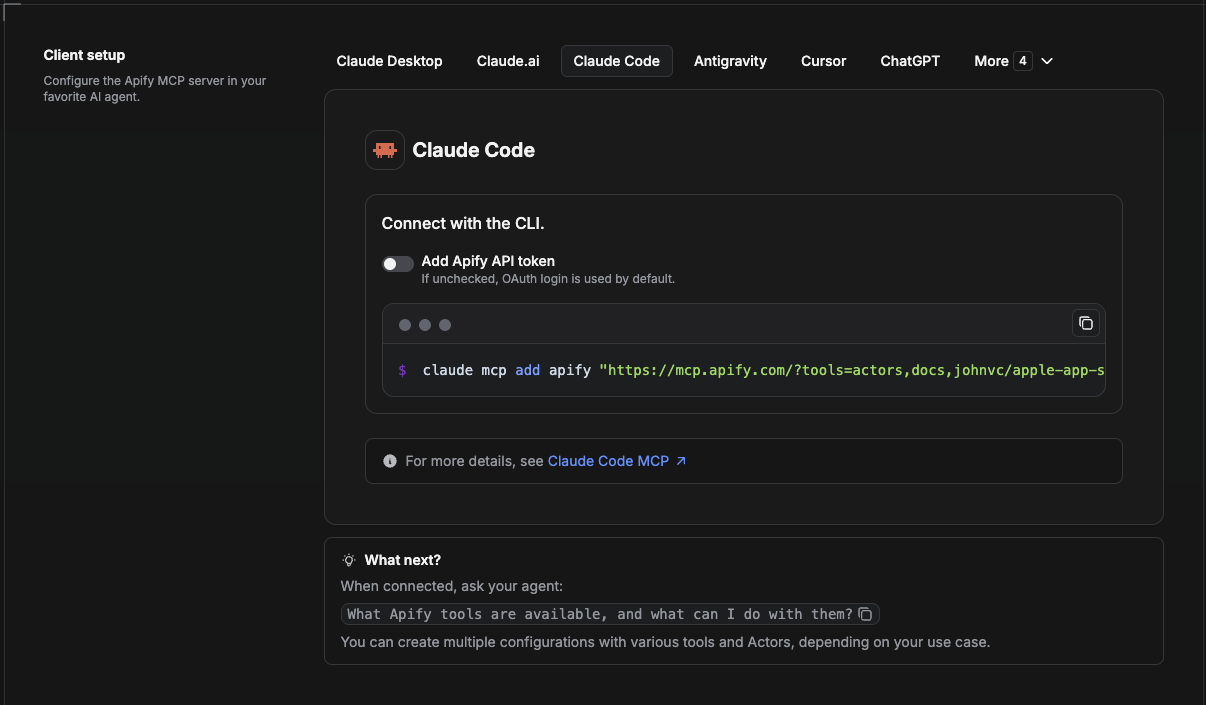
Claude Code is the command-line tool. Add the Actor's MCP server with one command:
```bash
claude mcp add --transport http apify \
"https://mcp.apify.com/?tools=actors,docs,johnvc/rapidapi-marketplace-api"
```
To use a token instead of browser OAuth:
```bash
claude mcp add --transport http apify \
"https://mcp.apify.com/?tools=actors,docs,johnvc/rapidapi-marketplace-api" \
--header "Authorization: Bearer YOUR_APIFY_TOKEN"
```
Then verify with `claude mcp list`, or run `/mcp` inside a session. Ask Claude Code to call the RapidAPI Marketplace API.
Try Claude Code free: https://claude.ai/referral/uIlpa7nPLg
Claude Code MCP docs: https://code.claude.com/docs/en/mcp
## Install in Claude (website)
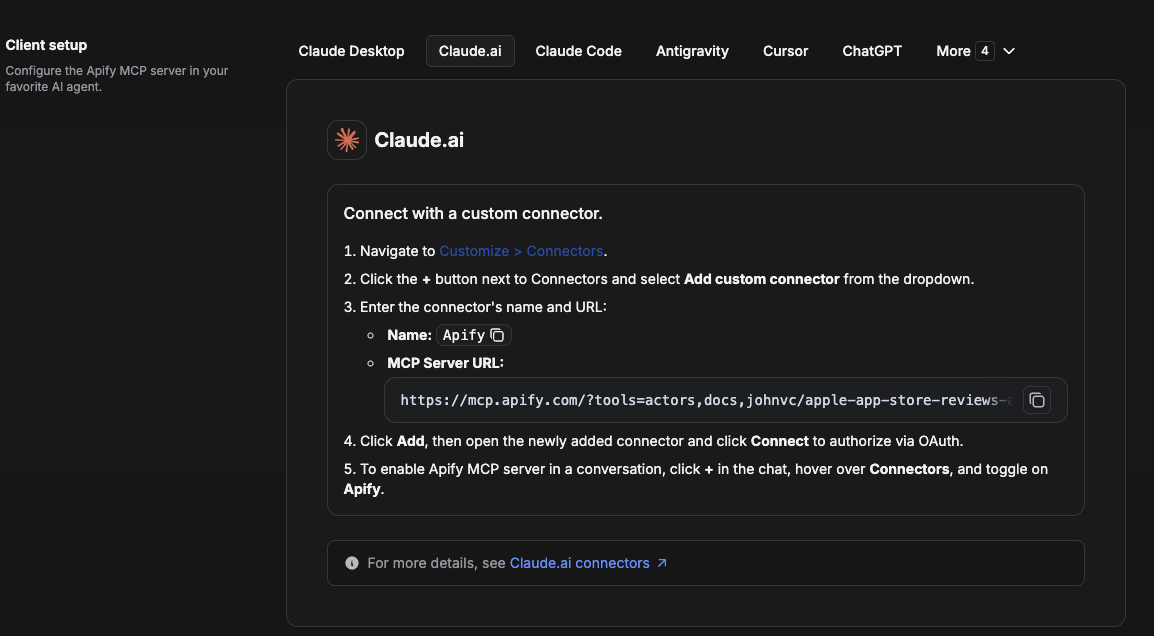
On claude.ai you add Apify as a connector, then enable just this Actor's tool.
1. Go to **Settings -> Connectors -> Browse connectors** and search for **Apify MCP server**. Install it (enable or update if prompted).
2. When connecting, authenticate with your Apify API token, and enable the tool `johnvc/rapidapi-marketplace-api`.
3. In any chat, open **+ -> Connectors** and turn on **Apify**.
4. Alternatively, choose **Add custom connector** and paste the full MCP URL `https://mcp.apify.com/?tools=actors,docs,johnvc/rapidapi-marketplace-api`, using OAuth when prompted.
5. Ask Claude to run the RapidAPI Marketplace API.
Open Claude on the web: https://claude.ai/referral/uIlpa7nPLg
## Install in Cursor
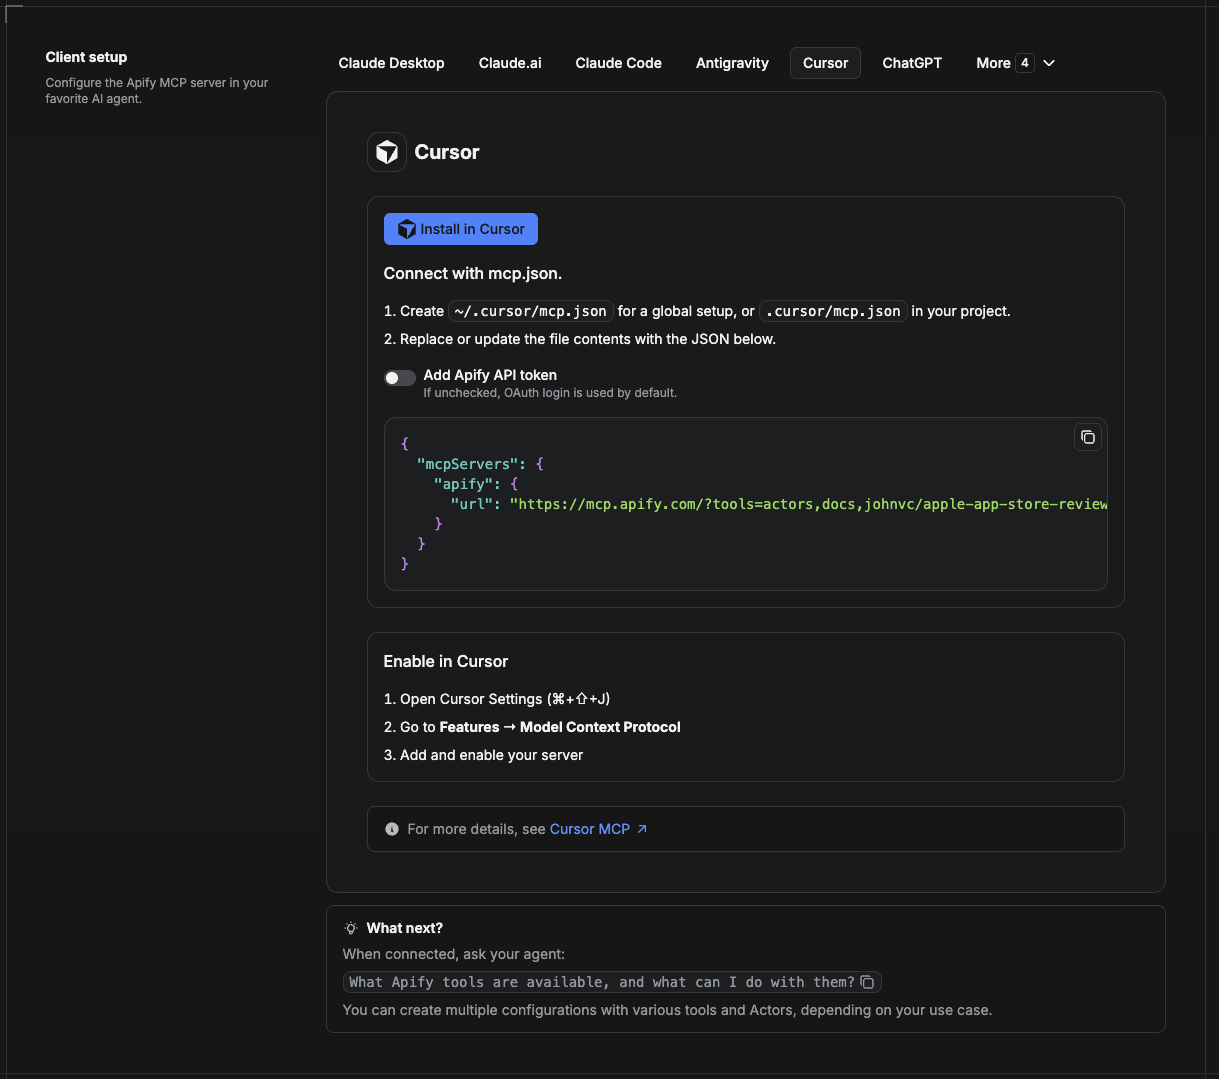
Cursor reads MCP servers from a project file at `.cursor/mcp.json`.
1. In your project, create `.cursor/mcp.json`:
```json
{
"mcpServers": {
"apify": {
"url": "https://mcp.apify.com/?tools=actors,docs,johnvc/rapidapi-marketplace-api"
}
}
}
```
2. If you prefer token auth over browser OAuth, add a header:
```json
{
"mcpServers": {
"apify": {
"url": "https://mcp.apify.com/?tools=actors,docs,johnvc/rapidapi-marketplace-api",
"headers": { "Authorization": "Bearer YOUR_APIFY_TOKEN" }
}
}
}
```
3. Open **Cursor -> Settings -> MCP** and confirm the **apify** server is connected (green dot).
4. In Composer or Chat, ask Cursor to call the RapidAPI Marketplace API.
New to Cursor? Get it here: https://cursor.com/referral?code=XQP4VBLI3NNX
## Install in ChatGPT
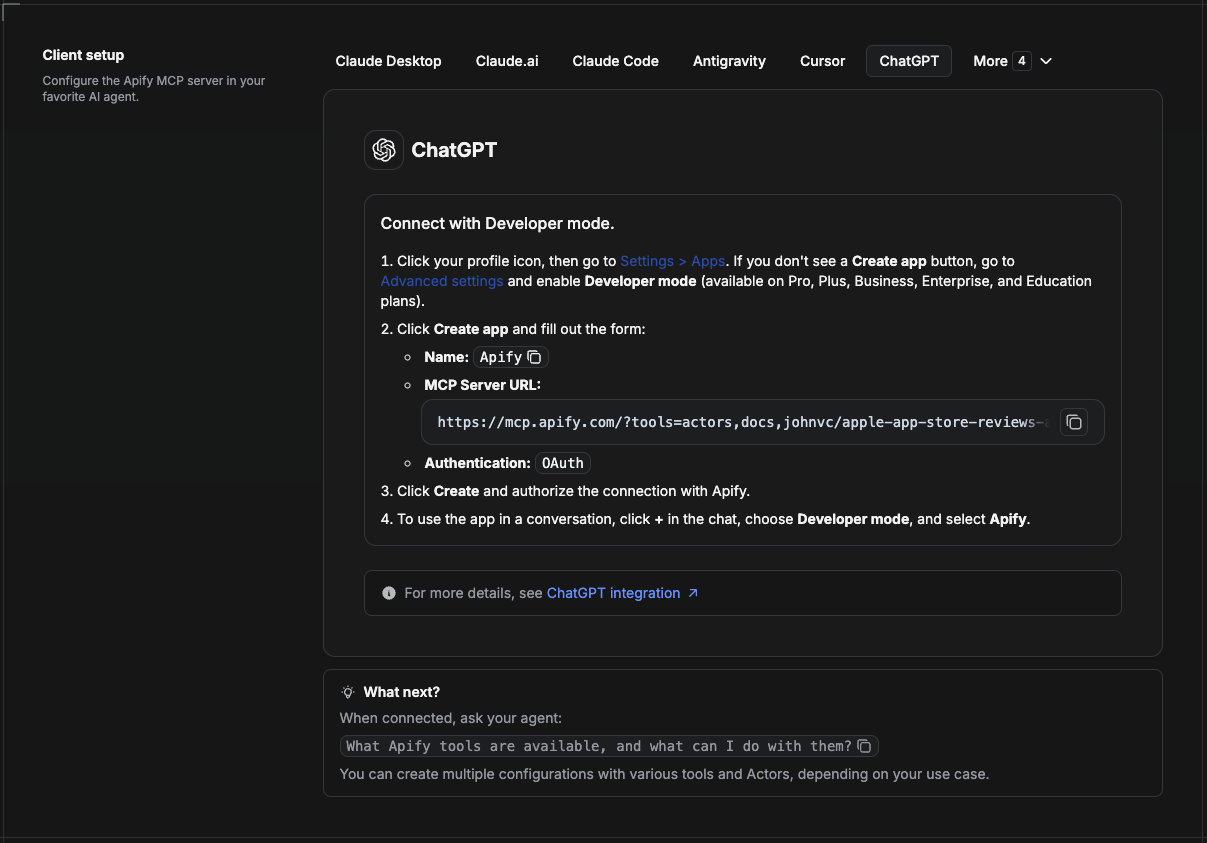
ChatGPT connects to the Apify MCP server through Developer mode (available on ChatGPT Pro, Plus, Business, Enterprise, and Education plans).
1. Click your profile icon, then go to **Settings > Apps**. If you do not see a **Create app** button, open **Advanced settings** and enable **Developer mode**.
2. Click **Create app** and fill out the form:
- **Name:** Apify
- **MCP Server URL:** `https://mcp.apify.com/?tools=actors,docs,johnvc/rapidapi-marketplace-api`
- **Authentication:** OAuth
3. Click **Create** and authorize the connection with Apify.
4. To use the app in a conversation, click **+** in the chat, choose **Developer mode**, and select **Apify**.
More help: https://docs.apify.com/platform/integrations/mcp
## License
This example is provided as-is for demonstrating the RapidAPI Marketplace API on Apify. Use it as a starting point for your own integrations.
<!-- ask-ai:start -->
## 🤖 Ask an AI assistant about this Actor
Open a ready-to-send prompt about the RapidAPI Marketplace API in the AI of your choice:
- 💬 [ChatGPT](https://chatgpt.com/?q=Using%20the%20RapidAPI%20Marketplace%20API%20on%20Apify%20%28https://apify.com/johnvc/rapidapi-marketplace-api?fpr=9n7kx3%29%2C%20walk%20me%20through%20this%20use%20case:%20%22Find%20Free%20APIs%20on%20RapidAPI%20by%20Popularity%22.%20Show%20me%20the%20input%20JSON%2C%20the%20output%20fields%2C%20and%20how%20to%20automate%20it%20with%20the%20API%20or%20MCP.)
- 🧠 [Claude](https://claude.ai/new?q=Using%20the%20RapidAPI%20Marketplace%20API%20on%20Apify%20%28https://apify.com/johnvc/rapidapi-marketplace-api?fpr=9n7kx3%29%2C%20walk%20me%20through%20this%20use%20case:%20%22Find%20Free%20APIs%20on%20RapidAPI%20by%20Popularity%22.%20Show%20me%20the%20input%20JSON%2C%20the%20output%20fields%2C%20and%20how%20to%20automate%20it%20with%20the%20API%20or%20MCP.)
- 🔍 [Perplexity](https://www.perplexity.ai/search?q=Using%20the%20RapidAPI%20Marketplace%20API%20on%20Apify%20%28https://apify.com/johnvc/rapidapi-marketplace-api?fpr=9n7kx3%29%2C%20walk%20me%20through%20this%20use%20case:%20%22Find%20Free%20APIs%20on%20RapidAPI%20by%20Popularity%22.%20Show%20me%20the%20input%20JSON%2C%20the%20output%20fields%2C%20and%20how%20to%20automate%20it%20with%20the%20API%20or%20MCP.)
- 🅒 [Copilot](https://copilot.microsoft.com/?q=Using%20the%20RapidAPI%20Marketplace%20API%20on%20Apify%20%28https://apify.com/johnvc/rapidapi-marketplace-api?fpr=9n7kx3%29%2C%20walk%20me%20through%20this%20use%20case:%20%22Find%20Free%20APIs%20on%20RapidAPI%20by%20Popularity%22.%20Show%20me%20the%20input%20JSON%2C%20the%20output%20fields%2C%20and%20how%20to%20automate%20it%20with%20the%20API%20or%20MCP.)
<!-- ask-ai:end -->
Last Updated: 2026.09.22
This server cannot be deployed
Maintenance
ActivityMaintained
ResponsivenessNo issues