
Context9
by Prism-Shadow
README.md

# Context9 - Bring Live Doc into Your Agent Context
<div align="center">
<p><b>Up-to-date</b> · <b>Local-first</b> · <b>Low-hallucination</b></p>
</div>
<div align="center">
**[X](https://x.com/prismshadow_ai)** · **[Discord](https://discord.gg/4TQ2bsSb)** · **[Issues](https://github.com/Prism-Shadow/context9/issues)**
</div>
<div align="center">
[](LICENSE)

</div>
<div align="center">
[](./docs/README.zh-CN.md)
[](./docs/README.zh-HK.md)
[](./docs/README.ja.md)
[](./docs/README.ko.md)
</div>
---
https://github.com/user-attachments/assets/553ab8a2-5227-42fa-a8bd-692cd13c0b96
## Why Context9?
- 🎯 Up-to-date knowledge: Real-time knowledge synchronization and reduce AI agent hallucinations.
- 🔐 Local-first: Fully open sourced and deploy on your own server, safely access your private knowledge.
- ⚙️ Easy-to-use Web UI: Easily manage your repositories and API-key permissions through the Context9 Panel.
## What Context9 Actually Does
**Context9 (Context Mine)** is an MCP (Model Context Protocol) server. With local deployment, Context9 securely feeds agents with the most up-to-date documentation, reducing LLM hallucinations.
<div style="text-align: center;">
<img src="public/overview.png" alt="overview" style="width: 80%; height: auto;">
</div>
## Install Context9
### Run Context9 server
```shell
docker run -d \
--name context9 \
-p 8011:8011 \
--restart unless-stopped \
ghcr.io/prism-shadow/context9:latest \
python -m context9.server --github_sync_interval 600
```
Or you can specify the port on which Context9 runs.
```shell
docker run -d \
--name context9 \
-e CONTEXT9_PORT=<port> \
-p <port>:<port> \
--restart unless-stopped \
ghcr.io/prism-shadow/context9:latest \
python -m context9.server --github_sync_interval 600
```
## Configure Context9
### Login to Context9
Visit `http://<server_ip>:8011/` to login to Context9
- Default username: `ctx9-admin`
- Default password: `88888888`
Remember to change the default password when you first log in to Context9.

### Add repositories
Add the repositories you need in Context9 by filling in the repository owner, repository name, and branch.
- For private repositories, you also need to provide a [GitHub Token](https://github.com/settings/personal-access-tokens)
Export & Import Repos using the Context9 template
- **Export Repos**: You can click the `Export Repos` button to export the current repository configuration as a local template, making it easy to reuse later.
- **Import Repos**: You can click the `Import Repos` button to import a Context9 template into your repository configuration. Context9 also provides several [templates](./template_repo/) for reference and use.

### Add API Keys
Generate an API key that can be used to access Context9.

After generating the API key, you need to configure which repositories the API key is allowed to access.

### Test Context9 (Optional)
You can test your configured Context9 instance by simply entering the current Context9 Server IP and API key in the MCP Inspector.

## Integrate Context9 with Agent
After deploying the Context9 service, you can seamlessly integrate both private and public real-time code documentation into your agents. You can connect to the Context9 MCP service using tools such as Cursor and Claude Code.
### Install in Cursor
Go to: `Settings` ->`Cursor Settings` -> `Tools & MCP` -> `Add a Custom MCP Server`
Paste the configuration below into `~/.cursor/mcp.json`. If you want to configure Context9 for a specific project only, create `.cursor/mcp.json` in the project directory and paste the configuration there.
```json
{
"mcpServers": {
"Context9": {
"url": "http://<server_ip>:8011/api/mcp/",
"headers": {
"Authorization": "Bearer <CTX9_API_KEY>"
}
}
}
}
```
### Install in Claude Code
Run the following command to add Context9 to Claude Code.
```shell
claude mcp add --transport http Context9 http://<server_ip>:8011/api/mcp/ --header "Authorization: Bearer <CTX9_API_KEY>"
```
### Suggestions for Context9 Usage
To avoid adding extra prompts every time you use Context9, we recommend that you:
- Use `CLAUDE.md` in Claude Code.
- Use `AGENTS.md` for Cursor, CodeX and other agents.
- Add rules in Cursor.
#### Use `CLAUDE.md` for Claude Code
Add a prompt to CLAUDE.md to enable Context9:
```
- Always retrieve required documentation via Context9
```
#### Use `AGENT.md` for Cursor, CodeX and other agents
Add rules to AGENTS.md, for example:
```text
Rules:
- Always retrieve required documentation via Context9
```
#### Add Rule for Cursor
Go to: `Setting` -> `Rules and Commands` -> `Add Rule`
Rule example:
```text
Always use Context9 MCP to obtain the necessary documentation, regardless of whether I explicitly ask for it.
```
## Work with Context9
### Set up entry documentation
To enable Context9 to correctly discover and index your repository documentation, each repository should provide a Spec document.
By default, Context9 expects a file named spec.md at the root of the repository.
```text
your-repo/
├── spec.md ← Specification entry point
├── README.md
├── docs/
│ └── ...
└── ...
```
> If you need to use a different filename or path, remember to update the repository configuration.
### Use relative link in documentation
You do not need to think about MCP, indexing, or document resolution. Just maintain documentation links using normal repository-relative paths, exactly as you would for human readers.
Example in documentation.
```markdown
## Related Documents
- [Detailed Guide](docs/detailed-guide.md)
- [API Reference](guides/api-reference.md)
- [FAQ](faq.md)
```
As long as these links are valid within the repository, Context9 will:
- Discover the documents
- Index them correctly
- Make them available to AI agents in real time
## Deploy Context9 from source
<details>
<summary>Expand</summary>
<h3>GUI Deployment</h3>
<p><strong>Requirements</strong></p>
<ul>
<li>Python >= 3.10</li>
<li>Node.js >= 18</li>
<li>Repository access (public or with authentication token)</li>
</ul>
<h4>Clone Context9 repository</h4>
<pre><code class="language-shell">git clone https://github.com/Prism-Shadow/context9.git && cd context9
</code></pre>
<h4>Set up python environment</h4>
<pre><code class="language-shell"># Install the package
uv sync
# Or install with development dependencies
uv sync --dev
</code></pre>
<h4>Install frontend dependencies</h4>
<pre><code class="language-shell">cd gui
npm install
cd ..
</code></pre>
<h4>Configure Environment</h4>
<p>Set the following environment variables (create a <code>.env</code> file, see <a href=".env_example">.env example</a> or export them directly):</p>
<ul>
<li><code>CONTEXT9_PORT</code> (Optional): Specifies the port number on which the Context9 service runs. Defaults to 8011.</li>
</ul>
<pre><code class="language-env">CONTEXT9_PORT=xxxx
</code></pre>
<h4>Build GUI and launch server</h4>
<pre><code class="language-shell"># Build frontend and start backend (serves GUI + API on the same port)
# Server is running on port 8011, visit http://<server_ip>:8011/
uv run python scripts/start.py --github_sync_interval 600
# Update repos every 60 seconds
uv run python scripts/start.py --github_sync_interval 60
</code></pre>
<p>Once started, open the GUI at: <code>http://<server_ip>:8011/</code></p>
<h4>Launch Context9 GUI with Docker</h4>
<p>You can also run the GUI deployment using Docker. Context9 provides a ready-to-use <a href="docker/Dockerfile">Dockerfile</a>.</p>
<pre><code class="language-shell"># Build docker image
docker build -f docker/Dockerfile -t context9-gui:latest .
# Run docker container
docker run -d \
--name context9-gui \
-p 8011:8011 \
--env-file .env \
--restart unless-stopped \
context9-gui:latest \
python -m context9.server --github_sync_interval 600
</code></pre>
<p>The GUI and API are served from the same port. Open <code>http://<server_ip>:8011/</code> in your browser.</p>
<p>The default login username is <code>ctx9-admin</code>, and the default password is <code>88888888</code>. Change password when you login to Context9.</p>
<h3>CLI Deployment</h3>
<p><strong>Requirements</strong></p>
<ul>
<li>Python >= 3.10</li>
<li>Repository access (public or with authentication token)</li>
<li>Optional: Webhook setup for event-based updates</li>
</ul>
<h4>Clone Context9 repository</h4>
<pre><code class="language-shell">git clone https://github.com/Prism-Shadow/context9.git && cd context9
</code></pre>
<h4>Set up python environment</h4>
<pre><code class="language-shell"># Install the package
uv sync
# Or install with development dependencies
uv sync --dev
</code></pre>
<h4>Configure repository</h4>
<p>Configure the repositories you need in <code>config.yaml</code> (private & public repositories)</p>
<p>An example of <code>config.yaml</code> file. <a href="config_example.yaml">config example</a></p>
<pre><code class="language-yaml"># config.yaml
repos:
# Private Repo 1
- owner: OwnerName
repo: RepoName
branch: BranchName
root_spec_path: RootSpecPath
# Private Repo 2 (Default root_spec_path is spec.md)
- owner: OwnerName
repo: RepoName
branch: BranchName
# Public Repo 1 (Example: sglang)
- owner: sgl-project
repo: sglang
branch: main
root_spec_path: README.md
</code></pre>
<p>You can include both private and public repositories.</p>
<details>
<summary><b>Configure public repos</b></summary>
<p>Simply specify the repository owner, name, and branch in <code>config.yaml</code>.</p>
</details>
<details>
<summary><b>Configure private repos</b></summary>
<ol>
<li>
Specify the repository owner, name, and branch in
<code>config.yaml</code>.
</li>
<li>
Add an authentication token with repository access permissions
to your environment.
<a href="#configure-environment">Configure environment</a>
</li>
</ol>
</details>
<h4>Configure Environment</h4>
<p>Set the following environment variables (create a <code>.env</code> file or export them directly):</p>
<ul>
<li><code>CTX9_API_KEY</code> (Required): API key used for server authentication to access private resources. <strong>Specified by an administrator. Keep it random and confidential.</strong></li>
<li><code>GITHUB_TOKEN</code> (Optional): Required when configuring private repositories in <code>config.yaml</code>. This is not limited to a GitHub personal access token—any organization-issued repository access token is supported, as long as it conforms to the GitHub API specification.</li>
<li><code>CONTEXT9_PORT</code> (Optional): Specifies the port number on which the Context9 MCP service runs. If not specified, it defaults to 8011.</li>
</ul>
<p>An example of <code>.env</code> file. <a href=".env_example">.env example</a></p>
<pre><code class="language-env">GITHUB_TOKEN=github_token
CTX9_API_KEY=XXXXXXXXXXXXXXXX
# Optional
CONTEXT9_PORT=8080
</code></pre>
<h4>Launch Context9 server</h4>
<pre><code class="language-shell"># Default:
# Sync repos every 600 seconds (10 minutes)
# Run server on port 8011
uv run python -m context9.server --config_file config.yaml
# Sync repos every 60 seconds (1 minute)
uv run python -m context9.server --github_sync_interval 60 --config_file config.yaml
# Run server on port 8080 (or define CONTEXT9_PORT in .env)
CONTEXT9_PORT=8080 uv run python -m context9.server --config_file config.yaml
</code></pre>
<h4>Launch Context9 Server with Docker</h4>
<p>You can also run Context9 using Docker. Context9 provides a ready-to-use <a href="docker/Dockerfile-cli">Dockerfile</a>.</p>
<p>The <code>config.yaml</code> file is included in the Docker image during the build process, so there is no need to provide it again when starting the container.</p>
<pre><code class="language-shell"># Build docker image
docker build -f docker/Dockerfile-cli -t context9:latest .
# Run docker container
# Change port mapping according to your .env
docker run -d \
--name context9 \
-p 8011:8011 \
--env-file .env \
--restart unless-stopped \
context9:latest
</code></pre>
</details>
## License
Licensed under the Apache License, version 2.0. See [LICENSE](LICENSE) for details.
## Acknowledge
This repo benefits from [context7](https://github.com/upstash/context7). Thanks to the authors and contributors for their excellent work and inspiration.
## ⭐ Star History
[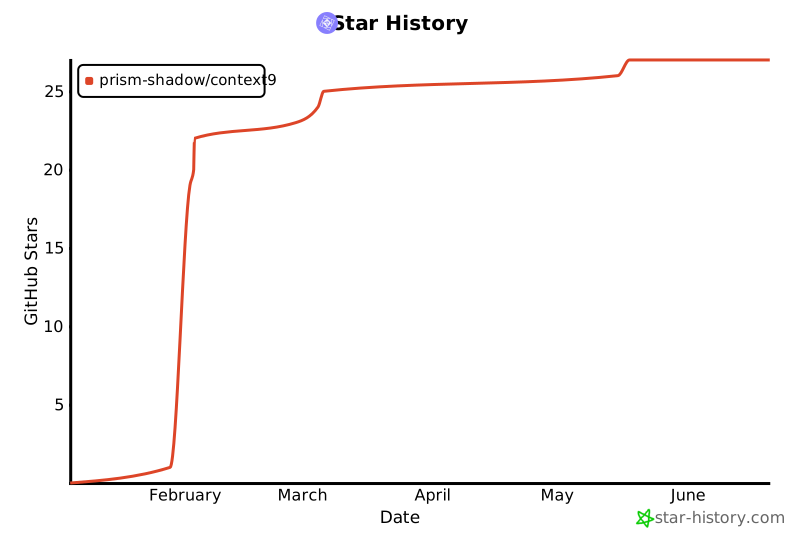](https://www.star-history.com/#Prism-Shadow/context9&type=date&legend=top-left)
This server cannot be deployed
Maintenance
ActivityInactive
ResponsivenessNo issues