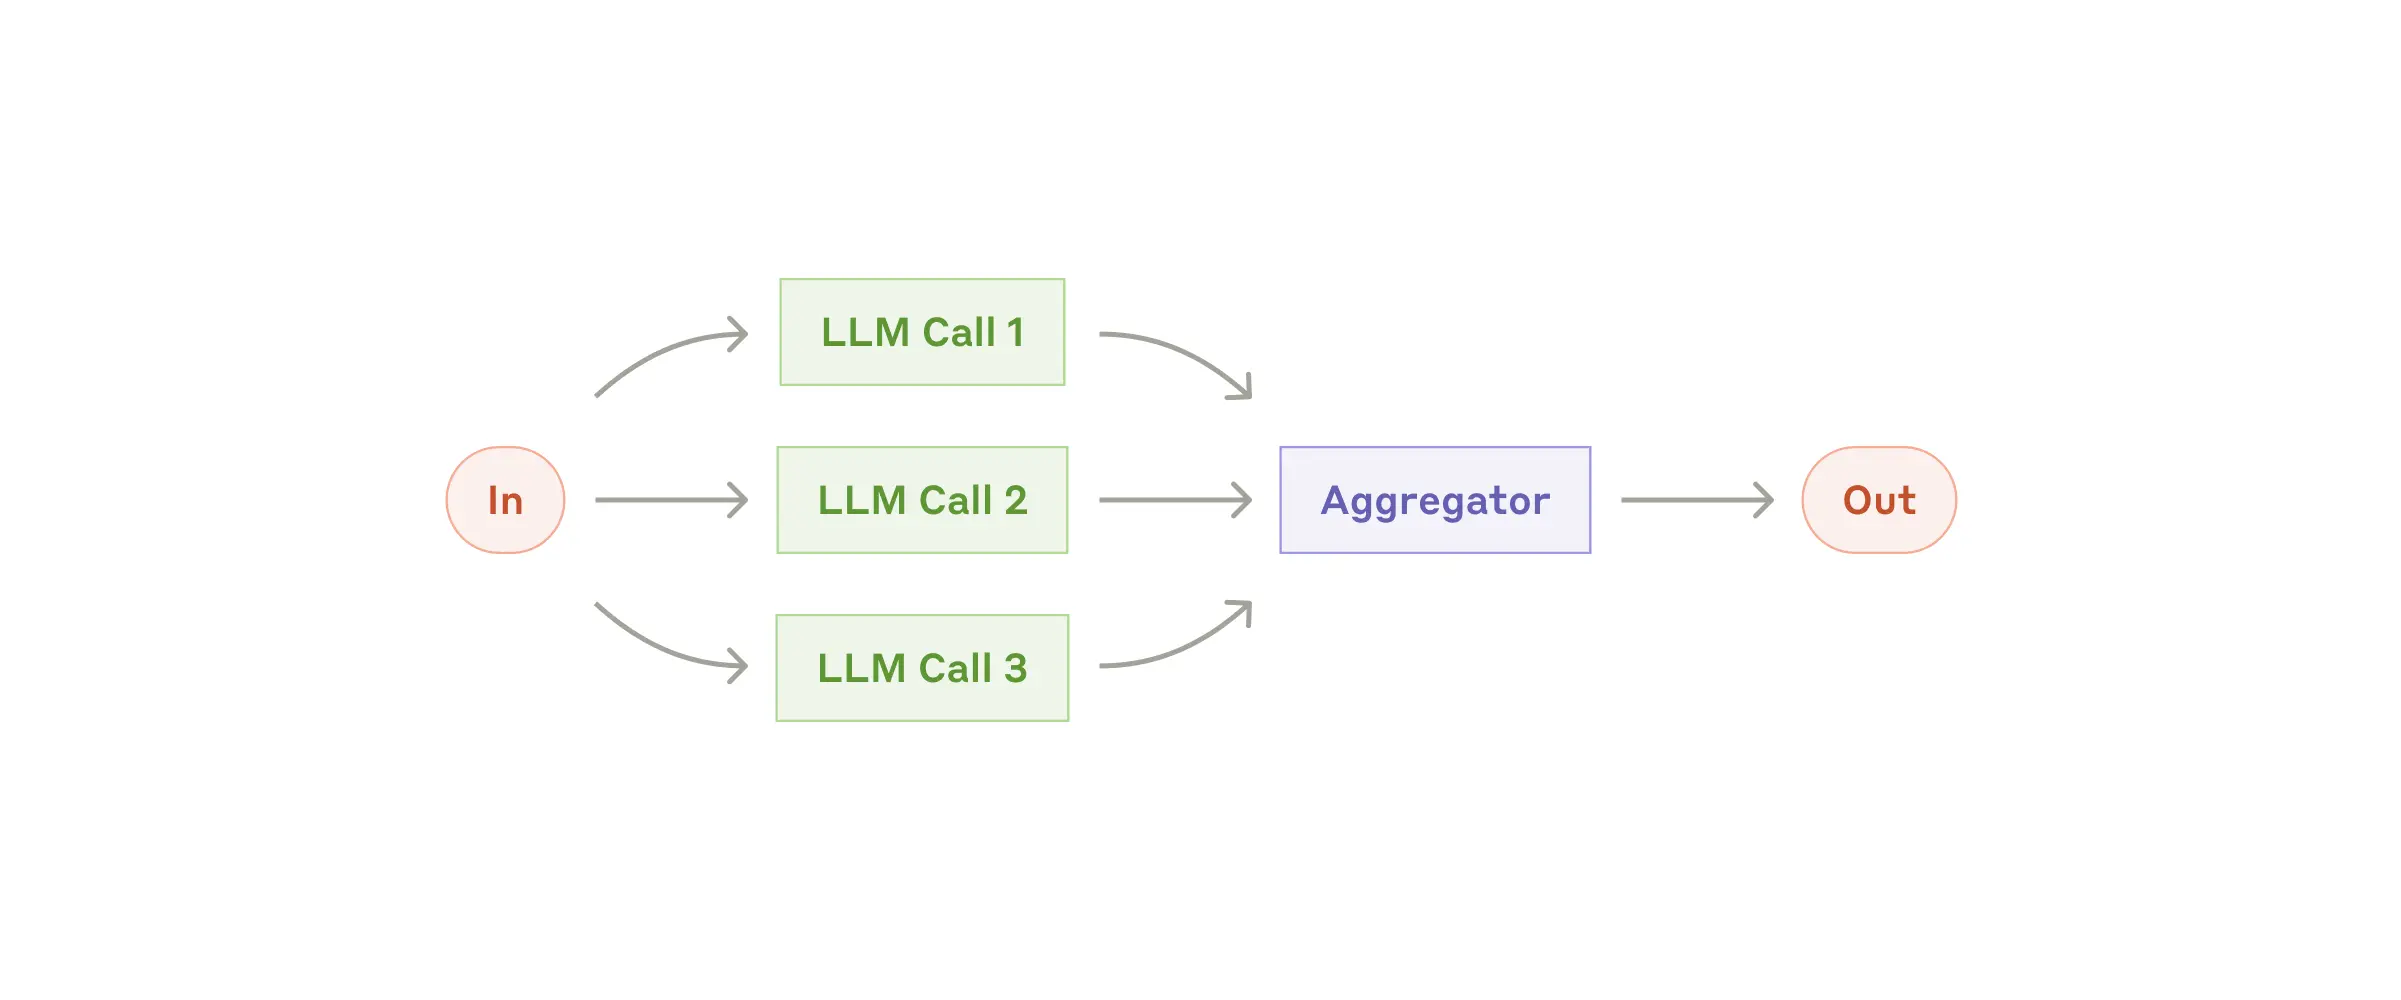
# Parallel Workflow example
This example shows a short story grading example. The MCP app runs the proofreader, fact_checker, and style_enforcer agents in parallel (fanning out the calls), then aggregates it together with a grader agent (fanning in the results).
---
```plaintext
┌────────────────┐
┌──▶│ Proofreader ├───┐
│ │ Agent │ │
│ └────────────────┘ │
┌─────────────┐ │ ┌────────────────┐ │ ┌─────────┐
│ ParallelLLM ├─┼──▶│ Fact Checker ├───┼────▶│ Grader │
└─────────────┘ │ │ Agent │ │ │ Agent │
│ └────────────────┘ │ └─────────┘
│ ┌────────────────┐ │
└──▶│ Style Enforcer ├───┘
│ Agent │
└────────────────┘
```
## `1` App set up
First, clone the repo and navigate to the workflow parallel example:
```bash
git clone https://github.com/lastmile-ai/mcp-agent.git
cd mcp-agent/examples/workflows/workflow_parallel
```
Install `uv` (if you don’t have it):
```bash
pip install uv
```
Sync `mcp-agent` project dependencies:
```bash
uv sync
```
Install requirements specific to this example:
```bash
uv pip install -r requirements.txt
```
## `2` Set up environment variables
Copy and configure your secrets and env variables:
```bash
cp mcp_agent.secrets.yaml.example mcp_agent.secrets.yaml
```
Then open `mcp_agent.secrets.yaml` and add your api key for your preferred LLM.
## (Optional) Configure tracing
In `mcp_agent.config.yaml`, you can set `otel` to `enabled` to enable OpenTelemetry tracing for the workflow.
You can [run Jaeger locally](https://www.jaegertracing.io/docs/2.5/getting-started/) to view the traces in the Jaeger UI.
## `3` Run locally
Run your MCP Agent app:
```bash
uv run main.py
```
