README.md•5.51 kB
# base-mcp-server
A Model Context Protocol server that provides read and write access to Feishu Base (飞书多维表格) databases. This server enables LLMs to inspect database schemas, then read and write records.
## Usage
### 1. Install Node.js
Make sure Node.js is installed on your machine.
### 2. Obtain Base Tokens
Get the `appToken` and `personalBaseToken` for your base account.
### 3. Install MCP Server Package Globally
Install the MCP server package globally using npm:
```bash
npm install -g @lark-base-open/mcp-node-server
```
### 4. MCP Server Configuration
In your MCP server configuration file, add the following:
```json
{
"mcpServers": {
"base-mcp-server": {
"command": "npx",
"args": [
"@lark-base-open/mcp-node-server",
"-a",
"appToken of base",
"-p",
"personalBaseToken of base"
]
}
}
}
```
**Note**: If you are using **Claude**, you will need to add the MCP configuration through the **Developer** option in the **Claude client settings**. You can access this in the **Settings** menu, and then add the MCP server details under the relevant section.
## tokens
You need get two tokens before using this mcp server.
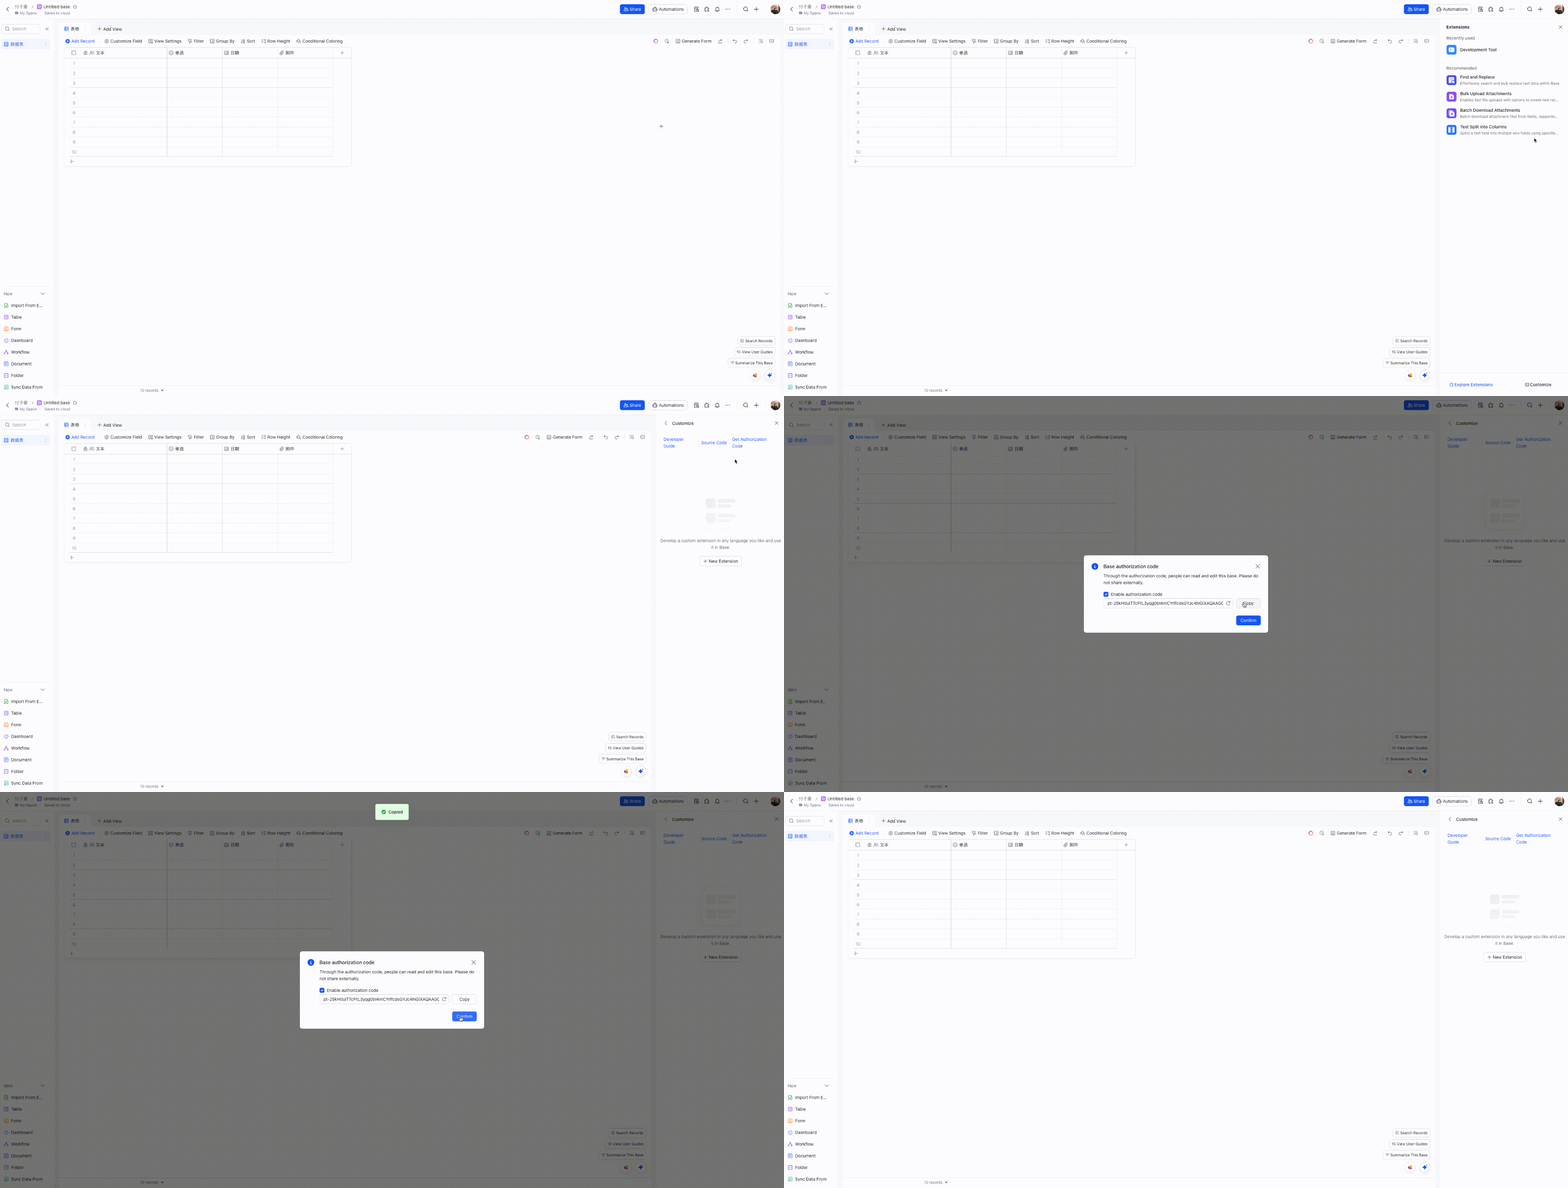
- personalBaseToken: find Base Plugin UI in your base, and access Custom Plugin->Get Authorization Code

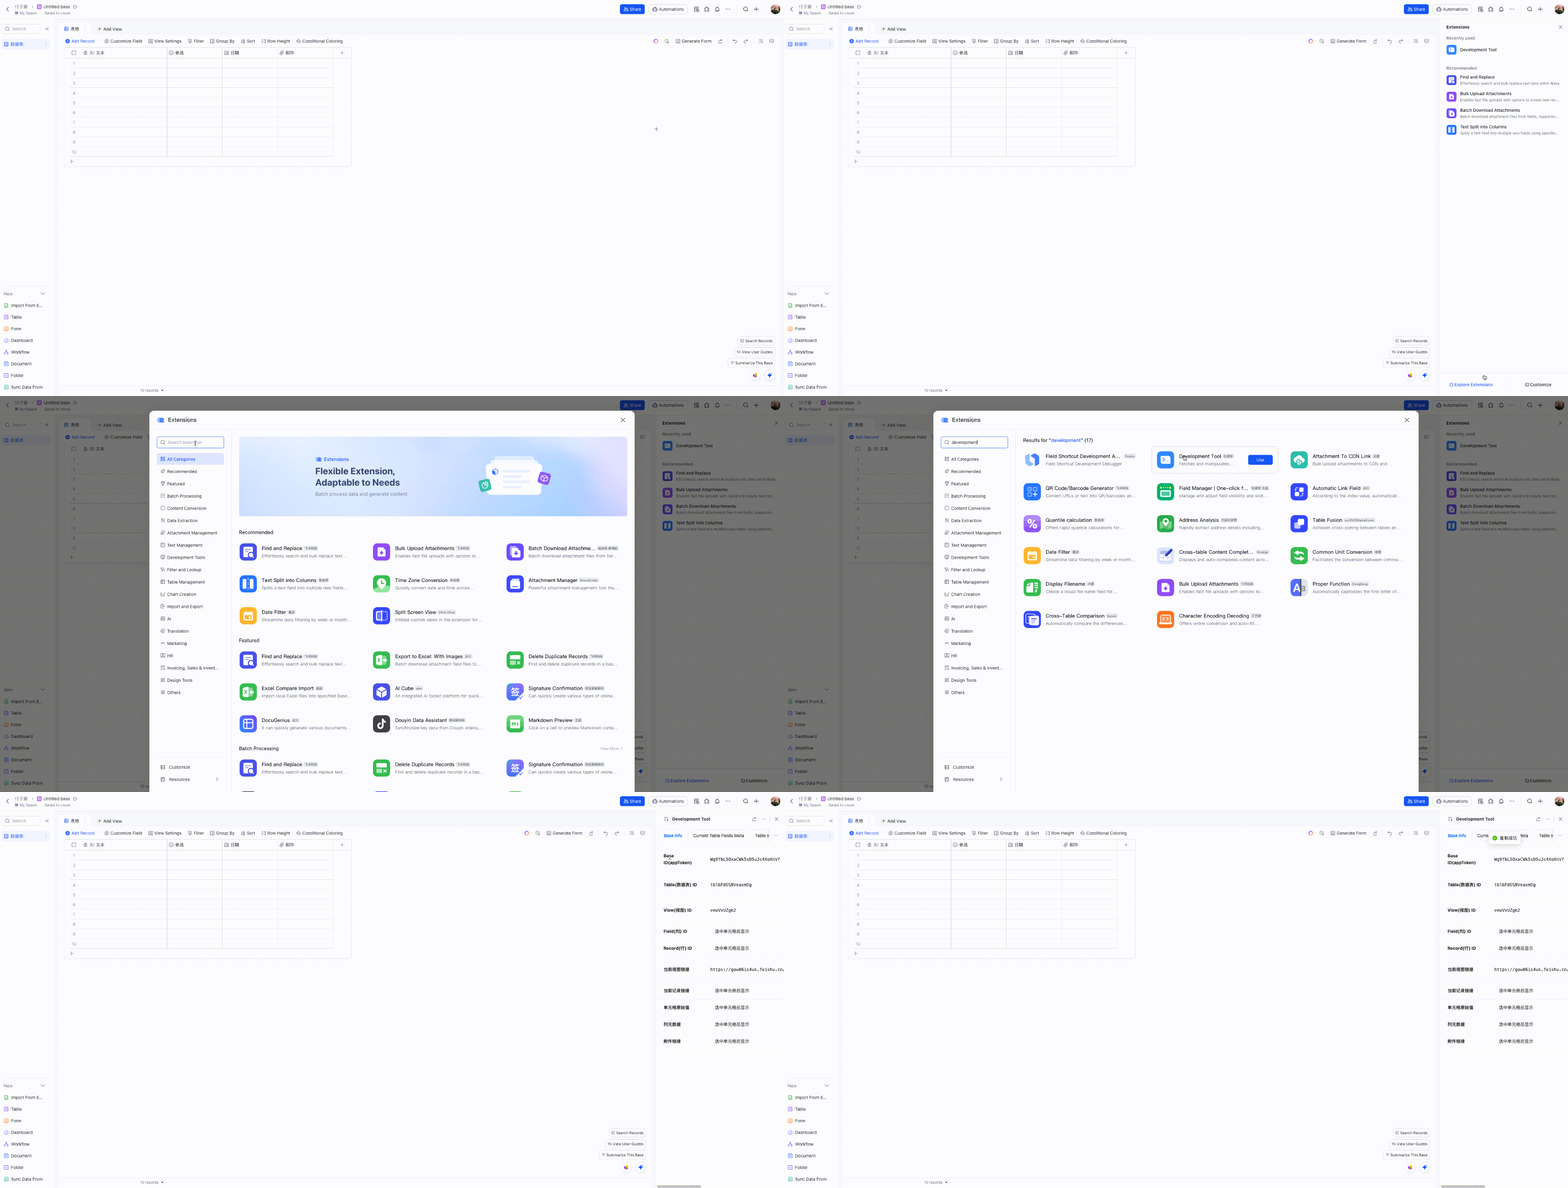
- appToken: You can obtain the `appToken` quickly through a **Developement Tool** plugin. Here’s a simplified step-by-step process on how to do it:

## Components
### Tools
- **list_tables**
- Lists all tables in a base
- No input parameters required
- **list_records**
- Lists records from a specified table
- Input parameters:
- `tableId` (string, required): The ID of the table to query
- **get_record**
- Gets a specific record by ID
- Input parameters:
- `tableId` (string, required): The ID of the table
- `recordId` (string, required): The ID of the record to retrieve
- **create_record**
- Creates a new record in a table
- Input parameters:
- `tableId` (string, required): The ID of the table
- `fields` (object, required): The fields and values for the new record
- **update_record**
- Updates a record in a table
- Input parameters:
- `tableId` (string, required): The ID of the table
- `recordId` (string, required): The ID of the record
- `fields` (object, required): The fields to update and their new values
- **delete_record**
- Deletes a record from a table
- Input parameters:
- `tableId` (string, required): The ID of the table
- `recordId` (string, required): The ID of the record to delete
- **create_table**
- Creates a new table in a base
- Input parameters:
- `name` (string, required): Name of the new table
- `fields` (array, required): Array of field definitions (name, type, description, options)
- **update_table**
- Updates a table's name
- Input parameters:
- `tableId` (string, required): The ID of the table
- `name` (string, required): New name for the table
- **delete_table**
- Deletes a table
- Input parameters:
- `tableId` (string, required): The ID of the table to delete
- **list_fields**
- Lists all fields in a table
- Input parameters:
- `tableId` (string, required): The ID of the table
- **create_field**
- Creates a new field in a table
- Input parameters:
- `tableId` (string, required): The ID of the table
- `nested` (object, required): Field configuration object containing:
- `field` (object, required): Field definition with name, type, and other properties
- **update_field**
- Updates a field in a table
- Input parameters:
- `tableId` (string, required): The ID of the table
- `fieldId` (string, required): The ID of the field
- `nested` (object, required): Updated field configuration
- **delete_field**
- Deletes a field from a table
- Input parameters:
- `tableId` (string, required): The ID of the table
- `fieldId` (string, required): The ID of the field to delete
## Development
To get started with development:
1. Install Node.js
2. Clone the repository
3. Install dependencies with `npm install`
4. Run `npm dev` to start the development server
5. Run `npm test` to run tests
6. Build with `npm build`
Available scripts:
- `npm dev`: Build and run the server in development mode
- `npm start`: Run the server
- `npm test`: Run tests
- `npm test:watch`: Run tests in watch mode
- `npm lint`: Run ESLint
- `npm build`: Build the project
- `npm build:watch`: Watch for changes and rebuild automatically
## Project Structure
```
.
├── src/ # Source code
│ ├── index.ts # Main entry point(stdio)
│ ├── index.sse.ts # SSE entry point
│ ├── service/ # Service implementations
│ ├── types/ # TypeScript type definitions
│ ├── utils/ # Utility functions
│ └── test/ # Test files
├── dist/ # Compiled output
```
## Dependencies
Main dependencies:
- `@lark-base-open/node-sdk`: Feishu Base Node.js SDK
- `@modelcontextprotocol/sdk`: Model Context Protocol SDK
- `express`: Web framework
- `zod`: Schema validation
## License
MIT