
Click on "Install Server".
Wait a few minutes for the server to deploy. Once ready, it will show a "Started" state.
In the chat, type
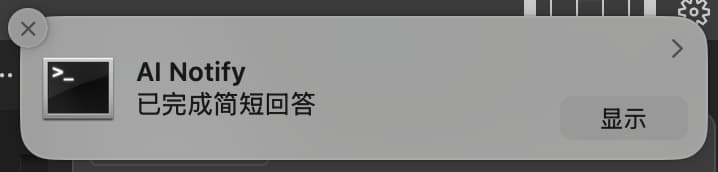
@followed by the MCP server name and your instructions, e.g., "@AI Notify MCPnotify me when you finish answering with a custom sound"
That's it! The server will respond to your query, and you can continue using it as needed.
Here is a step-by-step guide with screenshots.
Ai Notify MCP

🎯 为支持 MCP 协议的 AI 代码编辑器设计的智能通知服务器,当 AI 完成回答时自动发送系统通知,提升编程体验。
📑 目录
✨ 功能特性
🔔 跨平台通知支持
平台 | 通知方式 | 图标支持 | 音效支持 |
macOS | 系统通知中心 | ✅ | ✅ |
Windows | Windows 通知系统 | ✅ | ✅ |
Linux | libnotify | ✅ | ✅ |
🎨 高度自定义
智能标题:自动显示当前项目名称
灵活内容:支持自定义通知消息
图标定制:支持自定义通知图标
音效控制:可开启/关闭提示音
🤖 智能触发
自动通知:AI 回答完成时自动触发
手动控制:支持程序化调用通知
📦 安装配置
系统要求
环境 | 要求 |
Node.js | ≥ 14.0.0 |
npm | ≥ 6.0.0 |
Linux 额外要求 | libnotify |
Linux 用户安装 libnotify
详细安装步骤
1️⃣ 克隆项目
2️⃣ 安装依赖并构建
3️⃣ 配置编辑器
编辑你的 MCP 配置文件,添加以下配置:
💡 提示:请将路径替换为你的实际安装路径
4️⃣ 配置 AI 助手规则
在 Cursor Settings → Rules → User Rules 中添加:
5️⃣ 开启 Auto-Run 模式
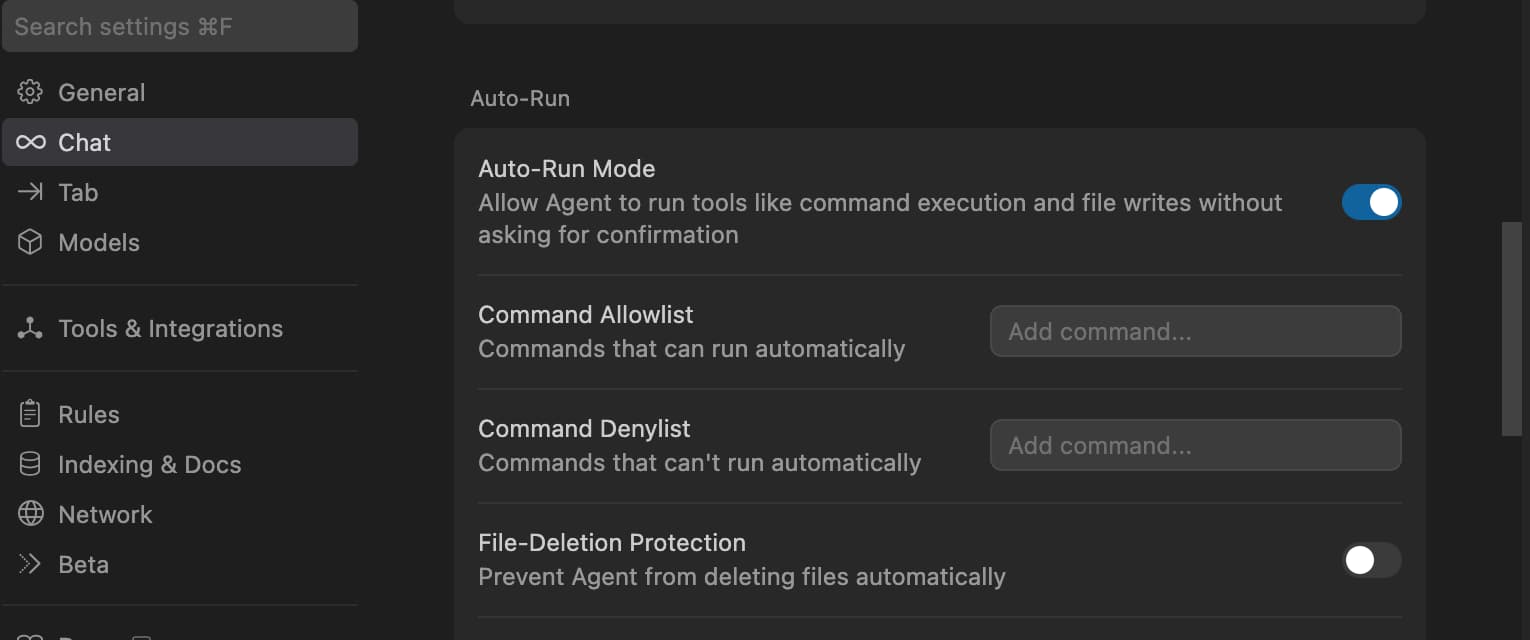
配置步骤:
打开
Cursor Settings→Features→Chat勾选
Enable auto-run mode重启 Cursor
🛠 使用说明
📋 可用工具
该 MCP 服务提供以下两个工具供 AI 调用:
🔧 show_completion_notification
功能:手动触发通知,支持自定义参数
参数 | 类型 | 默认值 | 说明 |
| string | "AI Assistant" | 通知标题 |
| string | "已完成回答" | 通知内容 |
| boolean | true | 是否播放提示音 |
🤖 auto_notify_completion
功能:自动通知工具,在 AI 回答完成后自动调用
参数 | 类型 | 默认值 | 说明 |
| number | 0 | 回答长度(用于内部统计) |
⚙️ 通知配置
你可以通过配置文件自定义通知行为:
配置选项说明:
配置项 | 类型 | 默认值 | 说明 |
| boolean | true | 是否播放通知音效 |
| string | - | 自定义通知图标路径 |
| string | "AI Assistant" | 默认通知标题 |
| string | "已完成回答" | 默认通知消息 |
🎨 图标规格建议
平台 | 推荐尺寸 | 支持格式 | 备注 |
macOS | 128×128px | PNG, ICNS | 支持透明背景 |
Windows | 256×256px | PNG, ICO | 建议多尺寸 ICO |
Linux | 128×128px | PNG, SVG | 推荐 SVG 矢量图 |
🔧 开发指南
开发环境
项目结构
扩展开发
🔍 故障排除
🔧 常见问题
🔍 检查清单:
✅ 确认 Auto-Run 模式已开启
✅ 检查 MCP 配置路径是否正确
✅ 确认服务已成功启动
✅ 检查系统通知权限设置
✅ 验证 AI 助手规则是否正确配置
🛠 调试命令:
💡 解决方案:
🔧 常见 Linux 发行版配置:
发行版 | 安装命令 | 备注 |
Ubuntu/Debian |
| 通常预装 |
CentOS/RHEL |
| 可能需要 EPEL 源 |
Arch Linux |
| 轻量化安装 |
🎨 解决步骤:
确认图标文件存在
ls -la ./assets/icon.png检查图标文件格式和尺寸
file ./assets/icon.png identify ./assets/icon.png # 需要 ImageMagick使用绝对路径
{ "notification": { "icon": "/Users/username/ai-notify-mcp/assets/icon.png" } }检查文件权限
chmod 644 ./assets/icon.png
🔍 诊断步骤:
检查 Node.js 版本
node --version # 应该 ≥ 14.0.0验证构建输出
ls -la dist/ cat dist/index.js | head -10手动启动测试
node dist/index.js --test检查端口占用
lsof -i :3000 # 默认端口
📊 调试模式
启用详细日志查看运行状态:
🆘 获得帮助
如果以上方法都无法解决问题,请:
收集系统信息
echo "OS: $(uname -a)" echo "Node: $(node --version)" echo "npm: $(npm --version)"创建详细的 Issue,包含:
系统信息
错误日志
配置文件
重现步骤
🤝 贡献指南
我们欢迎各种形式的贡献!让我们一起让这个项目变得更好 🚀
🎯 贡献方式
类型 | 说明 | 链接 |
🐛 Bug 报告 | 发现问题请及时反馈 | |
💡 功能建议 | 提出新功能想法 | |
📝 文档改进 | 完善说明文档 | 编辑 README 或添加示例 |
🔧 代码贡献 | 提交新功能或修复 | Fork → 开发 → Pull Request |
🔄 开发流程
1️⃣ 准备环境
2️⃣ 创建功能分支
3️⃣ 开发和测试
4️⃣ 提交更改
5️⃣ 创建 Pull Request
📋 代码规范
规范 | 要求 | 工具 |
语言 | TypeScript | TSC |
代码风格 | ESLint 规则 | ESLint + Prettier |
提交信息 | 约定式提交 | commitlint |
测试覆盖 | 新功能需要测试 | Jest |
文档 | 重要变更需要文档 | Markdown |
💡 开发建议
🔍 提交前:确保所有测试通过
📚 文档:为复杂功能添加说明
🧪 测试:编写单元测试和集成测试
🎨 代码:保持代码简洁易读
💬 沟通:有疑问及时在 Issue 中讨论
📄 许可证
本项目采用 MIT License 许可证。
🙏 致谢
感谢所有让这个项目成为可能的人和组织:
🏛️ MCP 协议团队 - 提供优秀的协议标准
🌍 开源社区 - 提供宝贵的反馈和贡献
👥 所有贡献者 - 让这个项目变得更好
💻 编辑器开发团队 - 支持 MCP 协议的实现
📞 支持与反馈
遇到问题或有建议?我们很乐意听到你的声音!
渠道 | 链接 | 适用场景 |
🐛 GitHub Issues | Bug 报告和功能请求 | |
📧 邮件联系 | 直接联系项目维护者 |
💌 联系我们
🌟 支持这个项目
如果 AI Notify MCP 对你有帮助,请考虑:
⭐ 给我们一个 Star • 🔀 Fork 并贡献 • 📢 分享给朋友
让 AI 编程体验更加智能和愉悦 ✨